Ana içeriğe geç
Onarım Topluluğuna Katılın - Hesap Oluşturun

GK61 Keyboard Keycap/Switch Replacement

Neye ihtiyacın var

    1. GK61 Keyboard Keycap/Switch Replacement, Keycap/Switches: adım 1, 1 resimden 1.
      • Unplug the keyboard.

      • When the keyboard lights are off, it indicates that the keyboard is turned off.

      FixBot'a Sor

      Yorum Ekle

    2. GK61 Keyboard Keycap/Switch Replacement: adım 2, 3 resimden 1. GK61 Keyboard Keycap/Switch Replacement: adım 2, 3 resimden 2. GK61 Keyboard Keycap/Switch Replacement: adım 2, 3 resimden 3.
      • Use a keycap puller to remove the top and bottom of the keycaps from the keyboard.

      • When pulling the keycap, make sure to apply pressure until you hear a click sound from the keycap.

      • Remember when using a keycap puller, place it on a key in a vertical position.

      FixBot'a Sor

      Yorum Ekle

    3. GK61 Keyboard Keycap/Switch Replacement: adım 3, 1 resimden 1.
      • After removing all the keycaps, put it in a bowl.

      • You can either use alcohol wipes or water to clean your keycaps.

      FixBot'a Sor

      Yorum Ekle

    4. GK61 Keyboard Keycap/Switch Replacement: adım 4, 1 resimden 1.
      • Dry the keycaps on a rag or paper towel.

      • Remember to let your keycaps dry for about 5-10 minutes after cleaning.

      FixBot'a Sor

      Yorum Ekle

    5. GK61 Keyboard Keycap/Switch Replacement: adım 5, 1 resimden 1.
      • Using a hand held vacuum cleaner remove any excess dust, hair, and oils.

      • Tilting your keyboard will also help for a deeper clean

      • If you cannot locate a hand held vacuum cleaner, a compressed air duster will also work.

      FixBot'a Sor
      Yorum Ekle

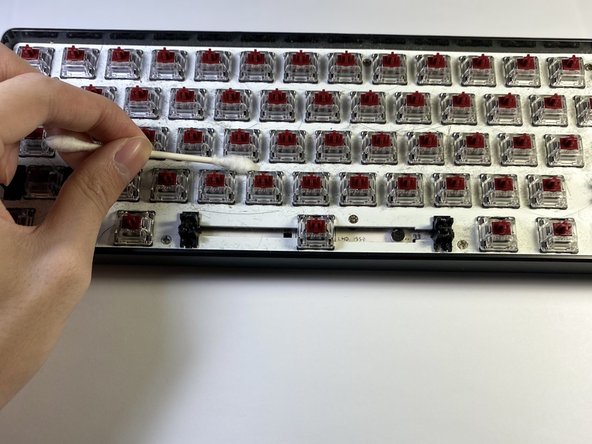
    6. GK61 Keyboard Keycap/Switch Replacement: adım 6, 3 resimden 1. GK61 Keyboard Keycap/Switch Replacement: adım 6, 3 resimden 2. GK61 Keyboard Keycap/Switch Replacement: adım 6, 3 resimden 3.
      • Using a Q-Tip with rubbing alcohol, gently clean and rub the crevices around the plate of the keyboard.

      • Make sure not to pour rubbing alcohol onto your keyboard. Doing so may cause severe damage to the keyboard.

      FixBot'a Sor

      Yorum Ekle

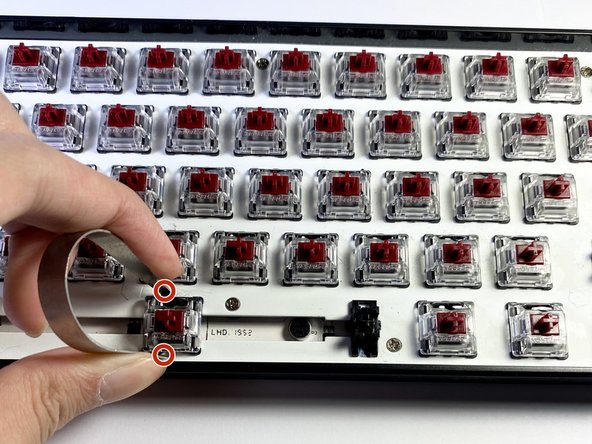
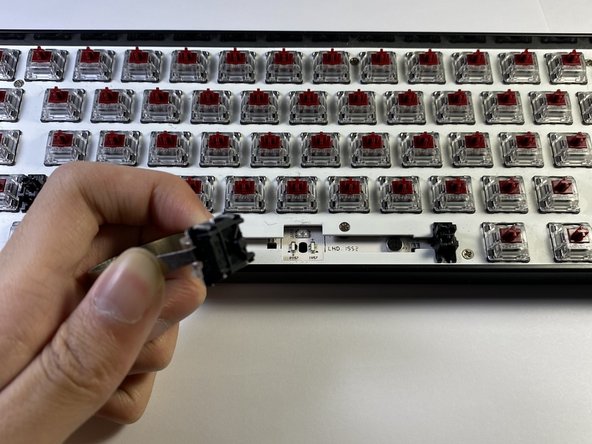
    7. GK61 Keyboard Keycap/Switch Replacement: adım 7, 3 resimden 1. GK61 Keyboard Keycap/Switch Replacement: adım 7, 3 resimden 2. GK61 Keyboard Keycap/Switch Replacement: adım 7, 3 resimden 3.
      • Using a switch puller, pull the keyboard switch from the top and bottom of the switch.

      • Remember to always pull straight up to fully remove the switch.

      FixBot'a Sor

      Yorum Ekle

    8. GK61 Keyboard Keycap/Switch Replacement: adım 8, 2 resimden 1. GK61 Keyboard Keycap/Switch Replacement: adım 8, 2 resimden 2.
      • Grab a replacement switch to replace the broken switch.

      • Push the switch straight down into the socket of the switch.

      • To avoid any damages, make sure to always push straight down and not in any other direction.

      FixBot'a Sor

      Yorum Ekle

    9. GK61 Keyboard Keycap/Switch Replacement: adım 9, 3 resimden 1. GK61 Keyboard Keycap/Switch Replacement: adım 9, 3 resimden 2. GK61 Keyboard Keycap/Switch Replacement: adım 9, 3 resimden 3.
      • After drying the keycaps, put the keycaps back into their sockets.

      • Align the keycap with the socket of the switch and push straight down with a bit of pressure.

      • When pushing straight down, you will hear a click sound that will indicate that the keycap has been placed.

      FixBot'a Sor

      Yorum Ekle

Sonuç

To reassemble your device, follow these instructions in reverse order.

İptal et: Bu kılavuzu tamamlamadım.

Alexander Truong

Üyelik tarihi: 05/05/21

169 İtibar

1 Kılavuz yazıldı

0Kılavuz Yorumları

Yorum Ekle

İstatistikleri Görüntüle:

Son 24 Saat: 1

Son 7 gün: 7

Son 30 gün: 59

Her zaman: 2,393