Giriş
A step-by-step guide to removing the outer case of the Garmin Nuvi 680.
Neye ihtiyacın var
-
-
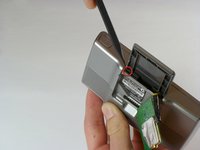
Locate the antenna on the back of the device and gently flip it open to reveal the screws underneath.
-
Remove the two 4.42 mm screws in the top-left and top-right corners of the antenna cover using a T5 Torx screwdriver
-
-
-
-
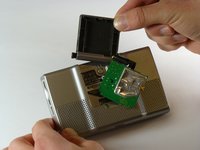
Insert the pointed end of a spudger into the leftmost slit at the top of the antenna case, where you previously removed the circuit board
-
Once the spudger is inserted into the leftmost end of the slit at the top of the antenna case, slide it to the rightmost side of the slit.
-
Slide the antenna case out of the device.
-
-
-
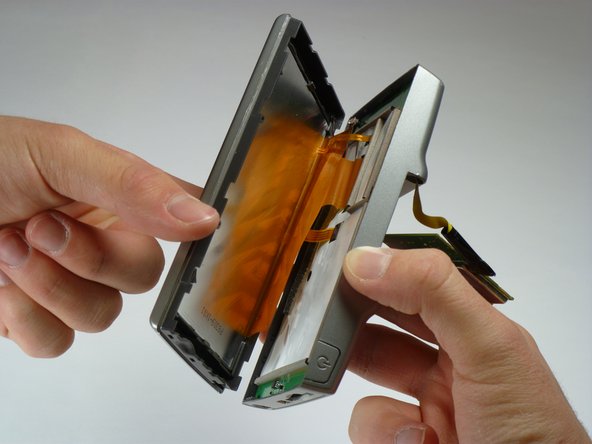
Identify the antenna assembly, which is now exposed after removing the antenna cover.
-
The two screws are positioned at the top-left and top-right corners of the antenna assembly
-
Use a T5 Torx screwdriver to remove the 10.82 mm screws from the top-left and top-right corners of the antenna assembly.
-
-
-
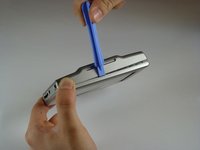
Using your iFixit Opening Tool, gently insert a flat end of the tool into the slit of the top cover.
-
Use the Opening Tool and your hands to pull apart the front and back of the device. Grip the top and bottom sides with your hand while inserting the tool into the slit to gently separate the two halves
-


To reassemble your device, follow these instructions in reverse order.
To reassemble your device, follow these instructions in reverse order.
İptal et: Bu kılavuzu tamamlamadım.
3 farklı kişi bu kılavuzu tamamladı.
Ekip

Cal Poly, Team 5-22, Amido Winter 2011 Cal Poly, Team 5-22, Amido Winter 2011 üyesi
CPSU-AMIDO-W11S5G22
5 Üyeler
7 adet Kılavuz yazıldı
2 Yorum
This guide works for the Garmin Nuvi 660 and 670 as well.
great instructions thank you! most of it also works for the NUVI 350, this one has an extra screw that holds the circuit board, and the connectors are different. Fixed the on/off button that broke of the soldering tips by re-soldering and adding some support at the back of the switch so this can't happen again.