Ana içeriğe geç

Gateway KAV60 LT2016U Netbook Cooling Fan Replacement

Arşivlenmiş Kılavuz
Bu kılavuz sadece arşivsel amaçlarla muhafaza edilmiştir. Onarımınızı gerçekleştirmek için kılavuzun güncel halini kullanın.

Neye ihtiyacın var

  1. Gateway KAV60 LT2016U Netbook Cooling Fan Replacement, Battery: adım 1, 1 resimden 1.
    • Unlock the button in the top left on the back of the laptop (So the red is showing).

  2. Gateway KAV60 LT2016U Netbook Cooling Fan Replacement: adım 2, 1 resimden 1.
    • The battery should be able to be removed easily now.

  3. Gateway KAV60 LT2016U Netbook Cooling Fan Replacement, Cooling Fan: adım 3, 1 resimden 1.
    • Start by first removing the battery of the device.

  4. Gateway KAV60 LT2016U Netbook Cooling Fan Replacement: adım 4, 1 resimden 1.
    • Next remove the RAM, hard drive, and wifi card before continuing so they aren't damaged.

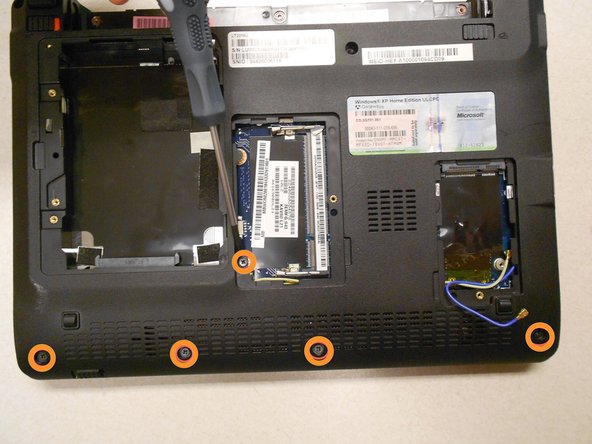
  5. Gateway KAV60 LT2016U Netbook Cooling Fan Replacement: adım 5, 2 resimden 1. Gateway KAV60 LT2016U Netbook Cooling Fan Replacement: adım 5, 2 resimden 2.
    • Remove all 11 of the screw shown on the bottom of the lap top using the specified screw driver.

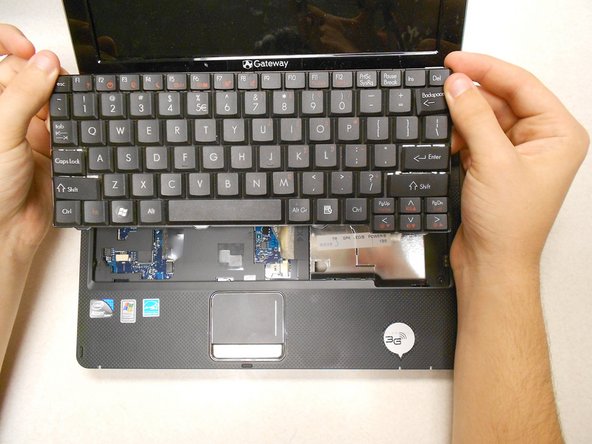
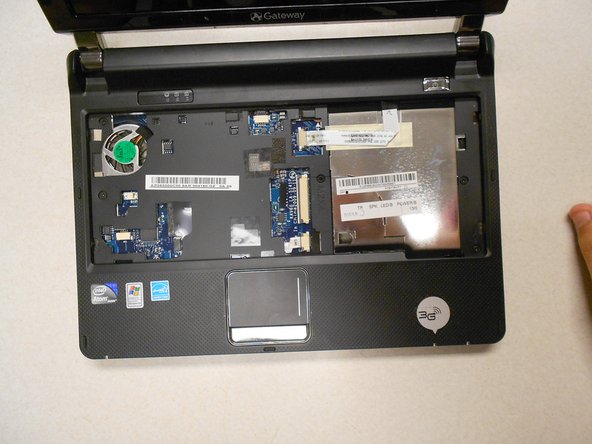
  6. Gateway KAV60 LT2016U Netbook Cooling Fan Replacement: adım 6, 3 resimden 1. Gateway KAV60 LT2016U Netbook Cooling Fan Replacement: adım 6, 3 resimden 2. Gateway KAV60 LT2016U Netbook Cooling Fan Replacement: adım 6, 3 resimden 3.
    • Lift off the keyboard by doing exactly what is shown in the first picture. Get the head of the plastic opening tool under and then wedge it out.

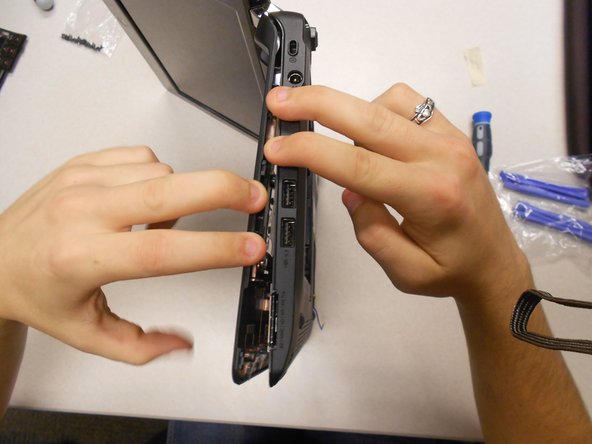
  7. Gateway KAV60 LT2016U Netbook Cooling Fan Replacement: adım 7, 3 resimden 1. Gateway KAV60 LT2016U Netbook Cooling Fan Replacement: adım 7, 3 resimden 2. Gateway KAV60 LT2016U Netbook Cooling Fan Replacement: adım 7, 3 resimden 3.
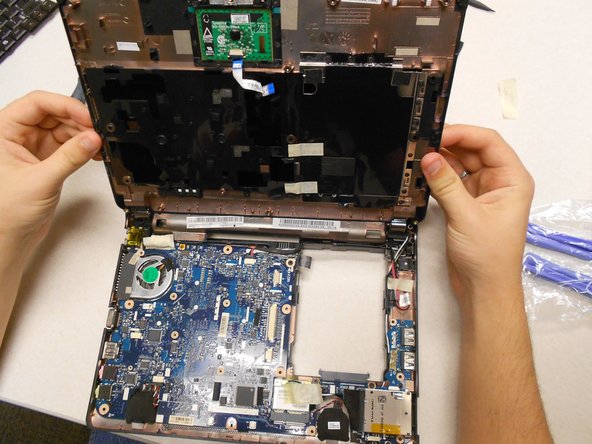
    • Remove the 5 circled screws with the Phillips #0 screw driver.

    • Carefully separate the back cover from the front either using your hands or a plastic opening tool.

  8. Gateway KAV60 LT2016U Netbook Cooling Fan Replacement: adım 8, 2 resimden 1. Gateway KAV60 LT2016U Netbook Cooling Fan Replacement: adım 8, 2 resimden 2.
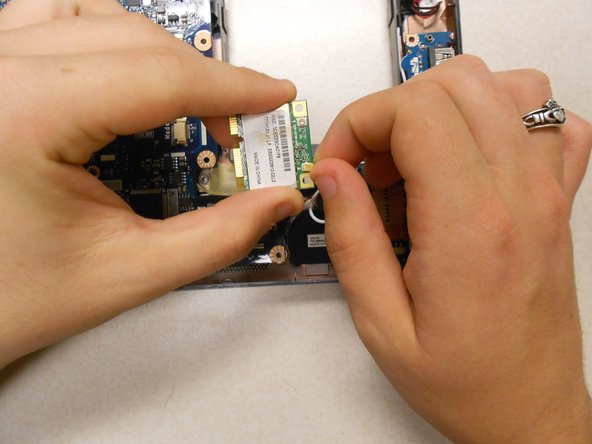
    • Unscrew this 1 screw to remove the wifi card.

    • Then unplug the wires it is attached to and take it out.

  9. Gateway KAV60 LT2016U Netbook Cooling Fan Replacement: adım 9, 2 resimden 1. Gateway KAV60 LT2016U Netbook Cooling Fan Replacement: adım 9, 2 resimden 2.
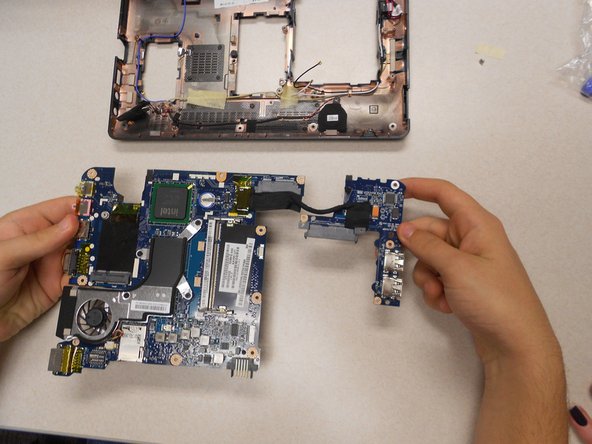
    • Use the phillps #00 screw driver to remove these 3 small scows so the motherboard can be removed.

    • Then remove it from the base of th computer.

  10. Gateway KAV60 LT2016U Netbook Cooling Fan Replacement: adım 10, 1 resimden 1.
    • Use the Phillips #00 screw driver to remove the 4 circled screws.

  11. Gateway KAV60 LT2016U Netbook Cooling Fan Replacement: adım 11, 1 resimden 1.
    • Disconnect the wires from the motherboard.

    • The fan should now be fully disconnected and ready to replace.

Sonuç

To reassemble your device, follow these instructions in reverse order.

Bir başkası bu kılavuzu tamamladı.

Kyle

Üyelik tarihi: 03/11/14

622 İtibar

3 adet Kılavuz yazıldı

Ekip

UMass Dartmouth, Team 3-2, Calaway Spring 2014 UMass Dartmouth, Team 3-2, Calaway Spring 2014 üyesi

UMASSD-CALAWAY-S14S3G2

4 Üyeler

6 adet Kılavuz yazıldı

0 Yorum

Yorum Ekle

İstatistikleri Görüntüle:

Son 24 Saat: 0

Son 7 gün: 0

Son 30 gün: 1

Her zaman: 109