Ana içeriğe geç

Gateway M-2626u CPU Replacement

Neye ihtiyacın var

  1. Gateway M-2626u CPU Replacement, Back Panel: adım 1, 2 resimden 1. Gateway M-2626u CPU Replacement, Back Panel: adım 1, 2 resimden 2.
    • Using the Phillips #1 screwdriver, remove the four 6mm screws on the back of the laptop.

  2. Gateway M-2626u CPU Replacement: adım 2, 2 resimden 1. Gateway M-2626u CPU Replacement: adım 2, 2 resimden 2.
    • Insert the plastic prying tool and pry the back panel off starting at an edge and moving your way around it.

  3. Gateway M-2626u CPU Replacement, CPU Fan: adım 3, 2 resimden 1. Gateway M-2626u CPU Replacement, CPU Fan: adım 3, 2 resimden 2.
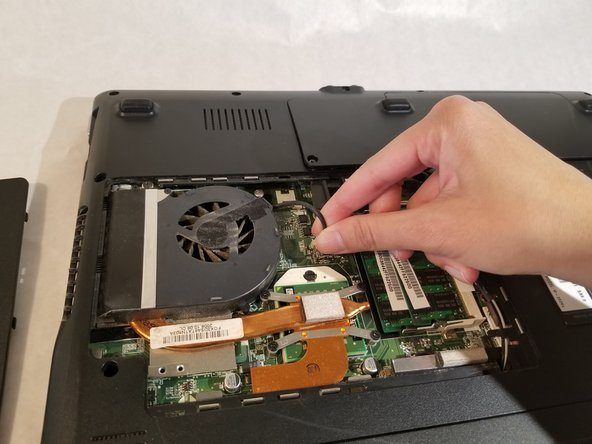
    • Remove the header by pulling on it with two fingers.

  4. Gateway M-2626u CPU Replacement: adım 4, 1 resimden 1.
    • Remove the six 2.5mm screws using a Phillips #1 screwdriver.

  5. Gateway M-2626u CPU Replacement: adım 5, 1 resimden 1.
    • Remove the fan by moving it to the side and lifting it out of the computer.

  6. Gateway M-2626u CPU Replacement, CPU: adım 6, 1 resimden 1.
    • Once the fan is removed, locate the CPU.

    • Rotate the plastic knob using a flat head screw driver as depicted in this image

  7. Gateway M-2626u CPU Replacement: adım 7, 1 resimden 1.
    • Lift and remove the CPU from the mother board socket.

Sonuç

To reassemble your device, follow these instructions in reverse order.

Armani Tayeh

Üyelik tarihi: 03/19/18

432 İtibar

4 adet Kılavuz yazıldı

Ekip

UMass Dartmouth, Team S3-G2, Peak Spring 2018 UMass Dartmouth, Team S3-G2, Peak Spring 2018 üyesi

UMASSD-PEAK-S18S3G2

2 Üyeler

14 adet Kılavuz yazıldı

0 Yorum

Yorum Ekle

İstatistikleri Görüntüle:

Son 24 Saat: 0

Son 7 gün: 2

Son 30 gün: 8

Her zaman: 228