Bu sürüm, hatalı düzenlemeler içerebilir. En son doğrulanmış bellek kopyası dönün.
Neye ihtiyacın var
-
Bu adım çevrilmemiş. Çevrilmesine yardım edin
-
Place your device on your workspace, screen facing down. Take the Spudger and use the pointed end to catch the latch below the battery. Drag the latch to the right until the battery detaches from the body of the device.
-
-
Bu adım çevrilmemiş. Çevrilmesine yardım edin
-
Pull the battery out, making sure to pull the battery parallel to the device.
-
-
Bu adım çevrilmemiş. Çevrilmesine yardım edin
-
Use a PH0 Phillips head screwdriver to remove the 9.0 mm screw on the rectangular panel underneath the device.
-
-
Bu adım çevrilmemiş. Çevrilmesine yardım edin
-
Use a plastic opening tool to pry open the rectangular panel the 9.0 mm screw was removed from.
-
-
-
Bu adım çevrilmemiş. Çevrilmesine yardım edin
-
Remove a single 9.0 mm screw on the silver box containing the hard drive. Pull the plastic flap at the side opposite to the side of the screw housing back in order to remove the silver box containing the hard drive.
-
-
Bu adım çevrilmemiş. Çevrilmesine yardım edin
-
Remove the two 9.0 mm screws on each side of the silver box to slide the hard drive from the silver box housing.
-
-
Bu adım çevrilmemiş. Çevrilmesine yardım edin
-
Use a PH0 Philips head screwdriver to remove the remaining 9.0 mm screws on the back of the device which should be sixteen screw in total.
-
-
Bu adım çevrilmemiş. Çevrilmesine yardım edin
-
Use a plastic opening tool to pry open the sides of the laptop base starting closest to the hinges.
-
-
Bu adım çevrilmemiş. Çevrilmesine yardım edin
-
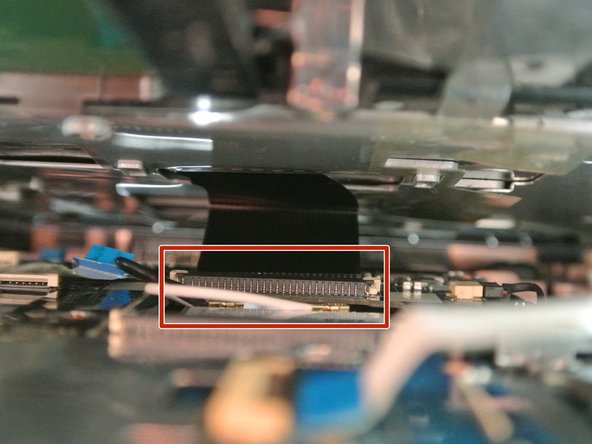
After prying the keyboard unit off of the base, Lift the white, hinged covers connected to the three ribbons shown and pull gently to disconnect.
-
-
Bu adım çevrilmemiş. Çevrilmesine yardım edin
-
Disconnect the wires that are connected to the Wireless Lan chip.
-
Use the PH0 Philips head screwdriver to remove the 9.0 mm screw that is connected to the Wireless Lan chip in the right upper corner. Then remove the CPU by angling it upwards and pulling it towards the laptop screen.
-
-
Bu adım çevrilmemiş. Çevrilmesine yardım edin
-
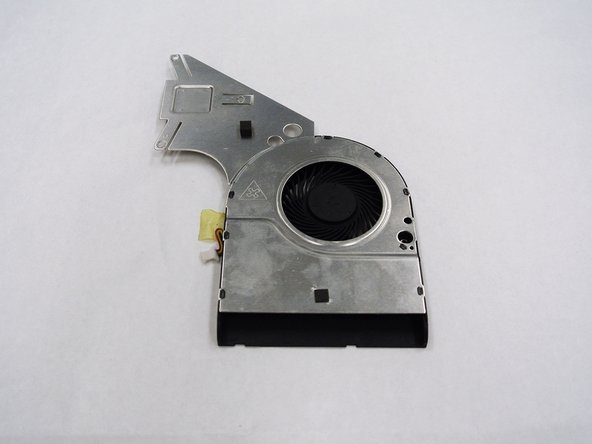
Use a PH0 Philips head screwdriver to remove the 9.0 mm screw connected to the CPU Fan.
-
Once the screw is out of the CPU Fan, then remove the two other 9.0 mm screws indicated.
-
-
Bu adım çevrilmemiş. Çevrilmesine yardım edin
-
Lift the motherboard up and out of the casing and pull it away from the screen in order to partially detach it from the laptop.
-
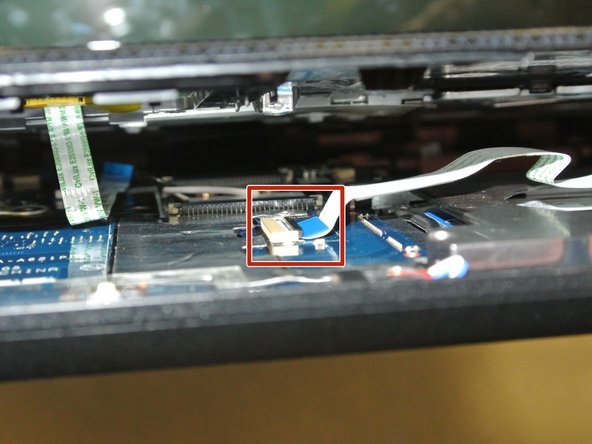
Turn over the motherboard and disconnect the wire labeled.
-
-
Bu adım çevrilmemiş. Çevrilmesine yardım edin
-
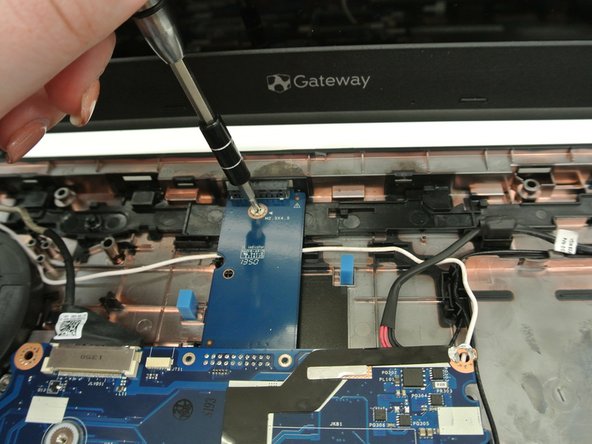
Use the PH0 screwdriver to unscrew the three 9.0 mm screws that are connected to the CPU Fan.
-


Ekip

University of Alabama, Team S2-G8, Bedsole Spring 2018 University of Alabama, Team S2-G8, Bedsole Spring 2018 üyesi
UA-BEDSOLE-S18S2G8
4 Üyeler
10 adet Kılavuz yazıldı