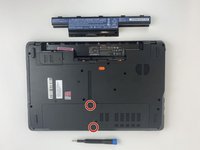
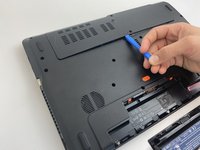
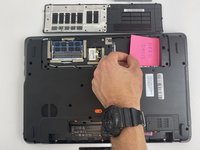
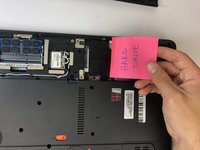
Ana içeriğe geç

Gateway NE56R27u Hard Drive Replacement

Neye ihtiyacın var

  1. Gateway NE56R27u Hard Drive Replacement, Battery: adım 1, 2 resimden 1. Gateway NE56R27u Hard Drive Replacement, Battery: adım 1, 2 resimden 2.
    • Using the spudger, push the orange tab to the unlock position.

  2. Gateway NE56R27u Hard Drive Replacement: adım 2, 2 resimden 1. Gateway NE56R27u Hard Drive Replacement: adım 2, 2 resimden 2.
    • Lift the battery from its compartment.

    • When reinstalling, insert back end of battery first, then clicking into place.

  3. Gateway NE56R27u Hard Drive Replacement, Hard Drive: adım 3, 3 resimden 1. Gateway NE56R27u Hard Drive Replacement, Hard Drive: adım 3, 3 resimden 2. Gateway NE56R27u Hard Drive Replacement, Hard Drive: adım 3, 3 resimden 3.
    • Unscrew the two 7.9mm Phillips #0 screws that secure the service cover.

  4. Gateway NE56R27u Hard Drive Replacement: adım 4, 2 resimden 1. Gateway NE56R27u Hard Drive Replacement: adım 4, 2 resimden 2.
    • Use the opening tool to gently pry open the compartment covering.

  5. Gateway NE56R27u Hard Drive Replacement: adım 5, 3 resimden 1. Gateway NE56R27u Hard Drive Replacement: adım 5, 3 resimden 2. Gateway NE56R27u Hard Drive Replacement: adım 5, 3 resimden 3.
    • Unscrew the two 0.5mm screws from the hard drive brackets using the Phillips #0 screwdriver.

    • Pull the plastic tab attached to the hard drive to the right to remove the hard drive.

    • The hard drive plugs into the port on the left within the compartment. Be sure to gently remove the hard drive without damaging the port.

  6. Gateway NE56R27u Hard Drive Replacement: adım 6, 2 resimden 1. Gateway NE56R27u Hard Drive Replacement: adım 6, 2 resimden 2.
    • Remove the hard drive by lifting up the right side, releasing the hard drive from the compartment clips on the left.

Sonuç

To reassemble your device, follow these instructions in reverse order.

0 Yorum

Yorum Ekle

İstatistikleri Görüntüle:

Son 24 Saat: 0

Son 7 gün: 0

Son 30 gün: 4

Her zaman: 258