Ana içeriğe geç

GeeksPhone Keon Antenna Replacement

Neye ihtiyacın var

  1. GeeksPhone Keon  Antenna Replacement, Battery: adım 1, 2 resimden 1. GeeksPhone Keon  Antenna Replacement, Battery: adım 1, 2 resimden 2.
    • Insert the plastic opening tool into the seam between the front of the device and the rear cover.

    • Slide the plastic opening tool from the bottom of the phone to the top.

    • Use the plastic opening tool to free all the clips attached to the phone.

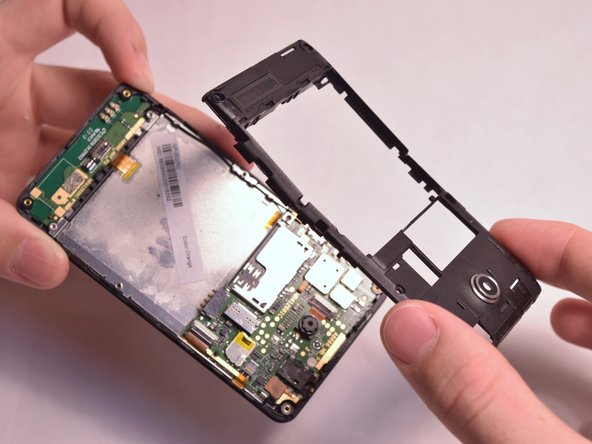
  2. GeeksPhone Keon  Antenna Replacement: adım 2, 1 resimden 1.
    • Lift the cover away from the phone.

  3. GeeksPhone Keon  Antenna Replacement: adım 3, 1 resimden 1.
    • Insert the plastic opening tool into the groove between the bottom of the phone and the battery.

    • Lift the battery with the plastic opening tool and finish removing battery by hand.

  4. GeeksPhone Keon  Antenna Replacement, Back Plate: adım 4, 2 resimden 1. GeeksPhone Keon  Antenna Replacement, Back Plate: adım 4, 2 resimden 2.
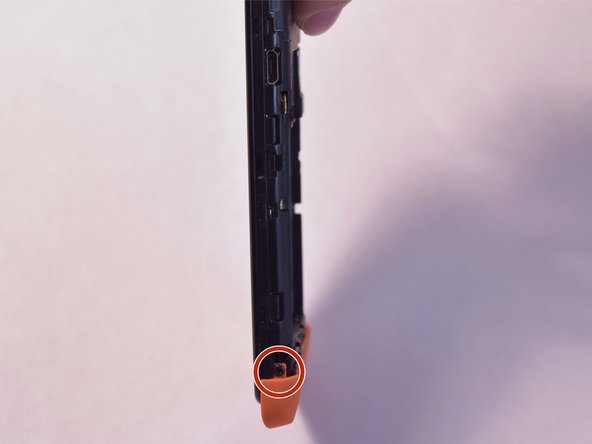
    • Remove the two 5mm T4 screws on the sides of the small orange plate.

  5. GeeksPhone Keon  Antenna Replacement: adım 5, 2 resimden 1. GeeksPhone Keon  Antenna Replacement: adım 5, 2 resimden 2.
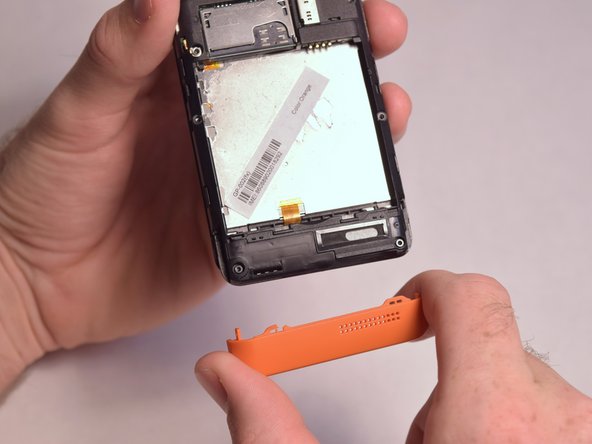
    • Gently remove the small orange plate by pulling it down.

  6. GeeksPhone Keon  Antenna Replacement: adım 6, 1 resimden 1.
    • Remove the following screws securing the back plate to the device:

    • Two silver 2mm T3 screws

    • Five black 3mm T3 screws

  7. GeeksPhone Keon  Antenna Replacement: adım 7, 3 resimden 1. GeeksPhone Keon  Antenna Replacement: adım 7, 3 resimden 2. GeeksPhone Keon  Antenna Replacement: adım 7, 3 resimden 3.
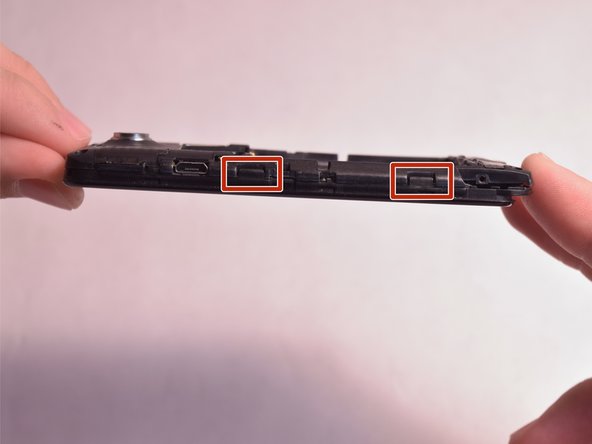
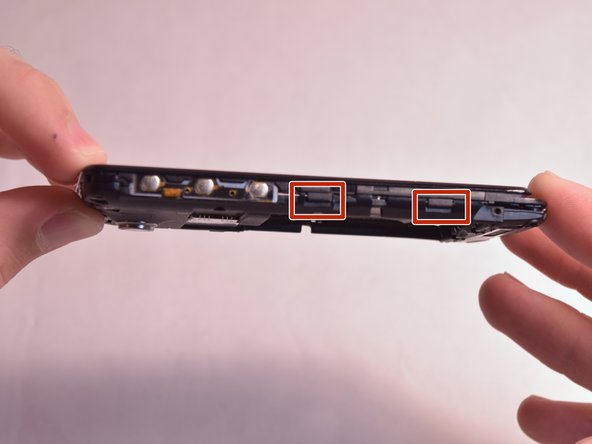
    • Slightly lift up the bottom corner of the backplate.

    • Release the four clips on both sides by pulling them away from the device.

  8. GeeksPhone Keon  Antenna Replacement: adım 8, 2 resimden 1. GeeksPhone Keon  Antenna Replacement: adım 8, 2 resimden 2.
    • Lift the backplate away from the device.

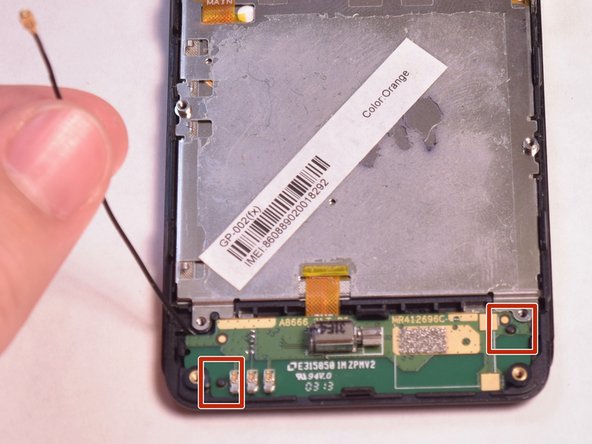
  9. GeeksPhone Keon  Antenna Replacement, Antenna: adım 9, 1 resimden 1.
    • Unfasten the black wire from the metal clamps by hand and lift the black wire away from the device.

    • Unfasten the plastic clamps attached to the antenna.

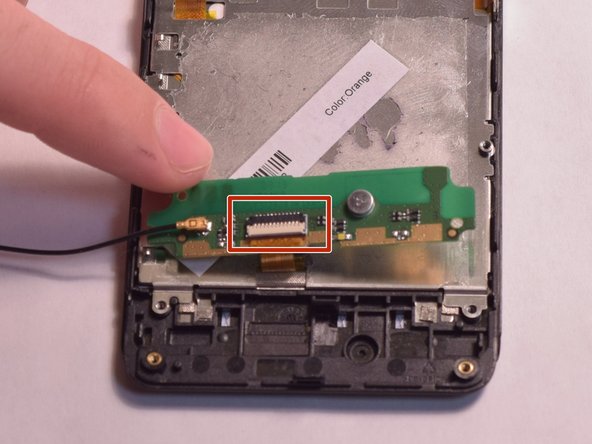
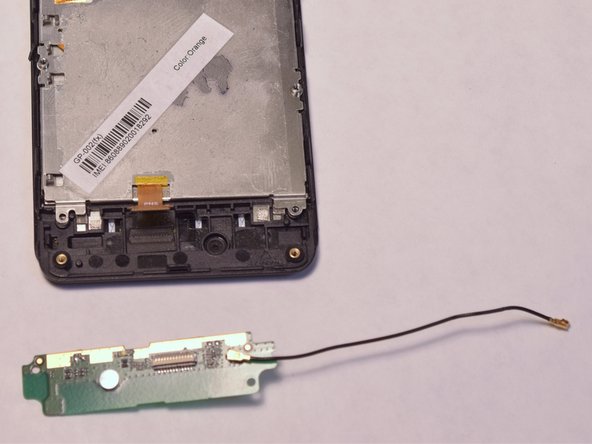
  10. GeeksPhone Keon  Antenna Replacement: adım 10, 3 resimden 1. GeeksPhone Keon  Antenna Replacement: adım 10, 3 resimden 2. GeeksPhone Keon  Antenna Replacement: adım 10, 3 resimden 3.
    • Gently lift the antenna and flip it over to reveal a ZIF connector on the back.

    • Flip up the small retaining flap on the ZIF connector and pull the ribbon cable out.

Sonuç

To reassemble your device, follow these instructions in reverse order.

Michael Moran

Üyelik tarihi: 08/26/15

113 İtibar

1 Kılavuz yazıldı

Ekip

USF Tampa, Team 3-5, Eyestone Fall 2015 USF Tampa, Team 3-5, Eyestone Fall 2015 üyesi

USFT-EYESTONE-F15S3G5

4 Üyeler

12 adet Kılavuz yazıldı

0 Yorum

Yorum Ekle

İstatistikleri Görüntüle:

Son 24 Saat: 0

Son 7 gün: 0

Son 30 gün: 1

Her zaman: 150