Bu sürüm, hatalı düzenlemeler içerebilir. En son doğrulanmış bellek kopyası dönün.
Neye ihtiyacın var
-
Bu adım çevrilmemiş. Çevrilmesine yardım edin
-
Remove the two levers and four dials by pulling them out directly towards you.
-
-
Bu adım çevrilmemiş. Çevrilmesine yardım edin
-
Look for the plastic clips on the back side of the toaster.
-
Disconnect the small plastic clips on the back of the toaster. Use Philips head Screwdriver to do this step.
-
Now, carefully remove the toaster casing.
-
-
Bu adım çevrilmemiş. Çevrilmesine yardım edin
-
Flip the toaster over so that the bottom plate is facing up.
-
-
-
Bu adım çevrilmemiş. Çevrilmesine yardım edin
-
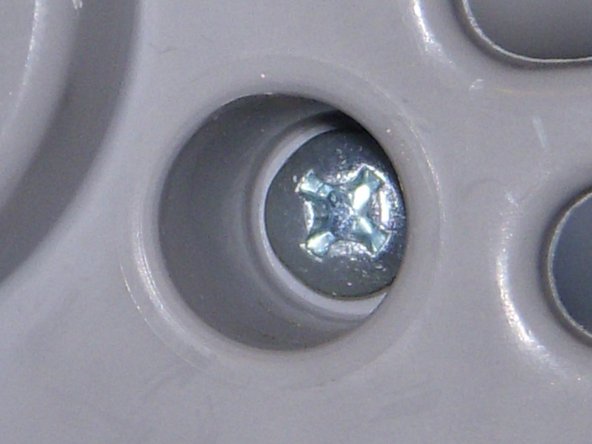
Remove the four screws from the bottom of the toaster.
-
-
Bu adım çevrilmemiş. Çevrilmesine yardım edin
-
Carefully separate the bottom plate from the metal components inside the toaster.
-
-
Bu adım çevrilmemiş. Çevrilmesine yardım edin
-
Using wire cutters, cut the power supply cable close to the base of the toaster, leave about 2 inches of wire.
-
-
Bu adım çevrilmemiş. Çevrilmesine yardım edin
-
Pull the power supply cord through the bottom plate of the toaster.
-
-
Bu adım çevrilmemiş. Çevrilmesine yardım edin
-
Insert the end of the new power supply cable through the hole in the bottom plate.
-
-
Bu adım çevrilmemiş. Çevrilmesine yardım edin
-
Strip about an inch of the wire insulation (casing) off the ends of both the new power supply cable, and the old power supply cable that is still attached to the toaster.
-
-
Bu adım çevrilmemiş. Çevrilmesine yardım edin
-
Splice the stripped ends of wire together using a wire cap.
-


Ekip

UMass Dartmouth, Team 4-4, Vijaybhaskar Fall 2013 UMass Dartmouth, Team 4-4, Vijaybhaskar Fall 2013 üyesi
UMASSD-VIJAYBHASKAR-F13S4G4
3 Üyeler
4 adet Kılavuz yazıldı