Ana içeriğe geç

General Electric Create Jason Wu Power Supply Button Replacement

Neye ihtiyacın var

  1. General Electric Create Jason Wu Power Supply Button Replacement, General Electric Create Jason Wu Casing Disassembly: adım 1, 3 resimden 1. General Electric Create Jason Wu Power Supply Button Replacement, General Electric Create Jason Wu Casing Disassembly: adım 1, 3 resimden 2. General Electric Create Jason Wu Power Supply Button Replacement, General Electric Create Jason Wu Casing Disassembly: adım 1, 3 resimden 3.
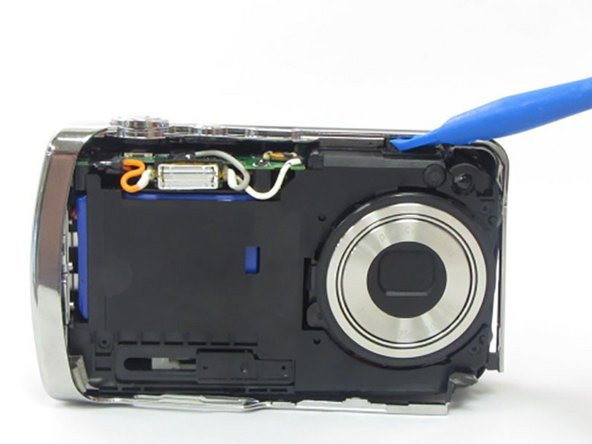
    • Begin by removing the 5 screws (located: 2 screws on either side and 1 screw on the bottom) using the PH000 head in the Precision Phillips Screwdriver.

    • These screws were missing in our example. These screws should have been small Phillips PH000 screws 1.5mm in length.

    • These screws are very small. To keep from losing any pieces, place all small metals on a magnetic project mat.

  2. General Electric Create Jason Wu Power Supply Button Replacement: adım 2, 2 resimden 1. General Electric Create Jason Wu Power Supply Button Replacement: adım 2, 2 resimden 2.
    • After the screws are removed, pull the front casing up and away from the camera.

    • If the casing is difficult to remove, use a plastic opening tool to gently pry up on the front as shown.

  3. General Electric Create Jason Wu Power Supply Button Replacement: adım 3, 3 resimden 1. General Electric Create Jason Wu Power Supply Button Replacement: adım 3, 3 resimden 2. General Electric Create Jason Wu Power Supply Button Replacement: adım 3, 3 resimden 3.
    • Using your hands or an opening tool, pry off the silver frame, taking special care at the top of the camera where the buttons are as it is a little harder to pry off.

    • If the back casing is loose from the camera body, it may be easier to perform step 4 first, then accomplish this step. Proceed as your unit allows.

  4. General Electric Create Jason Wu Power Supply Button Replacement: adım 4, 3 resimden 1. General Electric Create Jason Wu Power Supply Button Replacement: adım 4, 3 resimden 2. General Electric Create Jason Wu Power Supply Button Replacement: adım 4, 3 resimden 3.
    • The last part of the casing to disconnect is the back that houses the LCD screen.

    • The screen is attached by a connection ribbon. Gently pull the casing and screen away from the camera body to disconnect the casing.

    • The LCD screen is held onto the back casing by a small amount of adhesive. This may come loose during this process. Do not worry if they become separated.

    • This plug and the connection ribbon are fragile, try not to tear the connection ribbon when disconnecting.

  5. General Electric Create Jason Wu Power Supply Button Replacement, Power Supply Button: adım 5, 3 resimden 1. General Electric Create Jason Wu Power Supply Button Replacement, Power Supply Button: adım 5, 3 resimden 2. General Electric Create Jason Wu Power Supply Button Replacement, Power Supply Button: adım 5, 3 resimden 3.
    Bu adımda kullanılan alet:
    Flathead 3/32" or 2.5 mm Screwdriver
    $5.49
    Satın Al
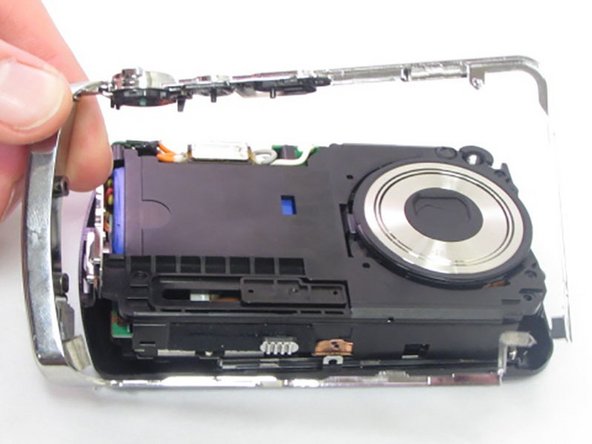
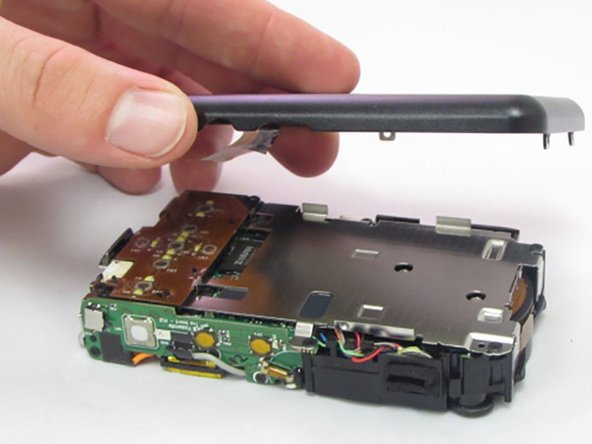
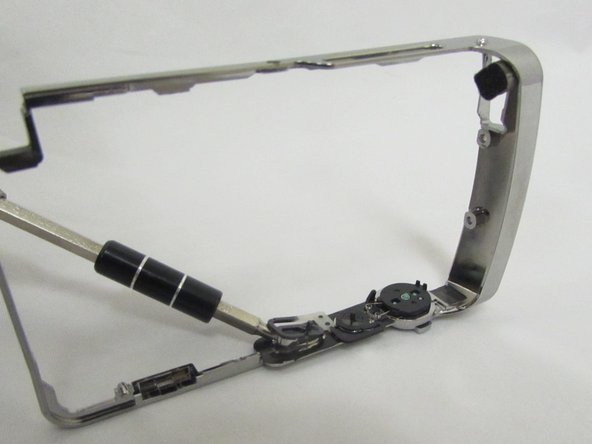
    • Locate the metal frame removed from around the camera in step 3.

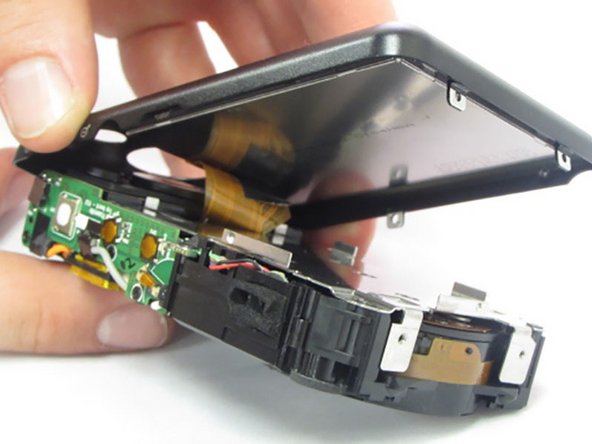
    • Lay the frame button side down or flat and gently pry the button out of place with the 3.0 flathead bit or a pair of tweezers.

    • This is very brittle plastic so use extreme caution and minimal force.

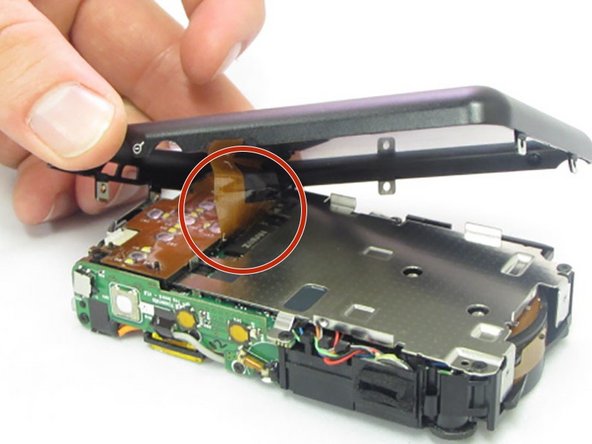
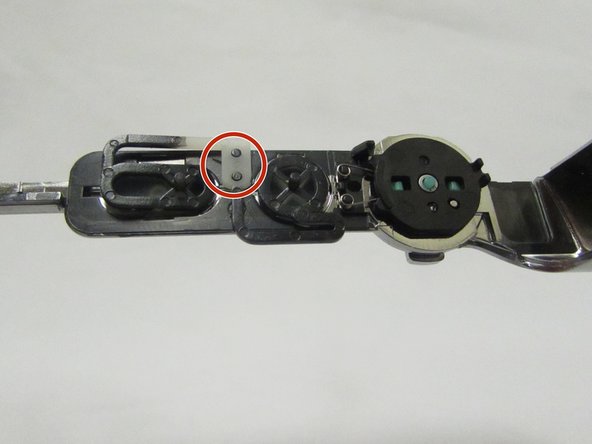
    • The button is secured to the frame by two small black rods pushed into the white colored portion of the button (see picture).

  6. General Electric Create Jason Wu Power Supply Button Replacement: adım 6, 1 resimden 1.
    • The button will pry off easily and shouldn't take much force

Sonuç

To reassemble your device, follow these instructions in reverse order.

0 Yorum

Yorum Ekle

İstatistikleri Görüntüle:

Son 24 Saat: 0

Son 7 gün: 1

Son 30 gün: 1

Her zaman: 168