Ana içeriğe geç
Onarım Topluluğuna Katılın - Hesap Oluşturun

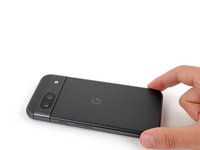
Google Pixel 8a Back Cover Replacement

Neye ihtiyacın var

    1. Google Pixel 8a Back Cover Replacement, Prepare your Pixel for disassembly: adım 1, 3 resimden 1. Google Pixel 8a Back Cover Replacement, Prepare your Pixel for disassembly: adım 1, 3 resimden 2. Google Pixel 8a Back Cover Replacement, Prepare your Pixel for disassembly: adım 1, 3 resimden 3.
      • Let your Pixel's battery drain below 25% before starting this repair. A charged lithium‑ion battery may catch fire if damaged.

      • Unplug all cables from your phone.

      • Completely power off your phone.

      • Press the power and volume up buttons at the same time to bring up the shutdown menu.

      FixBot'a Sor

      Yorum Ekle

    1. Google Pixel 8a Back Cover Replacement, Adhesive information: adım 2, 3 resimden 1. Google Pixel 8a Back Cover Replacement, Adhesive information: adım 2, 3 resimden 2. Google Pixel 8a Back Cover Replacement, Adhesive information: adım 2, 3 resimden 3.
      • The back cover is secured with adhesive around the perimeter and near the cameras. To avoid damaging your phone's internals, note the following:

      • Unless stated otherwise, don't insert your tool more than 3 mm (the width of your opening tool's flat section) around the edges.

      • Don't insert your tool under the edges of the camera bump.

      FixBot'a Sor

      Yorum Ekle

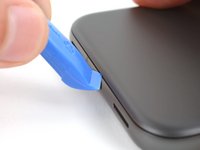
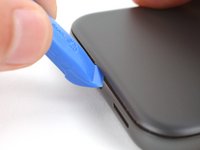
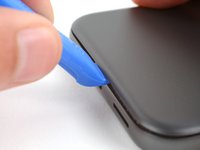
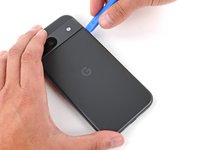
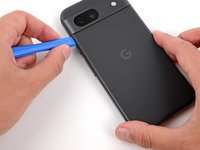
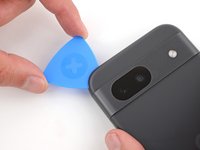
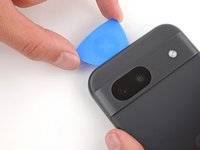
    2. Google Pixel 8a Back Cover Replacement, Insert an opening tool: adım 3, 3 resimden 1. Google Pixel 8a Back Cover Replacement, Insert an opening tool: adım 3, 3 resimden 2. Google Pixel 8a Back Cover Replacement, Insert an opening tool: adım 3, 3 resimden 3.
      • Your opening tool has a flat end and a curved end. During the opening procedure, use the flat end and angle it so the tool's sharp edge points upward.

      • Insert the edge of an opening tool between the back cover and the frame, starting with a sharp corner of the tool to help separate the adhesive.

      FixBot'a Sor

      Yorum Ekle

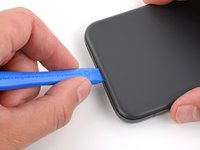
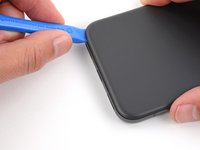
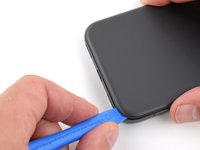
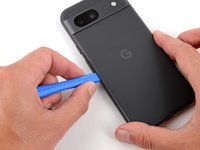
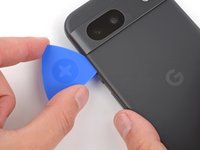
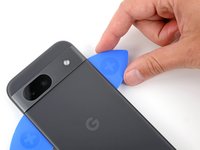
    3. Google Pixel 8a Back Cover Replacement, Separate the perimeter adhesive: adım 4, 3 resimden 1. Google Pixel 8a Back Cover Replacement, Separate the perimeter adhesive: adım 4, 3 resimden 2. Google Pixel 8a Back Cover Replacement, Separate the perimeter adhesive: adım 4, 3 resimden 3.
      • Slide your opening tool along the bottom edge to separate the adhesive securing the back cover.

      FixBot'a Sor

      Yorum Ekle

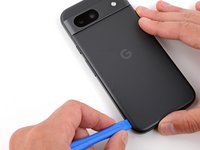
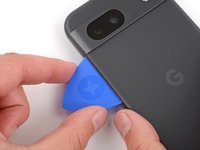
    4. Google Pixel 8a Back Cover Replacement: adım 5, 3 resimden 1. Google Pixel 8a Back Cover Replacement: adım 5, 3 resimden 2. Google Pixel 8a Back Cover Replacement: adım 5, 3 resimden 3.
      • Slide your opening tool around the bottom right corner and up the right edge, stopping at the bottom of the camera bump.

      • Remove your opening tool from under the back cover.

      FixBot'a Sor

      Yorum Ekle

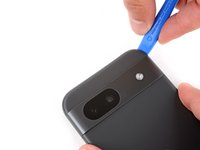
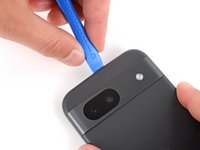
    5. Google Pixel 8a Back Cover Replacement: adım 6, 3 resimden 1. Google Pixel 8a Back Cover Replacement: adım 6, 3 resimden 2. Google Pixel 8a Back Cover Replacement: adım 6, 3 resimden 3.
      • Insert your opening tool under the top right corner of the back cover, just above the camera bump.

      • Slide your opening tool along the top edge, stopping at the top left corner just above the camera bump.

      • Remove your opening tool from under the back cover.

      FixBot'a Sor

      Yorum Ekle

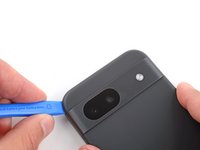
    6. Google Pixel 8a Back Cover Replacement: adım 7, 3 resimden 1. Google Pixel 8a Back Cover Replacement: adım 7, 3 resimden 2. Google Pixel 8a Back Cover Replacement: adım 7, 3 resimden 3.
      • Insert your opening tool under the left edge of the back cover, just below the camera bump.

      • Slide your opening tool down the left edge to separate the adhesive.

      FixBot'a Sor

      Yorum Ekle

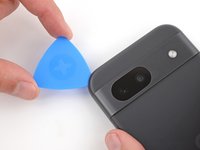
    7. Google Pixel 8a Back Cover Replacement, Separate the camera bump adhesive: adım 8, 3 resimden 1. Google Pixel 8a Back Cover Replacement, Separate the camera bump adhesive: adım 8, 3 resimden 2. Google Pixel 8a Back Cover Replacement, Separate the camera bump adhesive: adım 8, 3 resimden 3.
      • A strip of adhesive above the camera bump secures the top edge of the back cover.

      • Insert an opening pick under the top left corner of the back cover until the tip is close to the top edge of the camera bump.

      • You can insert the opening pick more than 3 mm along the top edge.

      • Slide the pick to the right, stopping when you reach the right edge of the cameras.

      FixBot'a Sor

      Yorum Ekle

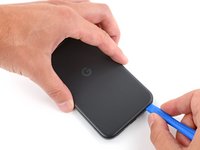
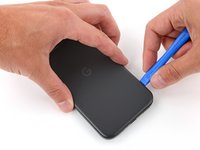
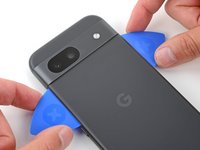
    8. Google Pixel 8a Back Cover Replacement: adım 9, 3 resimden 1. Google Pixel 8a Back Cover Replacement: adım 9, 3 resimden 2. Google Pixel 8a Back Cover Replacement: adım 9, 3 resimden 3.
      • A final strip of adhesive below the camera bump secures the back cover.

      • Insert the flat edge of an opening pick under the back cover, just below the camera bump.

      • Insert a second opening pick in the same spot on the other side.

      FixBot'a Sor

      Yorum Ekle

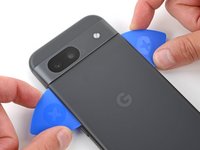
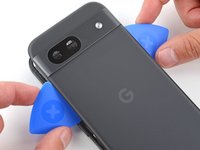
    9. Google Pixel 8a Back Cover Replacement: adım 10, 3 resimden 1. Google Pixel 8a Back Cover Replacement: adım 10, 3 resimden 2. Google Pixel 8a Back Cover Replacement: adım 10, 3 resimden 3.
      • Pry up simultaneously with both picks and apply constant pressure to separate the final piece of adhesive securing the back cover.

      • Be careful not to bend the back cover. If the adhesive feels stubborn, rotate the cover side-to-side to further loosen the adhesive.

      • If the adhesive isn't separating, you can lightly heat the back cover just below the camera bump with a hair dryer or iOpener to soften the adhesive.

      FixBot'a Sor

      Yorum Ekle

    10. Google Pixel 8a Back Cover Replacement, Remove the back cover: adım 11, 2 resimden 1. Google Pixel 8a Back Cover Replacement, Remove the back cover: adım 11, 2 resimden 2.
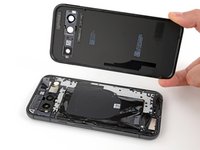
      • Remove the back cover.

      • During reassembly:

      • Now is a good time to test your phone before sealing it up. Power it on and check that it works. Power it back down before you continue reassembly.

      • Follow this guide to apply new adhesive and install your back cover.

      FixBot'a Sor

      Yorum Ekle

Sonuç

To reassemble your device, follow this guide.

To run a diagnostics test with the built-in Pixel Diagnostic tool, click here.

Repair didn’t go as planned? Try some basic troubleshooting, or ask our Answers community for help.

İptal et: Bu kılavuzu tamamlamadım.

5 farklı kişi bu kılavuzu tamamladı.

Spencer Day

Üyelik tarihi: 09/14/22

198.722 İtibar

1.243 adet Kılavuz yazıldı

Ekip

iFixit iFixit üyesi

Staff

123 Üyeler

59.471 adet Kılavuz yazıldı

0Kılavuz Yorumları

Yorum Ekle

İstatistikleri Görüntüle:

Son 24 Saat: 15

Son 7 gün: 62

Son 30 gün: 297

Her zaman: 8,031