Giriş
This guide will teach readers how to remove old or damaged strings from their guitars, and how to tie knots at the bridge and head of the guitars to keep the strings in place.
This guide will also outline the process of fitting open-ended nylon strings onto a Yamaha C-40 Classical Acoustic Guitar.
This guide assumes that the reader has basic knowledge of the parts of the guitar and their respective functions.
Neye ihtiyacın var
-
-
Turn the tuning pegs counter clock-wise to loosen all of the guitar strings and release the tension.
 FixBot'a Sor
-
-
-
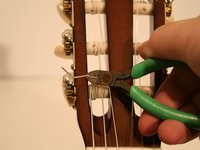
Once the strings are loose and have no tension, cut the strings with a handheld wire cutter.
-
Cut the knots near the tuning pegs and bridge as needed. Then, pull the strings to remove them.
-
-
-
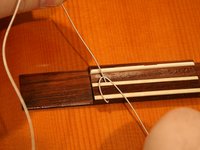
Insert the thick end of the string into the top of the bridge and thread it through until about 3 to 4 inches of the string stick out of the bottom.
-
Wrap the short end of the string around the long end of the string, creating a loop.
-
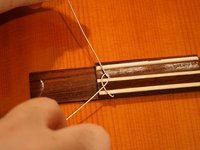
Pass the short end of the string through the loop (2 or 3 times for thick strings, 3 or 4 times for thin strings). Make sure the final pass leaves the string underneath the bridge.
-
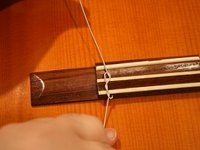
Pull both ends of the string until the knot is tight.
-
-
-
-
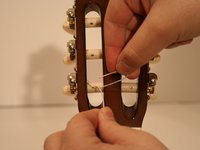
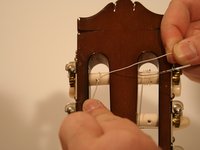
Insert the springy end of the string into the hole in the tuning peg.
-
Pull the springy end over the tuning peg and to the left side.
-
Bring the springy end to the right side by passing it under the string, creating a loop.
-
Push the springy end through the loop, and then pull both ends until the knot is tight. You may have to press the knot with your finger tighten it completely.
-
-
-
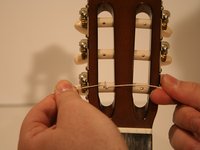
Insert the end of the string into the hole in the tuning peg.
-
Pull the end over the tuning peg to the right side.
-
Bring the end of the string to the left side by passing it under the string, creating a loop.
-
Push the end through the loop and then pull both ends until the knot is tight. You may have to press and hold the knot with your finger to tighten completely.
-
-
-
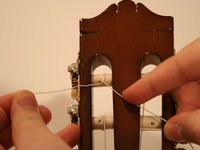
Turn the tuning knob in a clock-wise motion to tighten the string until the string makes a clear sound when plucked.
-
As the string winds around the tuning peg, make sure that the string passes over the loose end from the knot at least once. This will prevent "slipping" (detuning) during tuning and will help keep the knot tight.
-
-
-
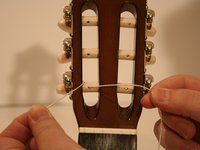
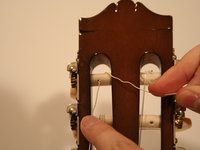
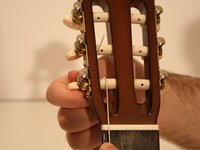
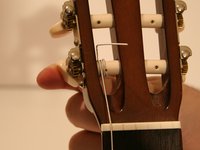
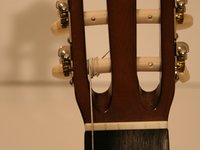
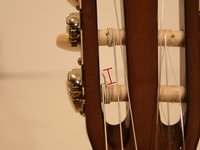
Before moving on, compare your work to the image provided. If the head of your guitar does not resemble the guitar in the image, go back to steps 3 and 4.
-
Check that strings are properly set in the notches of the nut of the guitar. The "nut" is the white bar just below the head of the guitar.
-
You are ready to tune your guitar! Classical guitar strings may "slip" or detune. It may take 4 or more rounds of tuning before the new strings stop slipping.
-
-
-
Once you have tuned your guitar, remove the loose ends of the strings from the head and bridge of the guitar with your handheld wire cutter.
-


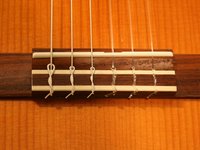
Your new strings are now in place!
İptal et: Bu kılavuzu tamamlamadım.
Bir başkası bu kılavuzu tamamladı.
Ekip

Oakland University, Team 6-1, Walwema Winter 2016 Oakland University, Team 6-1, Walwema Winter 2016 üyesi
OAK-WALWEMA-W16S6G1
10 Üyeler
13 adet Kılavuz yazıldı