Ana içeriğe geç

HKC P886A LCD Replacement

Neye ihtiyacın var

  1. HKC P886A LCD Replacement, Disassembling HKC P886A Overall Device Disassembly: adım 1, 2 resimden 1. HKC P886A LCD Replacement, Disassembling HKC P886A Overall Device Disassembly: adım 1, 2 resimden 2.
    • Insert the flat tip of the metal spudger into the seam between the back panel and the screen.

    • The easiest insertion point for the metal spudger is at the corners of the device.

    • Slide the spudger across the perimeter of the device and gently pry apart at each corner.

    • When the screen is separated from the back panel there will be two connected ribbon cables between the two halves of the device. These cables must be disconnected before further disassembly.

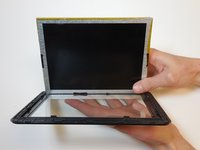
    • After the pressure clamps are released orient the device so that the speaker is to the right and the screen is tilted away from you.

  2. HKC P886A LCD Replacement: adım 2, 2 resimden 1. HKC P886A LCD Replacement: adım 2, 2 resimden 2.
    • The device is oriented with the camera to the right and the external button towards the top of the picture.

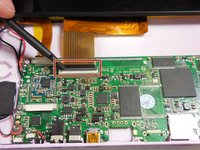
    • Locate the shorter ribbon cable and the black pressure tabs that hold the ribbon cable in place.

    • The tabs used to connect the ribbon cables are fragile and can easily be damaged.

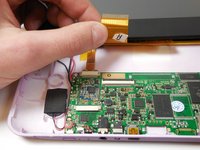
    • Use the plastic spudger to gently slide the tabs about 2mm away from connector.

    • Once tabs are successfully disconnected the ribbon cable should come out of the port without resistance.

  3. HKC P886A LCD Replacement: adım 3, 3 resimden 1. HKC P886A LCD Replacement: adım 3, 3 resimden 2. HKC P886A LCD Replacement: adım 3, 3 resimden 3.
    • Locate the longer ribbon cable and the pressure clamp that holds the cable in the connection port.

    • Using the plastic spudger, flip the black locking clip up.

    • The pressure clip will click when it has been disengaged.

    • Once the clip is unlocked, the cable should slide out without resistance

    • In photo 1 the device is oriented with the camera to the left and external buttons towards the bottom. In photo 2 the device is oriented with the camera toward the user. In photo 3 the camera is to the left.

  4. HKC P886A LCD Replacement, LCD: adım 4, 2 resimden 1. HKC P886A LCD Replacement, LCD: adım 4, 2 resimden 2.
    • The screen assembly is a delicate component and some prying is involved. Avoid deforming screen to avoid further damage.

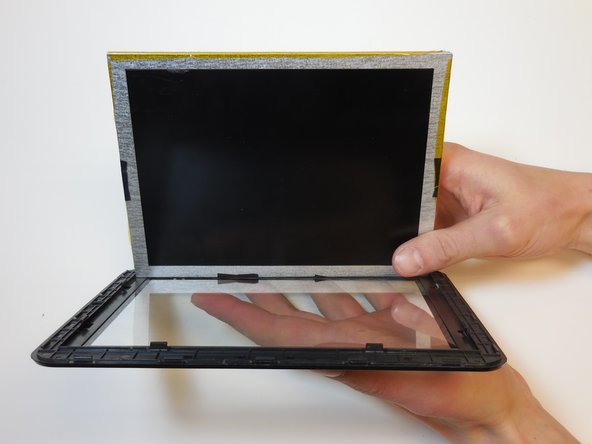
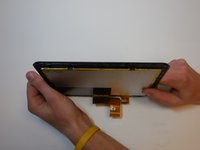
    • Gently bend the matrix away from the screen to release the pressure clamps.

    • Bend one side at a time applying equal force in order to reduce stress on the matrix from the bending.

    • Once all pressure clamps are disengaged, separate the screen and matrix without touching the front of either component.

    • Replacement matrices can be found at this link: screensurgeons.com

  5. HKC P886A LCD Replacement: adım 5, 1 resimden 1.
    • To reassemble to display, seat the LCD screen in the pressure clamps and gently push components together.

    • Do not touch the front of the matrix or screen to avoid getting fingerprints and smudges on device.

Sonuç

To reassemble your device, follow these instructions in reverse order.

Bir başkası bu kılavuzu tamamladı.

Cassidy

Üyelik tarihi: 03/11/15

409 İtibar

3 adet Kılavuz yazıldı

Ekip

Colorado Springs, Team 5-2, Panko Spring 2015 Colorado Springs, Team 5-2, Panko Spring 2015 üyesi

UCCS-PANKO-S15S5G2

3 Üyeler

8 adet Kılavuz yazıldı

0 Yorum

Yorum Ekle

İstatistikleri Görüntüle:

Son 24 Saat: 0

Son 7 gün: 1

Son 30 gün: 4

Her zaman: 565