Giriş
If the HMDX Chill begins to show issues with its ability to charge and the issue is not related to the charging port or charging cable it may be time to change the battery. This guide will show how to disassemble the device in order to locate and find the battery along with showing all of the attachments from the battery to the motherboard in order to properly replace the battery.
Neye ihtiyacın var
-
-
Insert a metal spudger under the rubber base.
-
Pry the rubber base off.
-
-
-
-
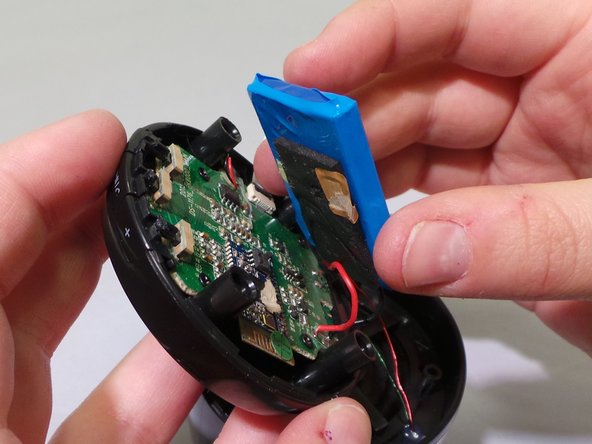
Once the base has been removed from the rest of the speaker locate the battery.
-
-
-
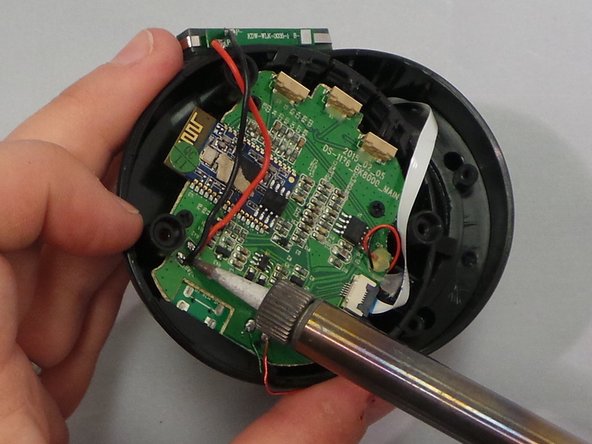
Locate the wires that attaches from the battery to the motherboard.
-
Using a soldering iron desolder the wires from the motherboard.
-


To reassemble your device, follow these instructions in reverse order.
To reassemble your device, follow these instructions in reverse order.
İptal et: Bu kılavuzu tamamlamadım.
Bir başkası bu kılavuzu tamamladı.
Ekip
