Bu sürüm, hatalı düzenlemeler içerebilir. En son doğrulanmış bellek kopyası dönün.
Neye ihtiyacın var
-
Bu adım çevrilmemiş. Çevrilmesine yardım edin
-
Remove all external devices from the computer.
-
Remove the charging cord from the computer.
-
-
Bu adım çevrilmemiş. Çevrilmesine yardım edin
-
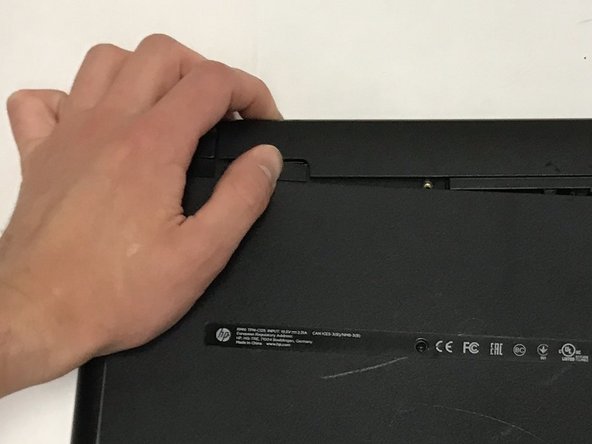
To remove the battery, slide the left slider on the back to the unlocked position.
-
-
Bu adım çevrilmemiş. Çevrilmesine yardım edin
-
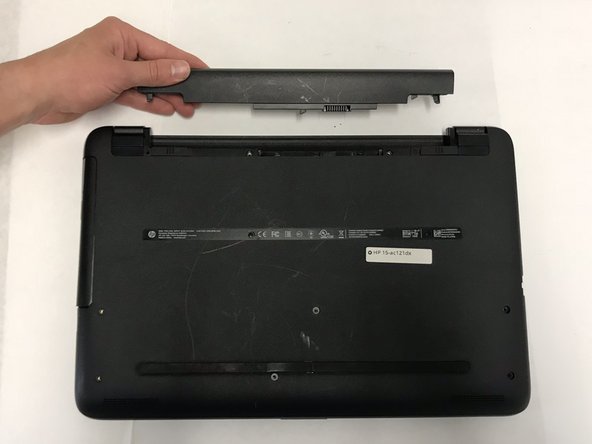
Push the right slider inwards.
-
Remove the battery out by pulling straight out and to the right.
-
-
Bu adım çevrilmemiş. Çevrilmesine yardım edin
-
Locate the CD Compartment panel and gently slide it out.
-
-
-
Bu adım çevrilmemiş. Çevrilmesine yardım edin
-
Remove the back of the laptop by unscrewing the screws shown.
-
Also remove the other 5 Phillips screws lining the back cover.
-
-
Bu adım çevrilmemiş. Çevrilmesine yardım edin
-
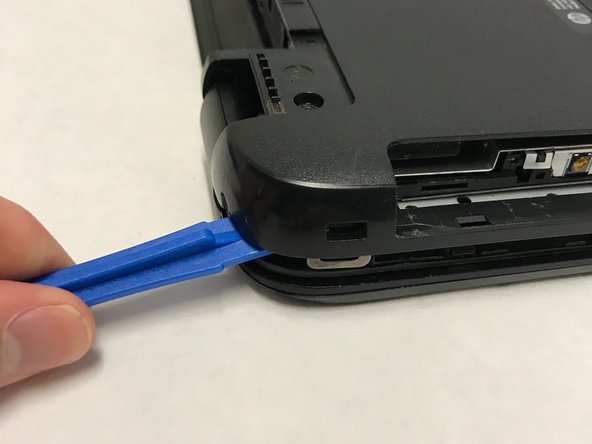
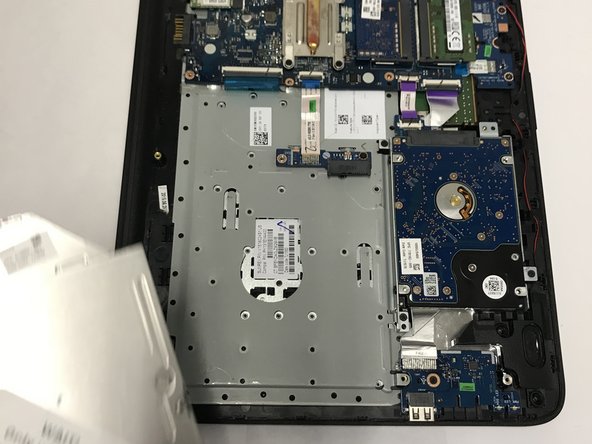
Using the prying tool, wedge it underneath the back of the laptop and do the same all around until the back comes off.
-
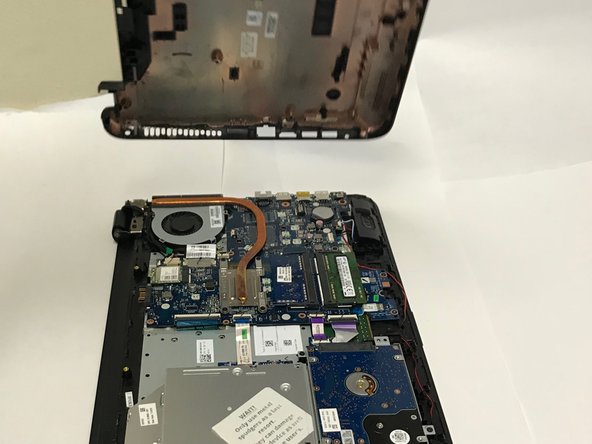
Dont forget to unscrew 2 screws under 2 plastic tabs (one on each hing). The lid will not come off without them being removed!
-
-
Bu adım çevrilmemiş. Çevrilmesine yardım edin
-
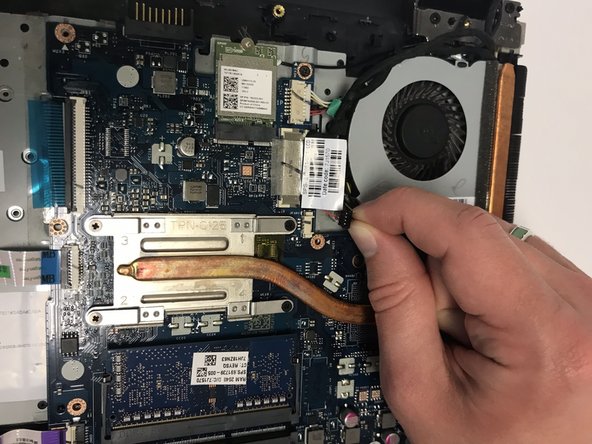
Locate the Fan as shown.
-
Pull out the black cable, with four wires attached from its port.
-
-
Bu adım çevrilmemiş. Çevrilmesine yardım edin
-
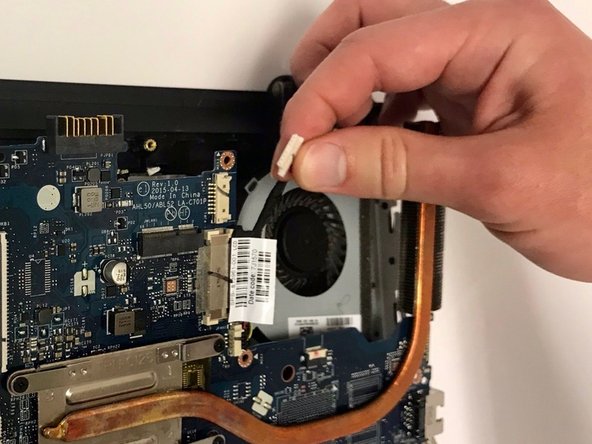
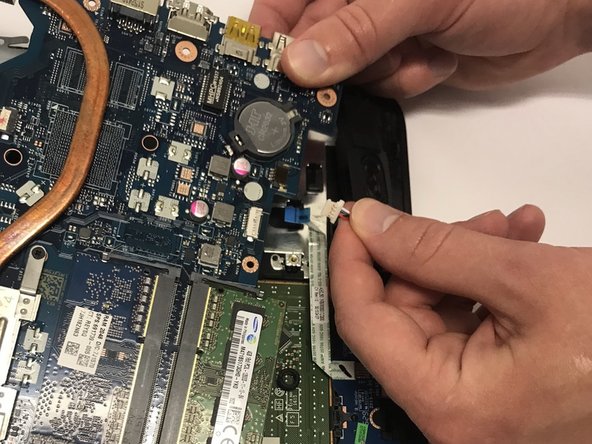
Pull out the white cable wire from its port.
-
Unscrew the two black Phillips screws holding in the fan.
-
-
Bu adım çevrilmemiş. Çevrilmesine yardım edin
-
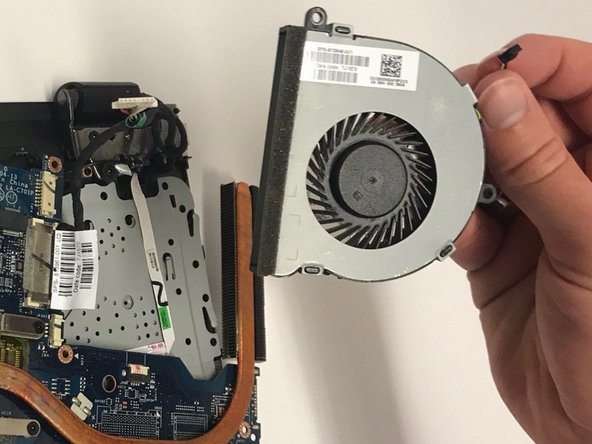
Remove fan.
-
Unscrew the two screws holding in the fan.
-
-
Bu adım çevrilmemiş. Çevrilmesine yardım edin
-
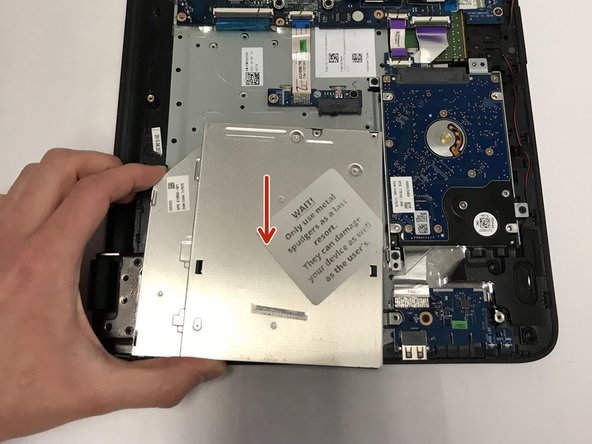
Locate the CD Compartment as shown and gently slide it out.
-
-
Bu adım çevrilmemiş. Çevrilmesine yardım edin
-
Locate the four ribbon clips.
-
Lift the grey part of the ribbon clips.
-
Pull the ribbon cable out and repeat this step for all four ribbon cables.
-
Also use a spudger and release the TWO cables attaching the hard drive to the motherboard. Another ribbon cable is located where the fan was sitting.
-
-
Bu adım çevrilmemiş. Çevrilmesine yardım edin
-
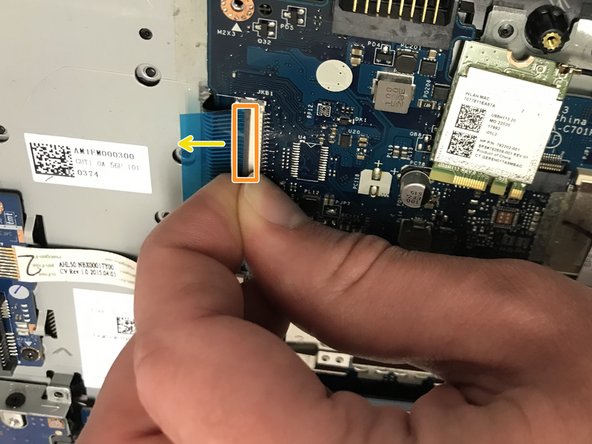
Pull out the white cable (contains red and white cable attached to a black support) with wires from its port.
-


İptal et: Bu kılavuzu tamamlamadım.
Bir başkası bu kılavuzu tamamladı.
Ekip

Baylor, Team S1-G2, Johnson Spring 2018 Baylor, Team S1-G2, Johnson Spring 2018 üyesi
BU-JOHNSON-S18S1G2
3 Üyeler
6 adet Kılavuz yazıldı
Bir Yorum
Pls can the motherboard of HP - 15 ac-250g5 replacethe board of HP 15 ac-121dx since they have the same body structure.