Ana içeriğe geç

HP 17-x173dx Motherboard Replacement

Neye ihtiyacın var

  1. HP 17-x173dx Motherboard Replacement, Battery: adım 1, 2 resimden 1. HP 17-x173dx Motherboard Replacement, Battery: adım 1, 2 resimden 2.
    • Begin by sliding the left tab to the unlock position

  2. HP 17-x173dx Motherboard Replacement: adım 2, 1 resimden 1.
    • Push each of the two tabs in the direction specified by the picture.

  3. HP 17-x173dx Motherboard Replacement: adım 3, 3 resimden 1. HP 17-x173dx Motherboard Replacement: adım 3, 3 resimden 2. HP 17-x173dx Motherboard Replacement: adım 3, 3 resimden 3.
    • Slide and hold the right tab to the left, while gently pushing out the battery with your thumbs

  4. HP 17-x173dx Motherboard Replacement, Motherboard: adım 4, 1 resimden 1.
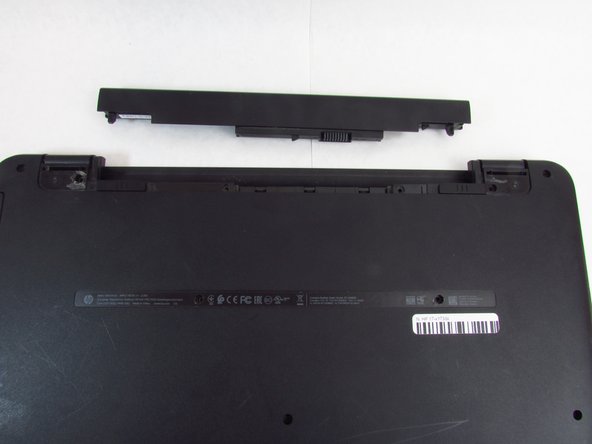
    • Using the Phillips #0 screwdriver, remove fourteen 7 mm screws on the back of the device (two will be underneath where the battery was).

  5. HP 17-x173dx Motherboard Replacement: adım 5, 3 resimden 1. HP 17-x173dx Motherboard Replacement: adım 5, 3 resimden 2. HP 17-x173dx Motherboard Replacement: adım 5, 3 resimden 3.
    • Remove the optical disk drive.

    • Use the spudger to lift the plastic backing, starting from the back right side, near the vents.

    • Remove the back of the device by continuing to lift the plastic around the entire perimeter of the device.

  6. HP 17-x173dx Motherboard Replacement: adım 6, 1 resimden 1.
    Bu adımda kullanılan alet:
    Tweezers
    $4.99
    Satın Al
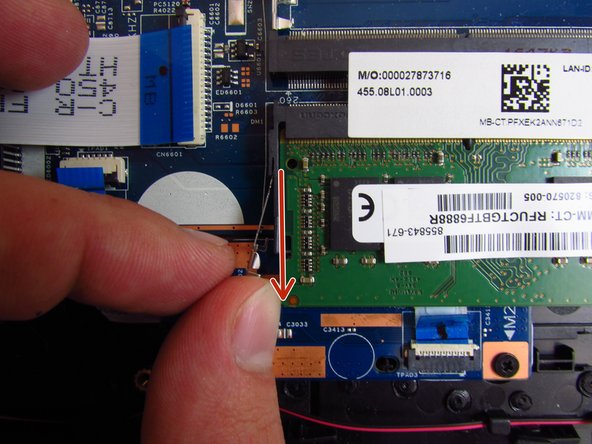
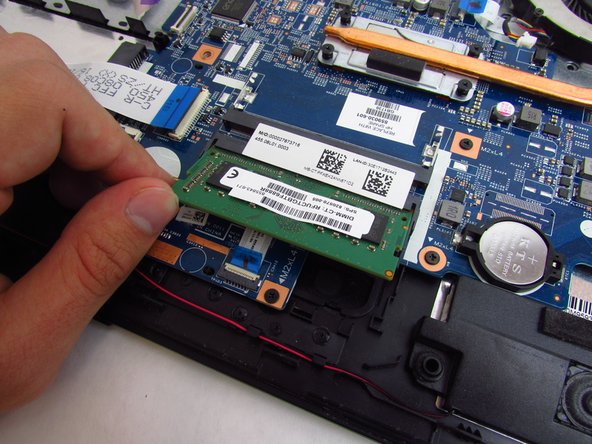
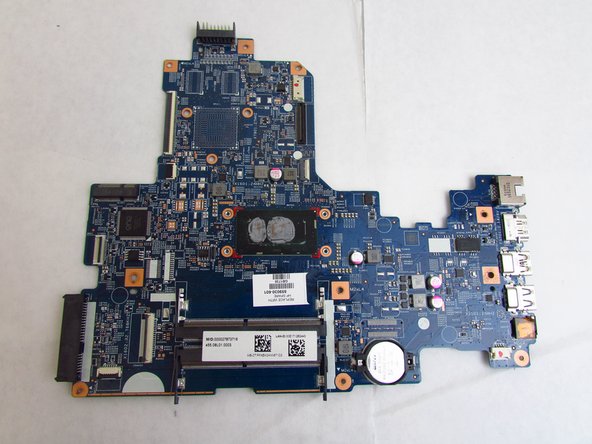
    • Disconnect all cable connections from the motherboard. For the 6 ribbon cables, take care to lift each plastic flap using a pair of dull tweezers before pulling the cable out. Additionally remove the 2 white plastic cable connections by simply pulling them away.

  7. HP 17-x173dx Motherboard Replacement: adım 7, 3 resimden 1. HP 17-x173dx Motherboard Replacement: adım 7, 3 resimden 2. HP 17-x173dx Motherboard Replacement: adım 7, 3 resimden 3.
    • Use a pair of tweezers or your nails to carefully pry the metal retention clips out and away from the RAM casing.

    • Gently bend the plastic retainers away to free the RAM stick and remove it from the device.

  8. HP 17-x173dx Motherboard Replacement: adım 8, 1 resimden 1.
    • Using the Phillips #0 screwdriver, remove the Wi-Fi module by unscrewing a single 5 mm screw.

    • Remove the hard drive by undoing the hard drive retention case.

    • The hard drive did not come attached when we received the device.

  9. HP 17-x173dx Motherboard Replacement: adım 10, 2 resimden 1. HP 17-x173dx Motherboard Replacement: adım 10, 2 resimden 2.
    • Remove nine 4 mm motherboard screws using the Phillips #0 screwdriver.

    • Lift the motherboard and heatsink with fan out of the laptop case.

  10. HP 17-x173dx Motherboard Replacement: adım 11, 3 resimden 1. HP 17-x173dx Motherboard Replacement: adım 11, 3 resimden 2. HP 17-x173dx Motherboard Replacement: adım 11, 3 resimden 3.
    • Unscrew four heat sink screws using the Phillips #0 screwdriver.

    • These will unscrew, but will stay attached to the heat-sink.

    • Remove the cooling fan and heat sink from the motherboard.

    • After removing the cooling fan and heat sink, you will be left with the motherboard.

Sonuç

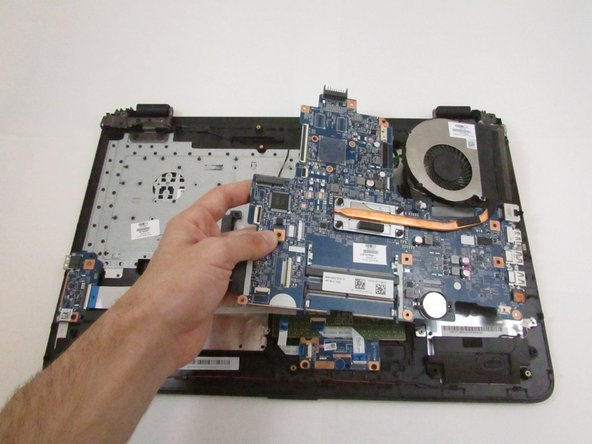
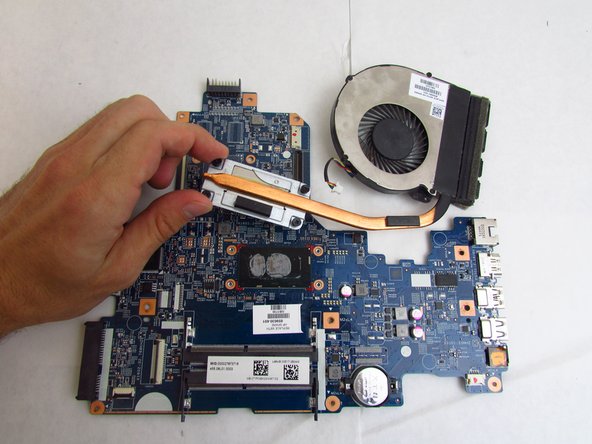
Install replacement motherboard and reassemble your device by following these instructions in reverse order.

4 farklı kişi bu kılavuzu tamamladı.

0 Yorum

Yorum Ekle

İstatistikleri Görüntüle:

Son 24 Saat: 0

Son 7 gün: 0

Son 30 gün: 8

Her zaman: 634