Neye ihtiyacın var
-
-
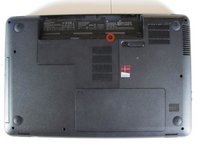
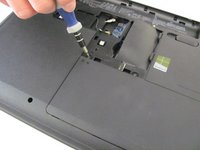
Flip the device over and locate the battery compartment.
-
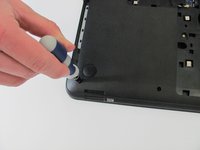
Slide the battery release latch to the left until the battery is detached from its slot.
-
A distinguishable pop will be heard when the battery is fully released.
 FixBot'a Sor
-
-
-
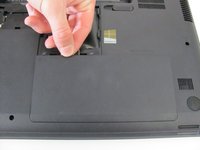
Slowly pull the battery out of its slot, being careful not to damage any of the connectors in the process.
-
-
-
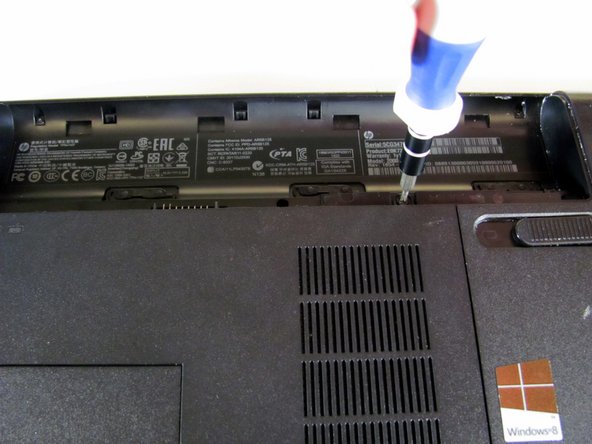
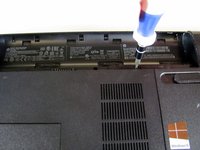
Loosen the Phillips #00 screw securing the RAM compartment cover.
-
-
-
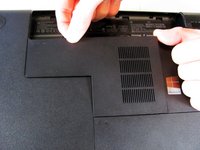
Once the screw is sufficiently loosened, slowly unclip the RAM compartment cover from its slots in the plastic chassis.
-
When unclipped completely, pull the compartment door out and away from the chassis.
-
-
-
-
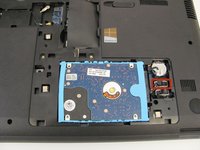
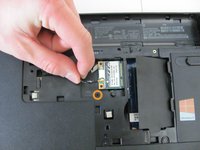
Loosen the two Phillips #00 screws that are securing the hard drive compartment.
-
Once the screws are sufficiently loosened, disconnect the clips holding the cover in place and slowly pull the cover away from the plastic chassis.
-
-
-
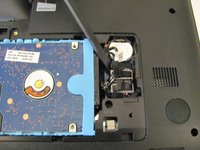
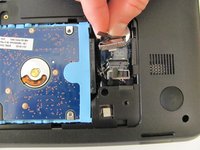
Using a spudger, disconnect the hard drive connecting cable. Use a slow, prying motion as if pulling a nail out of wood.
-
-
-
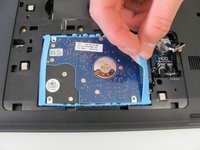
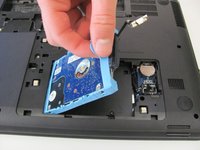
Using your fingers, grab the blue tab on the right side of the hard drive and slowly pull upwards.
-
Lift the hard drive out and away from its socket in the plastic chassis.
-
-
-
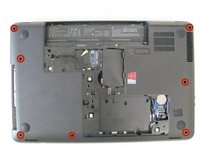
Locate all seven Phillips head screws around the borders of the plastic chassis.
-
Locate the small Phillips head screw next to the wireless chip.
-
Using a #00 Phillips head screwdriver, remove all eight screws listed above.
-
-
-
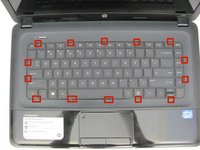
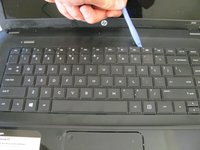
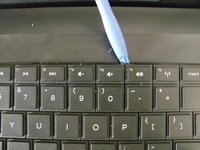
Locate the fourteen clips in the small gap that runs between the keyboard assembly and the chassis.
-
Using a plastic opening tool, slowly press down the keyboard clips and begin pulling the keyboard upwards.
-
-
-
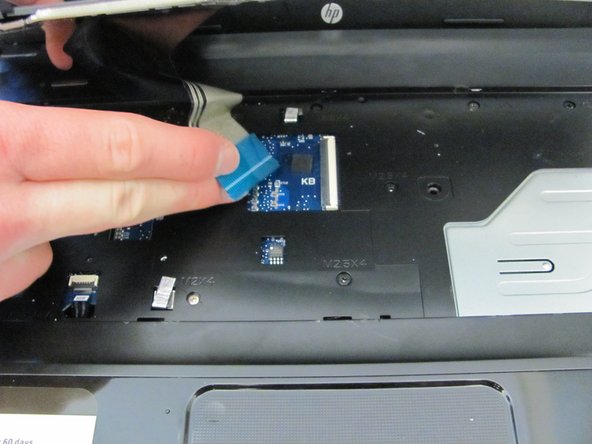
Once the keyboard is unscrewed, the ribbon cable below will also need to be disconnected.
-
Lift up the "flap" securing the ribbon cable to their slot on logic board and slowly pull the cables away from their connections.
-
Lift the keyboard assembly up and away from the plastic chassis.
-


To reassemble your device, follow these instructions in reverse order.
İptal et: Bu kılavuzu tamamlamadım.
28 farklı kişi bu kılavuzu tamamladı.

Ekip

Cal Poly, Team 3-40, Maness Spring 2014 Cal Poly, Team 3-40, Maness Spring 2014 üyesi
CPSU-MANESS-S14S3G40
4 Üyeler
6 adet Kılavuz yazıldı
3Kılavuz Yorumları
Step 5, 6, and 7 are completely unnecessary. You do not need to remove all those screws to replace the keyboard. You only need to remove the Hard Drive panel bolt in step 3, and the bolt in step 8 that has a keyboard logo next to it. You can confirm that this is the only bolt necessary to remove by viewing the underneath of the keyboard in step 10.
Agree with Keil, steps 5-7 are unnecessary, but an interesting experience. 63-year old grandma successfully replaced the keyboard so granddaughter can have a computer. Thanks for the great instructions!