Giriş
If your device is frequently overheating or making excessive noise, especially during compute intensive tasks, it may be due to a malfunctioning or dirty fan. This guide will show you how to replace the fan in the HP EliteBook 8530w laptop in the hopes of alleviating these issues.
Neye ihtiyacın var
-
-
-
Turn the laptop off then place it down so that the back is facing up.
-
Slide the battery release switch to the left and hold it there.
 FixBot'a Sor
-
-
-
Pull the battery away upward and away from the laptop while continuing to hold the release switch.
-
-
-
-
-
-
Unscrew the two screws from the center panel with a Phillips #00 screwdriver.
-
-
-
Flip the laptop over then open the lid.
-
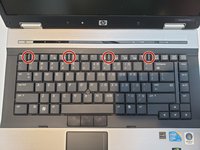
Slide the four tabs at the top of the keyboard towards you with your finger.
-
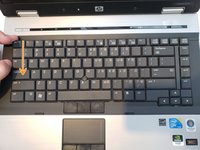
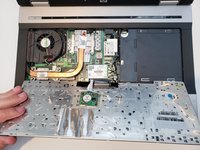
Wedge a finger or spudger in the top corner of the keyboard and hinge it forward to reveal the backside.
-
-
Bu adımda kullanılan alet:Tweezers$4.99
-
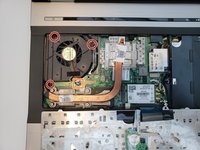
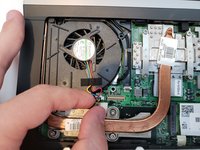
Use a Torx TR7 screwdriver to remove the three screws holding down the fan.
-
Gently remove the fan connector that plugs into the motherboard.
-
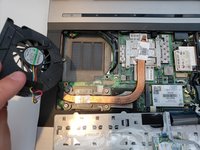
Remove the fan.
-
-




To reassemble your device, follow these instructions in reverse order.
İptal et: Bu kılavuzu tamamlamadım.
Bir başkası bu kılavuzu tamamladı.

Ekip

Embry-Riddle Aeronautical University, Team S14-G6, Lamothe Spring 2020 Embry-Riddle Aeronautical University, Team S14-G6, Lamothe Spring 2020 üyesi
ERAU-LAMOTHE-S20S14G6
3 Üyeler
60 adet Kılavuz yazıldı
