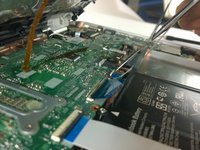
Ana içeriğe geç

HP Envy 15-u001dx Hard Drive Replacement

Neye ihtiyacın var

  1. HP Envy 15-u001dx Hard Drive Replacement, HP Envy 15-u001dx Disassembly: adım 1, 1 resimden 1.
    • Remove the two no-slip covers on the rear, bottom side using spudger shown in top center of picture.

    • The two in the front do not have to be removed as there are no screws underneath them.

  2. HP Envy 15-u001dx Hard Drive Replacement: adım 2, 1 resimden 1.
    • Remove the two cover tabs towards center of the bottom as there are screws underneath them.

  3. HP Envy 15-u001dx Hard Drive Replacement: adım 3, 1 resimden 1.
    • Remove all fourteen 4.5 mm screws from the bottom using a Phillips #0 screwdriver. Each location is marked by a red circle in the picture.

  4. HP Envy 15-u001dx Hard Drive Replacement: adım 4, 1 resimden 1.
    • Separate the top cover by using a spudger to go around the sides freeing the inside latches.

    • Once the bottom is free, carefully open to the inside as there are two ribbons that connect your keyboard and touch pad to the top cover.

  5. HP Envy 15-u001dx Hard Drive Replacement: adım 5, 2 resimden 1. HP Envy 15-u001dx Hard Drive Replacement: adım 5, 2 resimden 2.
    • Use the spudger to detach the two ribbons from their connectors.

    • The regular black nylon spudger should be used whenever possible, especially around sensitive internal components.

  6. HP Envy 15-u001dx Hard Drive Replacement, Hard Drive: adım 6, 1 resimden 1.
    • Gently remove hard drive from its connector.

Sonuç

To reassemble your device, follow these instructions in reverse order.

2 farklı kişi bu kılavuzu tamamladı.

Dakota Presley

Üyelik tarihi: 10/05/16

885 İtibar

6 adet Kılavuz yazıldı

Ekip

USF Tampa, Team 9-4, Lacy Fall 2016 USF Tampa, Team 9-4, Lacy Fall 2016 üyesi

USFT-LACY-F16S9G4

4 Üyeler

7 adet Kılavuz yazıldı

0 Yorum

Yorum Ekle

İstatistikleri Görüntüle:

Son 24 Saat: 0

Son 7 gün: 3

Son 30 gün: 22

Her zaman: 1,888