Ana içeriğe geç
Onarım Topluluğuna Katılın - Hesap Oluşturun

HP Envy 4-1105dx Display Replacement

Neye ihtiyacın var

    1. HP Envy 4-1105dx Display Replacement, Battery: adım 1, 1 resimden 1.
      • Power off the device before beginning disassembly. Disconnect all external devices.

      • Flip the device on its back.

      FixBot'a Sor
      Yorum Ekle

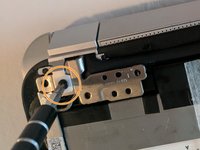
    2. HP Envy 4-1105dx Display Replacement: adım 2, 1 resimden 1.
      • Unscrew and remove the one 7.5 mm Phillips-head screw using Phillips #1 screwdriver.

      FixBot'a Sor
      Yorum Ekle

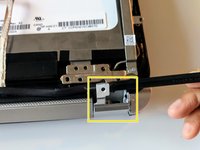
    3. HP Envy 4-1105dx Display Replacement: adım 3, 1 resimden 1.
      • Unscrew twelve 6.0 mm Phillips-head screws using Phillips #1 screwdriver.

      FixBot'a Sor
      Yorum Ekle

    4. HP Envy 4-1105dx Display Replacement: adım 4, 1 resimden 1.
      • Use the plastic opening tool (which is short and has a thin end for prying open device parts) to pry open the back case of the device.

      FixBot'a Sor

      Yorum Ekle

    5. HP Envy 4-1105dx Display Replacement: adım 5, 1 resimden 1.
      • Once the device is open, move the ribbon cable to the side.

      FixBot'a Sor

      Yorum Ekle

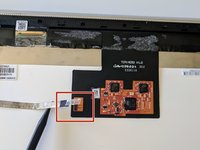
    6. HP Envy 4-1105dx Display Replacement: adım 6, 1 resimden 1.
      • Use the flat end of a plastic spudger to disconnect the battery cable from its socket in the motherboard.

      FixBot'a Sor
      Yorum Ekle

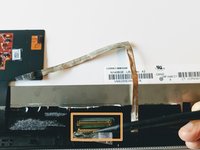
    7. HP Envy 4-1105dx Display Replacement: adım 7, 1 resimden 1.
      • Unscrew and remove the three 4.0 mm Phillips-head screws that hold the battery in place, using a Phillips #1 screwdriver.

      FixBot'a Sor
      Yorum Ekle

    8. HP Envy 4-1105dx Display Replacement: adım 8, 1 resimden 1.
      • Lift the battery up and remove.

      • Removing the battery can dislodge the touchpad bracket. Place the battery carefully over the alignment pins.

      FixBot'a Sor

      Yorum Ekle

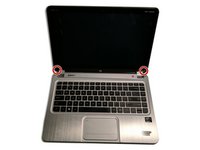
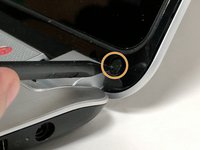
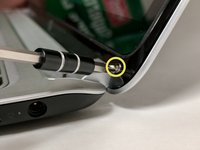
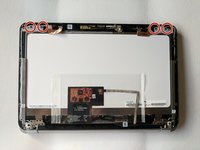
    1. HP Envy 4-1105dx Display Replacement, Display: adım 9, 3 resimden 1. HP Envy 4-1105dx Display Replacement, Display: adım 9, 3 resimden 2. HP Envy 4-1105dx Display Replacement, Display: adım 9, 3 resimden 3.
      • Close the device and turn it right-side up. Locate the two screw covers on the left and right side base of the display panel.

      • Remove the screw covers, using the black plastic spudger.

      • Remove the two 3.0 mm Phillips-front screws on the left and right hinges that secure the display panel to the computer, using a Phillips #1 screwdriver.

      FixBot'a Sor

      Yorum Ekle

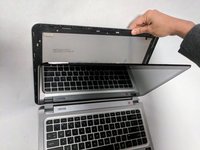
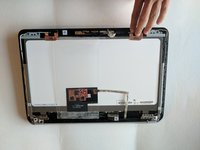
    2. HP Envy 4-1105dx Display Replacement: adım 10, 3 resimden 1. HP Envy 4-1105dx Display Replacement: adım 10, 3 resimden 2. HP Envy 4-1105dx Display Replacement: adım 10, 3 resimden 3.
      • Pry open the plastic bezel case of the device using the plastic spudger. If the plastic spudger doesn't work, carefully use the metal spudger.

      • Loosen the edges of the case from all four sides of the display panel.

      • Be careful not to use hands while opening, as the edges of the back case are sharp.

      • Once the back case pops out, close the laptop exposing the back display.

      FixBot'a Sor

      Yorum Ekle

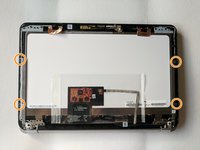
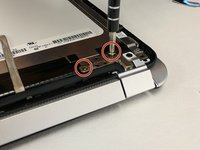
    3. HP Envy 4-1105dx Display Replacement: adım 11, 2 resimden 1. HP Envy 4-1105dx Display Replacement: adım 11, 2 resimden 2.
      • Remove the four 4.0 mm Phillips display panel screws using Phillips #1 screwdriver.

      • Remove the four 2.0 mm Phillips screws using Phillips #00 screwdriver.

      FixBot'a Sor

      Yorum Ekle

    4. HP Envy 4-1105dx Display Replacement: adım 12, 3 resimden 1. HP Envy 4-1105dx Display Replacement: adım 12, 3 resimden 2. HP Envy 4-1105dx Display Replacement: adım 12, 3 resimden 3.
      • Remove the four 4.0 mm Phillips silver screws on the hinges using a Phillips #1 screw driver.

      • Remove the two 6.0 mm Phillips black hinge cover screws using a Phillips #0 screw driver.

      • Flip and remove the hinge covers using a plastic spudger.

      • While flipping, be careful not bend the screen brackets.

      FixBot'a Sor

      Yorum Ekle

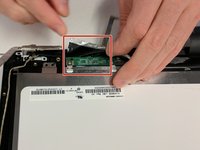
    5. HP Envy 4-1105dx Display Replacement: adım 13, 2 resimden 1. HP Envy 4-1105dx Display Replacement: adım 13, 2 resimden 2.
      • Disconnect the ribbon cable on the bottom of the display panel using a plastic spudger.

      • Disconnect the adjacent golden LCD connector using a plastic spudger.
      FixBot'a Sor

      Yorum Ekle

    6. HP Envy 4-1105dx Display Replacement: adım 14, 1 resimden 1.
      • Remove the golden tape adhering to the display panel using a plastic spudger.

      FixBot'a Sor

      Yorum Ekle

    7. HP Envy 4-1105dx Display Replacement: adım 15, 1 resimden 1.
      • Remove the white color wifi antennas from the display panel using a plastic spudger.

      FixBot'a Sor

      Yorum Ekle

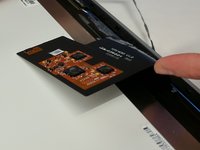
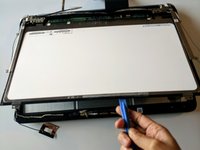
    8. HP Envy 4-1105dx Display Replacement: adım 16, 3 resimden 1. HP Envy 4-1105dx Display Replacement: adım 16, 3 resimden 2. HP Envy 4-1105dx Display Replacement: adım 16, 3 resimden 3.
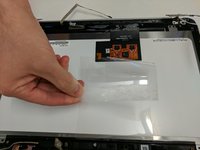
      • Separate the transparent plastic tape that covers the circuit board using hands.

      • Carefully flip the circuit board.

      • Remove the black tape adhering to the green circuit board that is connected to the display panel.

      FixBot'a Sor

      Yorum Ekle

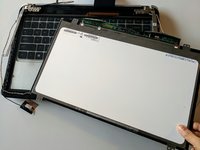
    9. HP Envy 4-1105dx Display Replacement: adım 17, 2 resimden 1. HP Envy 4-1105dx Display Replacement: adım 17, 2 resimden 2.
      • Using a plastic prying tool, remove the display panel.

      • This is the disassembled screen.

      FixBot'a Sor

      Yorum Ekle

Sonuç

To reassemble your device, follow these instructions in reverse order.

İptal et: Bu kılavuzu tamamlamadım.

0Kılavuz Yorumları

Yorum Ekle

İstatistikleri Görüntüle:

Son 24 Saat: 0

Son 7 gün: 7

Son 30 gün: 25

Her zaman: 1,286