Ana içeriğe geç

HP Envy x360 15m-cn0012dx Fan Replacement

Neye ihtiyacın var

  1. HP Envy x360 15m-cn0012dx  Fan Replacement, Fan: adım 1, 2 resimden 1. HP Envy x360 15m-cn0012dx  Fan Replacement, Fan: adım 1, 2 resimden 2.
    • Make sure the computer is turned off, and remove all cables.

    • Set the laptop face down.

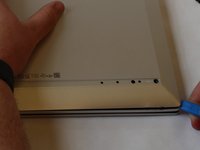
    • Peel back the grey screw guards, along the top and bottom edge of the back case. It may be helpful to use a spudger to get started.

    • Peel slowly to avoid tearing the rubber covers.

  2. HP Envy x360 15m-cn0012dx  Fan Replacement: adım 2, 3 resimden 1. HP Envy x360 15m-cn0012dx  Fan Replacement: adım 2, 3 resimden 2. HP Envy x360 15m-cn0012dx  Fan Replacement: adım 2, 3 resimden 3.
    • Using the Phillips #0 screwdriver, remove the seven 5mm screws from the back case.

  3. HP Envy x360 15m-cn0012dx  Fan Replacement: adım 3, 3 resimden 1. HP Envy x360 15m-cn0012dx  Fan Replacement: adım 3, 3 resimden 2. HP Envy x360 15m-cn0012dx  Fan Replacement: adım 3, 3 resimden 3.
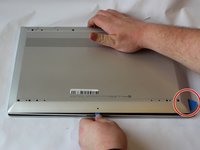
    • Pry open the back cover using the iFixit Opening Tool.

    • While using the tool, place a pick at each corner of the computer (be careful and do it slowly).

    • Once all the corners are slightly lifted, carefully pop off the back cover.

  4. HP Envy x360 15m-cn0012dx  Fan Replacement: adım 4, 3 resimden 1. HP Envy x360 15m-cn0012dx  Fan Replacement: adım 4, 3 resimden 2. HP Envy x360 15m-cn0012dx  Fan Replacement: adım 4, 3 resimden 3.
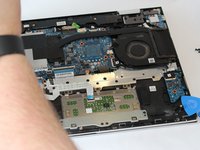
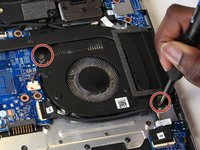
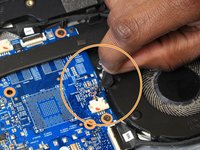
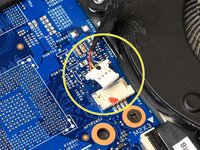
    • Remove the two 4mm screws from the fan using a Phillips #0 screwdriver.

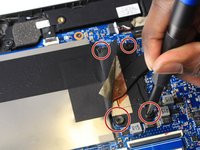
    • Peel the tape off of the multicolor cable bundle connecting the fan to the motherboard.

    • Use the iFixit opening tool to disconnect the connector.

  5. HP Envy x360 15m-cn0012dx  Fan Replacement: adım 5, 2 resimden 1. HP Envy x360 15m-cn0012dx  Fan Replacement: adım 5, 2 resimden 2.
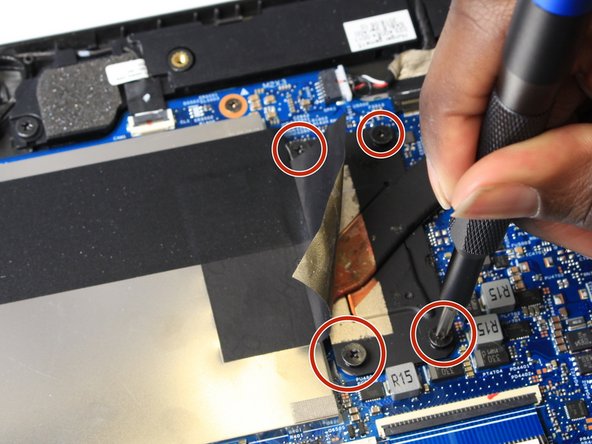
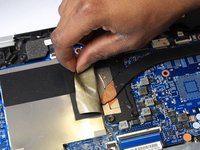
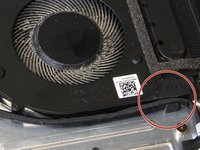
    • Peel back the tape from the heatsink.

    • Use the Phillips #0 screwdriver to remove the four captive screws from the heatsink.

    • These screws will stay inside the heatsink while it is removed, simply loosen them until they disengage from the case and the heatsink becomes loose.

  6. HP Envy x360 15m-cn0012dx  Fan Replacement: adım 6, 2 resimden 1. HP Envy x360 15m-cn0012dx  Fan Replacement: adım 6, 2 resimden 2.
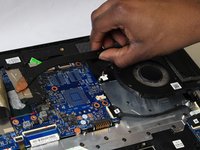
    • Unlatch the black cable from the plastic guides on the fan.

    • Lift the fan from the laptop case.

Sonuç

To reassemble your device, follow these instructions in reverse order.

2 farklı kişi bu kılavuzu tamamladı.

Ross Jeseritz

Üyelik tarihi: 02/04/20

157 İtibar

1 Kılavuz yazıldı

Ekip

UW Stout, Team S1-G3, Schneider-Bateman Spring 2020 UW Stout, Team S1-G3, Schneider-Bateman Spring 2020 üyesi

UWSTOUT-SCHNEIDER-BATEMAN-S20S1G3

3 Üyeler

5 adet Kılavuz yazıldı

0 Yorum

Yorum Ekle

İstatistikleri Görüntüle:

Son 24 Saat: 0

Son 7 gün: 10

Son 30 gün: 65

Her zaman: 2,701