Ana içeriğe geç

HP Envy x360 m6-aq105dx Solid State Drive Replacement

Arşivlenmiş Kılavuz
Bu kılavuz sadece arşivsel amaçlarla muhafaza edilmiştir. Onarımınızı gerçekleştirmek için kılavuzun güncel halini kullanın.

Neye ihtiyacın var

  1. HP Envy x360 m6-aq105dx Solid State Drive Replacement, Back Cover: adım 1, 1 resimden 1.
    • Ground yourself by touching a metal object or surface. This prevents electrical damage to other components in the laptop.

    • Remove the two 7.8 mm screws using the Phillips #0 screwdriver.

    • Remove the six 5.2 mm screws using the Torx T5 screwdriver.

  2. HP Envy x360 m6-aq105dx Solid State Drive Replacement: adım 2, 1 resimden 1.
    • Light to moderate force is required to remove the back cover.

    • Insert the Jimmy in between the frame of the laptop and the removable back cover and remove the back cover from the device.

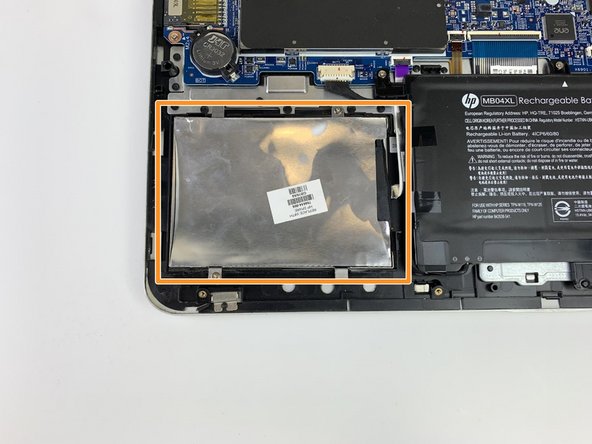
  3. HP Envy x360 m6-aq105dx Solid State Drive Replacement, Solid State Drive: adım 3, 1 resimden 1.
    • Remove the two 4.6 mm screws securing old hard drive/solid-state drive in place using the Phillips #0 screwdriver.

  4. HP Envy x360 m6-aq105dx Solid State Drive Replacement: adım 4, 2 resimden 1. HP Envy x360 m6-aq105dx Solid State Drive Replacement: adım 4, 2 resimden 2.
    • Disconnect the SATA cable connected to the old hard drive/solid-state drive.

    • Remove the solid state drive.

Sonuç

To reassemble your device, follow these instructions in reverse order.

0 Yorum

Yorum Ekle

İstatistikleri Görüntüle:

Son 24 Saat: 0

Son 7 gün: 0

Son 30 gün: 0

Her zaman: 36