Bu sürüm, hatalı düzenlemeler içerebilir. En son doğrulanmış bellek kopyası dönün.
Neye ihtiyacın var
-
Bu adım çevrilmemiş. Çevrilmesine yardım edin
-
First of all, we will remove the battery and open up the 2 panels at the bottom of the laptop. You'll see the RAM, HDD and Wifi.
-
-
Bu adım çevrilmemiş. Çevrilmesine yardım edin
-
Disconnect the wifi antennas and remove the wifi adapter. Keep in mind where to put the antennas again.
-
You remove the wifi adapter by removing the small screw and lifting up the adapter.
-
Ram modules are removed by pressing out on the metal tabs.
-
-
Bu adım çevrilmemiş. Çevrilmesine yardım edin
-
Now remove the HDD and the RAM. Unscrew the harddrive and lift it out. Gently pull out the SATA connector.
-
-
Bu adım çevrilmemiş. Çevrilmesine yardım edin
-
Remove the 3 screws of the DVD/RW bay.
-
Now remove the dvd bay by prying a little spudger between the case and the dvd player. Then gently pull the dvd player out.
-
-
Bu adım çevrilmemiş. Çevrilmesine yardım edin
-
This is the step where we will remove the screws from the whole case.
-
First remove the screws in the battery compartment.
-
Remove the rest of the case screws. There is one screw at the top left corner not shown in the pictures
-
There are 2 hidden screws in the HDD compartment. ( M2.5x6.5)
-
-
-
Bu adım çevrilmemiş. Çevrilmesine yardım edin
-
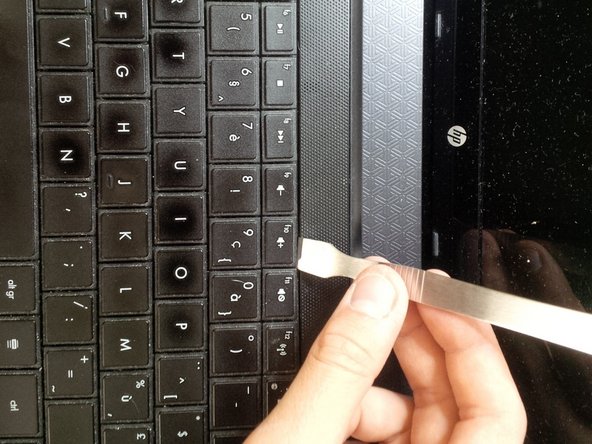
After removing all the screws, we can remove the keyboard.
-
Use a spudger to pry and search for the "locks"
-
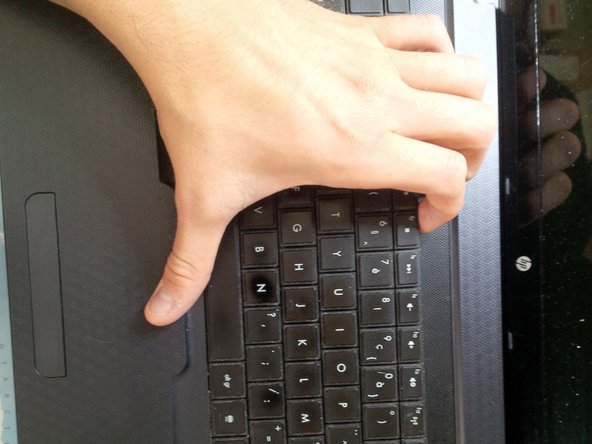
use your hand to gently remove the keyboard. You will here clicks.
-
-
Bu adım çevrilmemiş. Çevrilmesine yardım edin
-
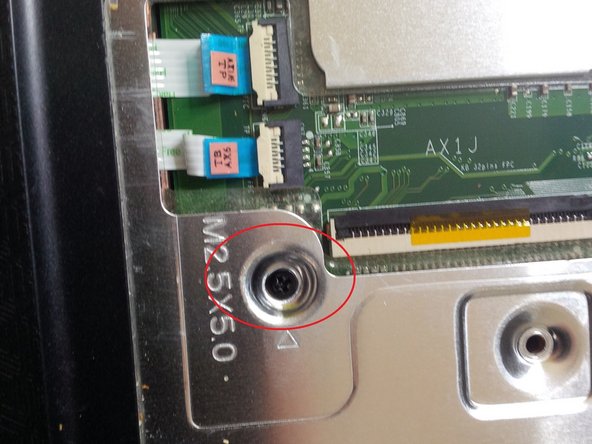
There are hidden screws under the keyboard. Remove them. (M2.5x6.5)
-
-
Bu adım çevrilmemiş. Çevrilmesine yardım edin
-
Remove all the visible connectors.
-
The other connectors are from the power button and the mouse pad.
-
-
Bu adım çevrilmemiş. Çevrilmesine yardım edin
-
Now gently remove the case with a spudger.
-
Gently slide the spudger to open the case.
-
You will hear clicks.
-
-
Bu adım çevrilmemiş. Çevrilmesine yardım edin
-
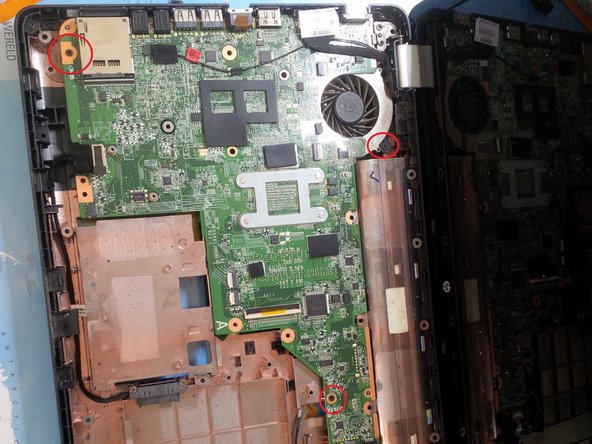
After you've removed the case you will see the motherboard.
-
Remove the screws from the motherboard.
-
-
Bu adım çevrilmemiş. Çevrilmesine yardım edin
-
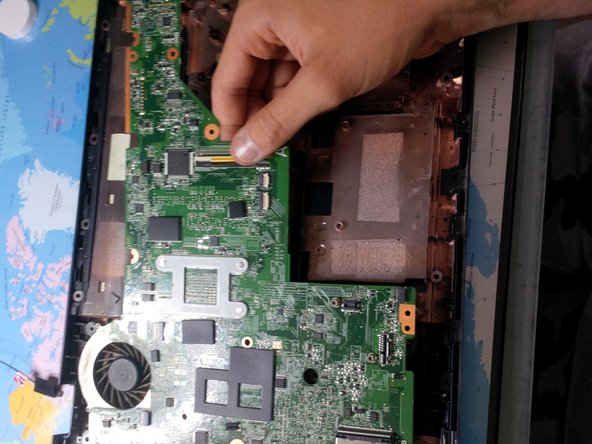
Remove the connectors for the screen.
-
During re-assembly tape the LCD cable to the motherboard with electrical tape. It will fit better and you have less troubles with the screen. Kapton tape can also be used and is better arround heat.
-
-
Bu adım çevrilmemiş. Çevrilmesine yardım edin
-
Now remove the SATA dock from the dvd player.
-
Like the other connectors , just pull it gently out the socket.
-
-
Bu adım çevrilmemiş. Çevrilmesine yardım edin
-
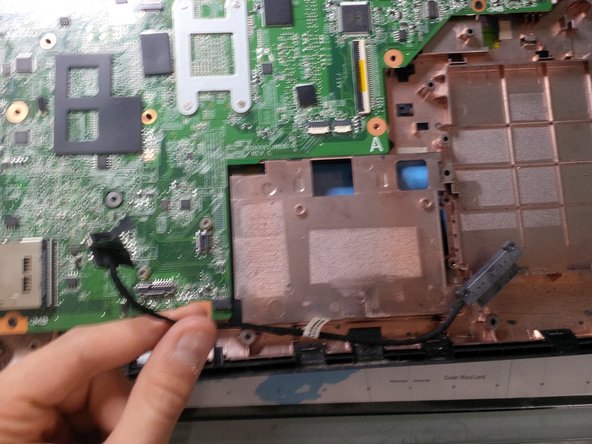
Now remove the usb conncetor + the dc jack connector.
-
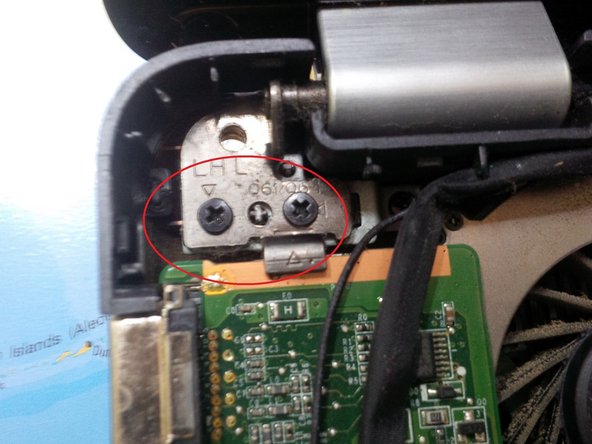
After removing all the cables/ wires and screws, we can remove the screws from the screen hinge. It should only be needed to remove the screws on the left hinge.
-
Remove the motherboard by pulling it up and sliding it to the right. you might need to move the screen a few mm so you can slide the motherboard free.
-
-
Bu adım çevrilmemiş. Çevrilmesine yardım edin
-
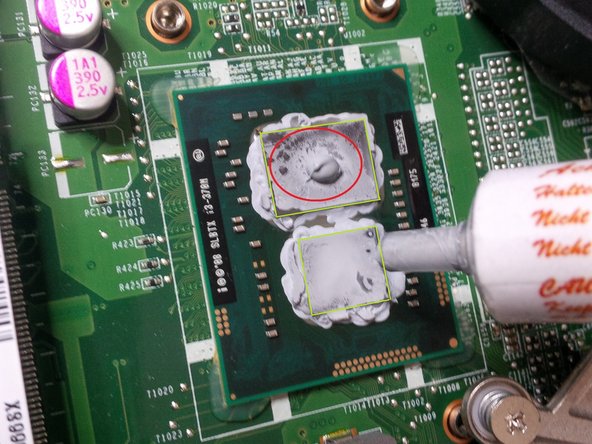
Now the last steps. We will put some new thermal paste on the soldered CPU and GPU.
-
First remove the 4 screws of the socket.
-
Clean off the old thermal paste with some paper tissue and Q tips and some alcohol.
-
-
Bu adım çevrilmemiş. Çevrilmesine yardım edin
-
Now re-assemble the laptop. Just reverse everything you did.
-
When you have screwed on the heatsink hold the fan with a finger and blast the heatsink fins with compressed air to get any dirt out. you might have to blow from both sides of the fins to get trapped dirt out.
-
Give case a short blast of air also to get dirt out... also blast the connectors as they are good at collecting dust and dirt
-


İptal et: Bu kılavuzu tamamlamadım.
6 farklı kişi bu kılavuzu tamamladı.