Ana içeriğe geç

HP Mobile Thin Client mt41 Fan Replacement

Neye ihtiyacın var

  1. HP Mobile Thin Client mt41 Fan Replacement, Back Cover: adım 1, 2 resimden 1. HP Mobile Thin Client mt41 Fan Replacement, Back Cover: adım 1, 2 resimden 2.
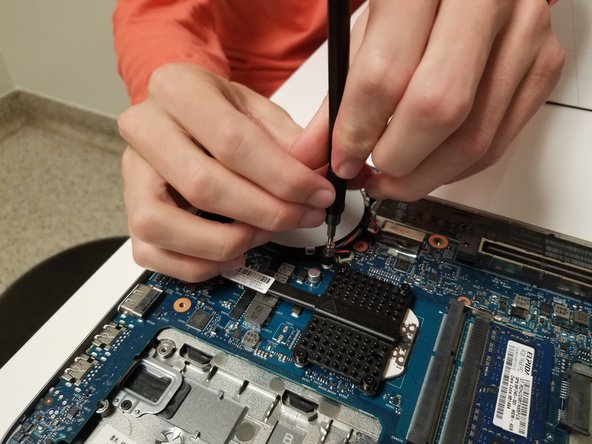
    • Remove the nine screws that keep the back cover secured using the T5 Torx screwdriver.

  2. HP Mobile Thin Client mt41 Fan Replacement: adım 2, 2 resimden 1. HP Mobile Thin Client mt41 Fan Replacement: adım 2, 2 resimden 2.
    • Remove the middle plate using the iFixit opening tool.

    • This may require a bit of force. If it is not coming out try the other side.

  3. HP Mobile Thin Client mt41 Fan Replacement: adım 3, 1 resimden 1.
    • Pop the back cover off from its latches by separating the two parts along their seam using the iFixit opening tool.

    • Be gentle; the plastic can crack.

  4. HP Mobile Thin Client mt41 Fan Replacement: adım 4, 1 resimden 1.
    • Lift the back cover once all corners are unclasped from their latches.

    • Lifting the cover should not require much force.

  5. HP Mobile Thin Client mt41 Fan Replacement, Fan: adım 5, 2 resimden 1. HP Mobile Thin Client mt41 Fan Replacement, Fan: adım 5, 2 resimden 2.
    • Using a J1 head for your screwdriver, remove the 4 surrounding screws.

  6. HP Mobile Thin Client mt41 Fan Replacement: adım 6, 1 resimden 1.
    • Keep your screws close by, and slowly remove the CPU fan.

  7. HP Mobile Thin Client mt41 Fan Replacement: adım 7, 1 resimden 1.
    • Be mindful of wires, the final step is to unplug the fan from the motherboard, at the base of red and blue wires.

Sonuç

To reassemble your device, follow these instructions in reverse order.

Bir başkası bu kılavuzu tamamladı.

0 Yorum

Yorum Ekle

İstatistikleri Görüntüle:

Son 24 Saat: 0

Son 7 gün: 3

Son 30 gün: 7

Her zaman: 354