Giriş
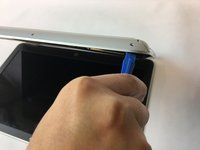
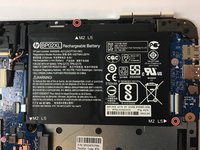
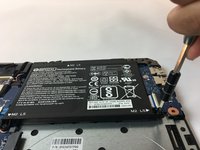
We will be removing the back panel and then removing the battery. Before you do any major hardware modifications to the laptop, it is important to remove the battery first. Once removed, further modifications are much safer.
Neye ihtiyacın var
Videoya Genel Bakış
-
-
Using the plastic opening tool, remove the top rubber feet on the back panel as it hides one of the screws we will be removing.
-
-


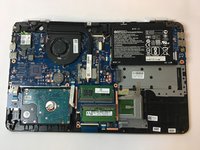




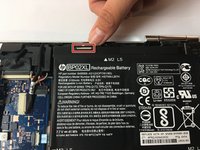
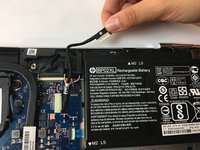
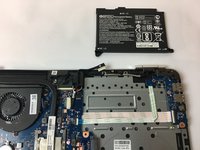
To reassemble your device, follow these instructions in reverse order.
To reassemble your device, follow these instructions in reverse order.
İptal et: Bu kılavuzu tamamlamadım.
18 farklı kişi bu kılavuzu tamamladı.



Ekip

USF Tampa, Team S13-G3, Cagle Fall 2017 USF Tampa, Team S13-G3, Cagle Fall 2017 üyesi
USFT-CAGLE-F17S13G3
2 Üyeler
6 adet Kılavuz yazıldı
6 Yorum
That one screw under the rubber pad is a special kind of BS.
The screw in the middle of everything was hardest for me to reinstall because it has to hold the CD drive in place ,and that drive hole must line up with everything else _just right_. Also, prying the keyboard from the shell was harder than I expected. It’s snapped in there pretty tight.
The procedure should be modified to start with removing the center screw that retains the DVD drive and then pulling out the drive. That makes separating the case halves easier.
My problem on ebay and amazon i only got aftermarket battery they claim oem 849909-850
I BOUGHT 3 SO FAR SAME THING …HP SAYS THEY DONT HAVE THE BATTERY FOR SALE ANY LONGER
Laptop wont start with nee battery … i conect old one with power on , once start conect new one and works
When shutdown or sleep it wont start with new battery
Will restart with new battery and last up to 6 hours new battery but wont start.
How can i start my laptop with new battery ?
It would be useful to have a heads up on how to get the CD/DVD drive back in place. I found ejecting the CD tray before shutdown and disassembly gave me some wiggle room when reinstalling. Then, you have to slide the CD plug into the motherboard jack before snapping the back cover into place. Make sure the screw hole on the CD drive aligns properly with the screw hole on the motherboard.
Also, my battery had 3 screws; one at the "top," one at each bottom corner.
