Bu sürüm, hatalı düzenlemeler içerebilir. En son doğrulanmış bellek kopyası dönün.
Neye ihtiyacın var
-
Bu adım çevrilmemiş. Çevrilmesine yardım edin
-
Close your laptop and turn it over so that the bottom is facing up.
-
-
Bu adım çevrilmemiş. Çevrilmesine yardım edin
-
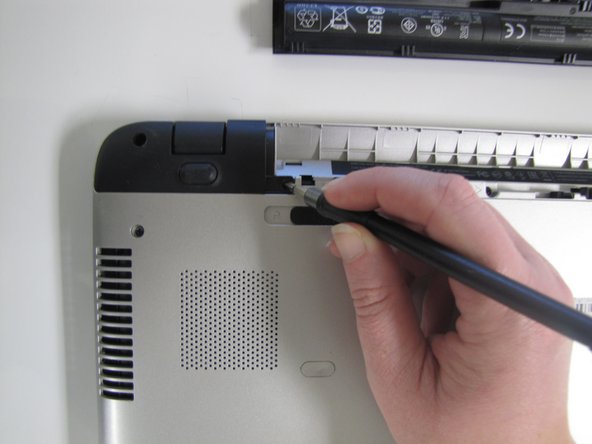
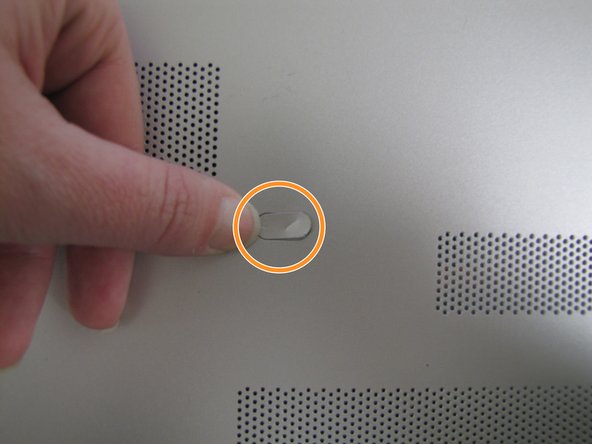
In the upper left hand corner, slide the bar with the lock icon to the right. This will unlock the battery.
-
-
Bu adım çevrilmemiş. Çevrilmesine yardım edin
-
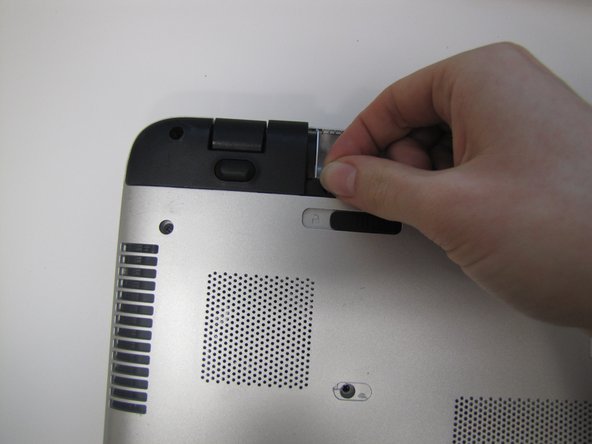
Slide the bar with the battery icon, on the right of your laptop, to the left to release the battery.
-
-
-
Bu adım çevrilmemiş. Çevrilmesine yardım edin
-
Remove the twenty 6.5mm screws using the Phillips #00 screwdriver.
-
Two of these 6.5mm screws are covered by a silver sticker. Remove the sticker by gently scraping your finger nail under the sticker and then remove the screws.
-
-
Bu adım çevrilmemiş. Çevrilmesine yardım edin
-
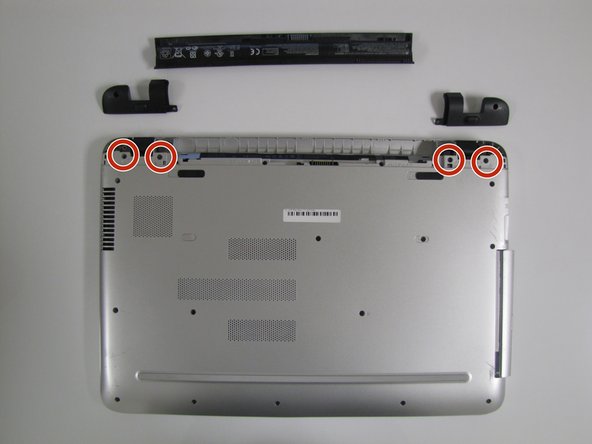
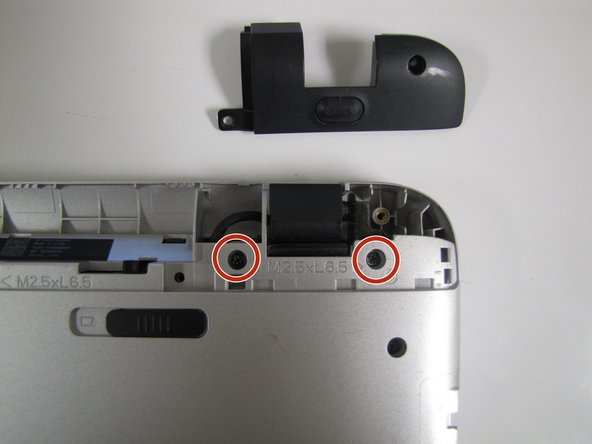
Remove the black corner covers on either side of the battery to reveal four additional 6.5mm Phillips #00 screws.
-
-
Bu adım çevrilmemiş. Çevrilmesine yardım edin
-
Remove the four 6.5mm Phillips #00 screws that were underneath the black corner covers.
-
-
Bu adım çevrilmemiş. Çevrilmesine yardım edin
-
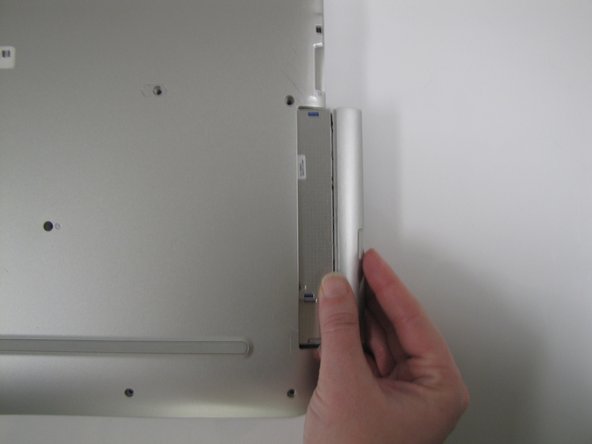
On the right-hand corner of the laptop, remove the CD-ROM by pressing the small button on the side. Pull it out of the laptop, and set it to the side.
-
-
Bu adım çevrilmemiş. Çevrilmesine yardım edin
-
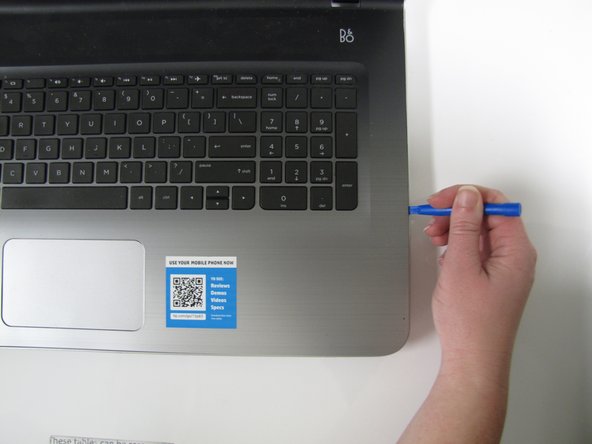
Flip the computer back over with the screen facing up and open the laptop.
-
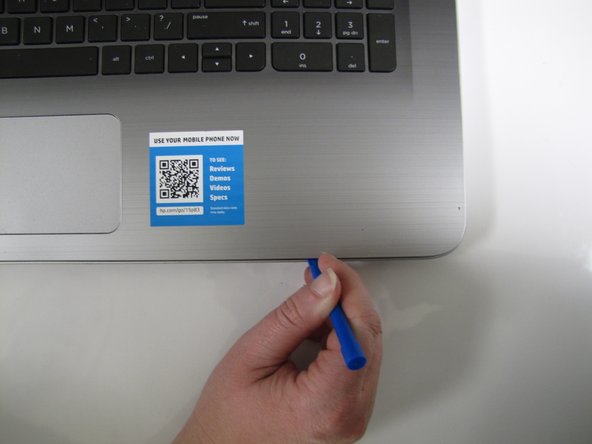
Use the Plastic Opening Tool to separate the face plate from the backing.
-
-
Bu adım çevrilmemiş. Çevrilmesine yardım edin
-
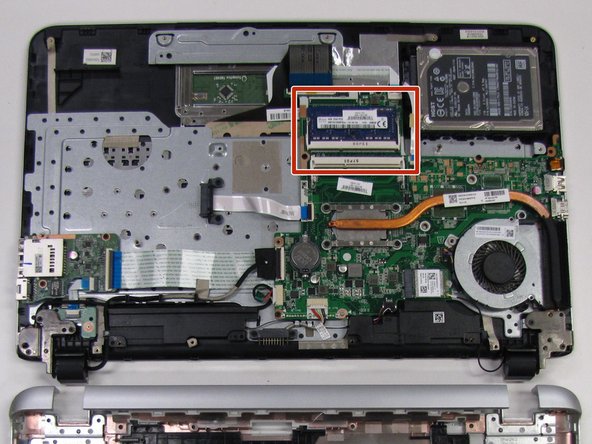
After running the Plastic Opening Tool along the sides, you can gently lift the keyboard up and on top of the screen to access the RAM.
-
The RAM will be located above the Motherboard and next to the Processor.
-
-
Bu adım çevrilmemiş. Çevrilmesine yardım edin
-
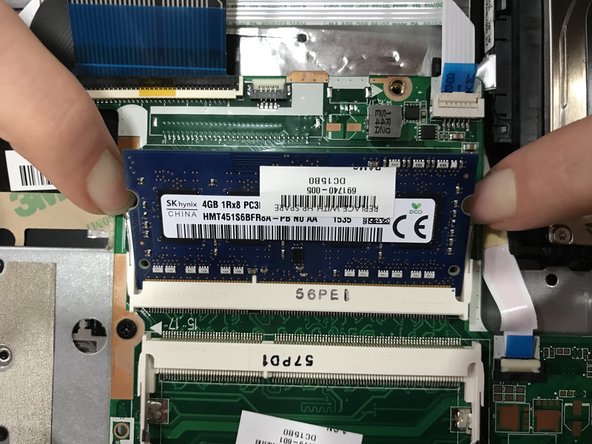
Release the RAM by pulling the two white levers away from the sides of the RAM.
-


İptal et: Bu kılavuzu tamamlamadım.
3 farklı kişi bu kılavuzu tamamladı.
Ekip

University of North Texas, Team S1-G2, Boettger Fall 2017 University of North Texas, Team S1-G2, Boettger Fall 2017 üyesi
UNT-BOETTGER-F17S1G2
2 Üyeler
5 adet Kılavuz yazıldı