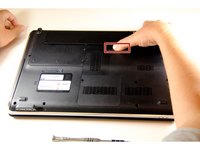
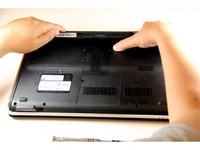
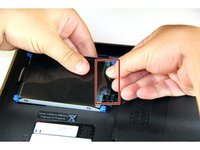
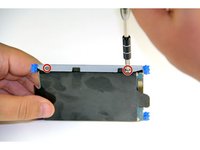
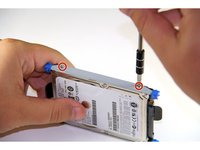
Ana içeriğe geç

HP Pavilion DV5T-1000 Hard Drive Replacement

Neye ihtiyacın var

    • Make sure the laptop is turned off, and the power cable is removed.

    • Leaving the laptop turned on can cause damage to the hardware and any stored data.

  1. HP Pavilion DV5T-1000 Hard Drive Replacement: adım 2, 1 resimden 1.
    • Turn the laptop over to access the backside of the computer.

    • Identify and confirm that the laptop is an HP Pavilion DV5T-1000.

  2. HP Pavilion DV5T-1000 Hard Drive Replacement: adım 3, 2 resimden 1. HP Pavilion DV5T-1000 Hard Drive Replacement: adım 3, 2 resimden 2.
    • Slide the battery lock to the left, it's located just below the battery compartment.

    • Pull the battery up and out, to remove it from the battery compartment.

    • To prevent hardware damage, remove the battery before working on the laptop.

  3. HP Pavilion DV5T-1000 Hard Drive Replacement: adım 4, 1 resimden 1.
    • Identify the hard drive compartment, located at the top left-hand frame of the laptop.

  4. HP Pavilion DV5T-1000 Hard Drive Replacement: adım 5, 1 resimden 1.
    • In order to remove the hard drive compartment cover, first remove the two screws located on the panel, using a size 0 Phillips head screwdriver.

  5. HP Pavilion DV5T-1000 Hard Drive Replacement: adım 6, 1 resimden 1.
    • Expose the hard drive by lifting the drive cover.

  6. HP Pavilion DV5T-1000 Hard Drive Replacement: adım 7, 1 resimden 1.
    • In order to loosen the hard drive from the motherboard, tug gently on the black tabs located at both ends of the hard drive.

    • Be cautious when handling the cable that connects the hard drive to the computer's motherboard.

  7. HP Pavilion DV5T-1000 Hard Drive Replacement: adım 8, 2 resimden 1. HP Pavilion DV5T-1000 Hard Drive Replacement: adım 8, 2 resimden 2.
    • Firmly hold both the black plug, and the hard drive itself to separate the drive from the cable.

  8. HP Pavilion DV5T-1000 Hard Drive Replacement: adım 9, 2 resimden 1. HP Pavilion DV5T-1000 Hard Drive Replacement: adım 9, 2 resimden 2.
    • Remove the 4 screws using a size 0 Phillips head screwdriver.

    • Remove the metal from the perimeter of the hard drive.

Sonuç

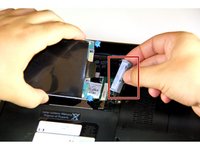
To reassemble your device, follow these instructions in reverse order.

4 farklı kişi bu kılavuzu tamamladı.

Josh Taimanglo

Üyelik tarihi: 09/21/15

147 İtibar

1 Kılavuz yazıldı

Ekip

Bir Yorum

Help after replacing hard drive installation of windows

Bettyjean Serrano - Yanıt

Yorum Ekle

İstatistikleri Görüntüle:

Son 24 Saat: 4

Son 7 gün: 8

Son 30 gün: 14

Her zaman: 1,832