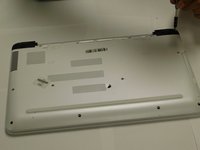
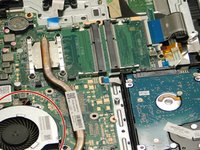
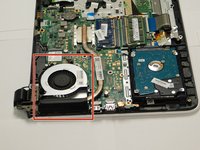
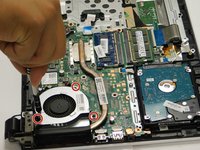
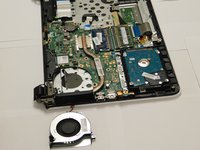
Ana içeriğe geç

HP Pavilion Notebook 15-ab293cl CPU Fan Replacement

Neye ihtiyacın var

  1. HP Pavilion Notebook 15-ab293cl CPU Fan Replacement, CPU Fan: adım 1, 2 resimden 1. HP Pavilion Notebook 15-ab293cl CPU Fan Replacement, CPU Fan: adım 1, 2 resimden 2.
    • Start by flipping the laptop, revealing its back.

  2. HP Pavilion Notebook 15-ab293cl CPU Fan Replacement: adım 2, 3 resimden 1. HP Pavilion Notebook 15-ab293cl CPU Fan Replacement: adım 2, 3 resimden 2. HP Pavilion Notebook 15-ab293cl CPU Fan Replacement: adım 2, 3 resimden 3.
    • Slide the tab marked with a lock/unlock symbol. The slide the other tab in order to release the battery.

  3. HP Pavilion Notebook 15-ab293cl CPU Fan Replacement: adım 3, 2 resimden 1. HP Pavilion Notebook 15-ab293cl CPU Fan Replacement: adım 3, 2 resimden 2.
    • Once the battery is removed, unscrew and remove the both of the 7.5 mm screws off the black tabs using a PH1 screw driver. Then pry off the covers using the plastic opening tools.

  4. HP Pavilion Notebook 15-ab293cl CPU Fan Replacement: adım 4, 3 resimden 1. HP Pavilion Notebook 15-ab293cl CPU Fan Replacement: adım 4, 3 resimden 2. HP Pavilion Notebook 15-ab293cl CPU Fan Replacement: adım 4, 3 resimden 3.
    • Remove all 16 size 3.5 mm screws with a PH1 screwdriver and pry the CD drive in order reveal one last screw that must be removed.

  5. HP Pavilion Notebook 15-ab293cl CPU Fan Replacement: adım 5, 1 resimden 1.
    • Utilizing either a plastic or metal opening tool, begin prying the case from the laptop. Lastly, remove the remaining clips located on the back of the laptop.

  6. HP Pavilion Notebook 15-ab293cl CPU Fan Replacement: adım 6, 2 resimden 1. HP Pavilion Notebook 15-ab293cl CPU Fan Replacement: adım 6, 2 resimden 2.
    • Once the laptop is fully open locate the cooling fan.

  7. HP Pavilion Notebook 15-ab293cl CPU Fan Replacement: adım 7, 3 resimden 1. HP Pavilion Notebook 15-ab293cl CPU Fan Replacement: adım 7, 3 resimden 2. HP Pavilion Notebook 15-ab293cl CPU Fan Replacement: adım 7, 3 resimden 3.
    • Utilizing a PH00 Screwdriver remove the two 3.5 mm screws detaining the cooling fan. Then use tweezers to remove the plug connecting the cooling fan to the mother board. Lastly remove the cooling fan.

Sonuç

To reassemble your device, follow these instructions in reverse order.

4 farklı kişi bu kılavuzu tamamladı.

John Carlo Barajas

Üyelik tarihi: 09/10/18

208 İtibar

1 Kılavuz yazıldı

Ekip

Gateway, Team S1-G2, Luster Fall 2018 Gateway, Team S1-G2, Luster Fall 2018 üyesi

GCC-LUSTER-F18S1G2

4 Üyeler

4 adet Kılavuz yazıldı

Bir Yorum

very detailed. Thanks!

mrobinson29 - Yanıt

Yorum Ekle

İstatistikleri Görüntüle:

Son 24 Saat: 0

Son 7 gün: 2

Son 30 gün: 6

Her zaman: 1,186