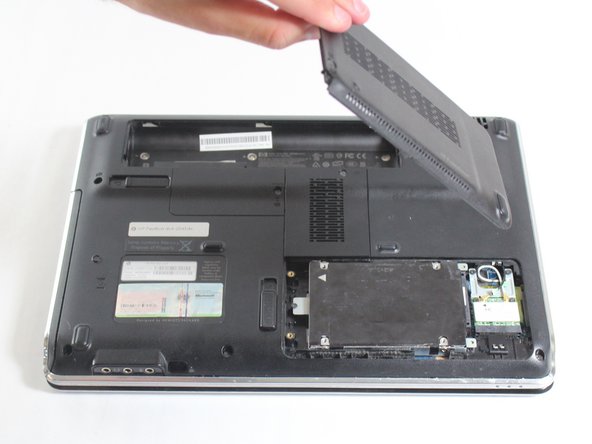
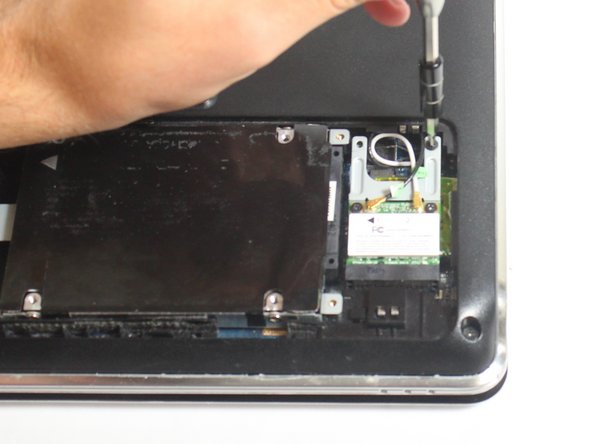
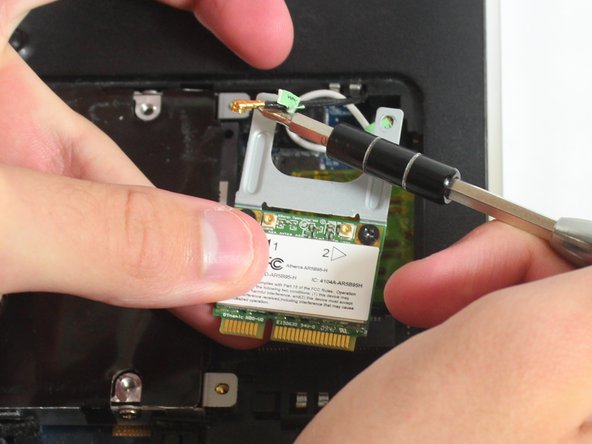
Ana içeriğe geç

HP Pavilion dv4-2045dx Wi-fi Adapter/card Replacement

Neye ihtiyacın var

  1. HP Pavilion dv4-2045dx Wi-fi Adapter/card Replacement, Battery: adım 1, 1 resimden 1.
    • Turn off your laptop and disconnect the power adapter before doing anything else with your computer.

  2. HP Pavilion dv4-2045dx Wi-fi Adapter/card Replacement: adım 2, 1 resimden 1.
    • Turn your laptop over so the bottom of your laptop is facing up and the hinge is located away from you

  3. HP Pavilion dv4-2045dx Wi-fi Adapter/card Replacement: adım 3, 2 resimden 1. HP Pavilion dv4-2045dx Wi-fi Adapter/card Replacement: adım 3, 2 resimden 2.
    • Slide the lock switch to the left.

    • The lock switch is located by the bottom left side of the battery.

    • The battery should pop up after you move the switch.

  4. HP Pavilion dv4-2045dx Wi-fi Adapter/card Replacement: adım 4, 3 resimden 1. HP Pavilion dv4-2045dx Wi-fi Adapter/card Replacement: adım 4, 3 resimden 2. HP Pavilion dv4-2045dx Wi-fi Adapter/card Replacement: adım 4, 3 resimden 3.
    • Lift up the released battery by rotating it up and away from you.

    • Pull the battery out.

    • The battery is held in by a latch in the front of the battery socket and by tabs in the back. When putting the battery back in, line the tabs back up with the grooves located in the back of the socket and rotate the battery towards you. When in place, push the battery in until you hear a click.

  5. HP Pavilion dv4-2045dx Wi-fi Adapter/card Replacement, Wi-fi Adapter/card: adım 5, 3 resimden 1. HP Pavilion dv4-2045dx Wi-fi Adapter/card Replacement, Wi-fi Adapter/card: adım 5, 3 resimden 2. HP Pavilion dv4-2045dx Wi-fi Adapter/card Replacement, Wi-fi Adapter/card: adım 5, 3 resimden 3.
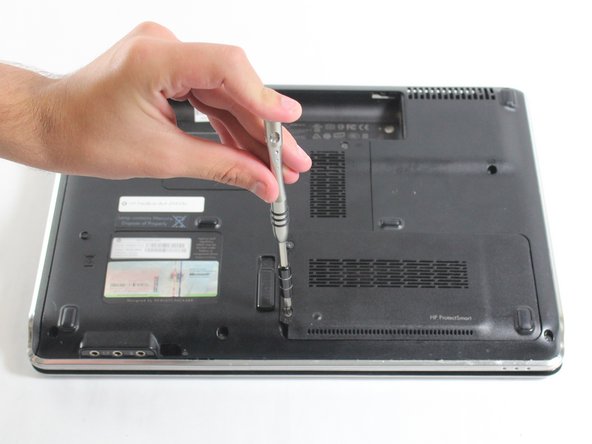
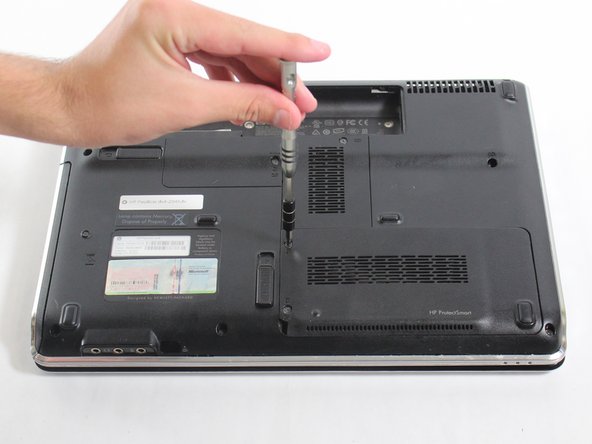
    • Locate the two 7.5 mm screws on the hard drive case plate.

    • Use the Phillips #0 screw driver to remove both 7.5 mm screws.

    • Be sure to place the screws somewhere they will not roll away so that you do not lose them.

  6. HP Pavilion dv4-2045dx Wi-fi Adapter/card Replacement: adım 6, 2 resimden 1. HP Pavilion dv4-2045dx Wi-fi Adapter/card Replacement: adım 6, 2 resimden 2.
    • Remove the hard drive case plate.

    • You may want to use an opening pick under the leftmost edge to pry open the case plate if you have trouble opening the hard drive socket.

  7. HP Pavilion dv4-2045dx Wi-fi Adapter/card Replacement: adım 7, 3 resimden 1. HP Pavilion dv4-2045dx Wi-fi Adapter/card Replacement: adım 7, 3 resimden 2. HP Pavilion dv4-2045dx Wi-fi Adapter/card Replacement: adım 7, 3 resimden 3.
    • Unscrew and remove the two 2.5 mm black screws with a Phillips #0 screwdriver.

    • Put the screws somewhere they will not roll away so you do not lose them.

    • Notice that these 2.5 mm screws are black, while the other 2.5 mm screws in the laptop are gold.

    • There are two other screws on the wifi adapter/card; do not remove these. Only remove the two screws indicated in the picture.

  8. HP Pavilion dv4-2045dx Wi-fi Adapter/card Replacement: adım 8, 1 resimden 1.
    • Lift the wifi adapter/card out of the hard drive socket with your hands.

    • The card will remain attached to the hard drive by two wires.

  9. HP Pavilion dv4-2045dx Wi-fi Adapter/card Replacement: adım 9, 3 resimden 1. HP Pavilion dv4-2045dx Wi-fi Adapter/card Replacement: adım 9, 3 resimden 2. HP Pavilion dv4-2045dx Wi-fi Adapter/card Replacement: adım 9, 3 resimden 3.
    • Locate the two antenna cable connectors. One is white and the other is black.

    • Pop off the two antenna cable connectors using your fingers or a plastic spudger.

    • Avoid using metal tools on delicate components, as they may cause further damage to the device.

  10. HP Pavilion dv4-2045dx Wi-fi Adapter/card Replacement: adım 10, 2 resimden 1. HP Pavilion dv4-2045dx Wi-fi Adapter/card Replacement: adım 10, 2 resimden 2.
    • Remove the wifi adapter/card from the socket.

    • When replacing the wifi adapter/card, make sure to reattach the white and black wires in the correct places. A sticker on the card has a black triangle and a white triangle, indicating where the wires reattach.

Sonuç

To reassemble your device, follow these instructions in reverse order.

2 farklı kişi bu kılavuzu tamamladı.

Sarah Tucker

Üyelik tarihi: 09/23/15

263 İtibar

1 Kılavuz yazıldı

Ekip

Baylor, Team 6-8, Williams Fall 2015 Baylor, Team 6-8, Williams Fall 2015 üyesi

BU-WILLIAMS-F15S6G8

3 Üyeler

5 adet Kılavuz yazıldı

Bir Yorum

Saving $$$ doing it myself, thanks this tutorial made it easy.... Thanks....

Darrell Dimmick - Yanıt

Yorum Ekle

İstatistikleri Görüntüle:

Son 24 Saat: 0

Son 7 gün: 4

Son 30 gün: 7

Her zaman: 1,555