Giriş
Recently my HP Touchsmart PC began making noises that indicated to me that a CPU cooling fan was starting to go. After a thorough check I had confirmed it was the fan so I ordered a replacement and set about breaking out the tools to repair it.
Neye ihtiyacın var
-
-
First step is to take the back panel off the All in One PC. My PC was mounted on the wall rather than using the stand.
-
After taking the PC off the wall mount and laying it flat on the table I had to remove the center screw that would allow the back panel to slide off.
-
Remove the screw and then slide the panel downwards to remove it.
-
-
-
With the back panel off it is time to begin working to remove the back bezel.
-
Start by removing the screws at the bottom of the unit. These hold in the feet of the PC. Undo the screw and then pull down to remove the foot.
-
Do this for both sides of the PC
-
-
-
Then you need to carefully pry up on the outer bezel edge to remove the trim strips. These strips hide the screws.
-
I used a plastic spudger and worked from the bottom of the unit to the top along the edge. After some resistance each section would pop up.
-
-
-
-
There are a series of screws that go around the perimeter of the unit which are visible once the trim has been removed.
-
Remove these screws all around the outside.
-
-
-
There screws on the side of the DVD drive and screws at the bottom of the PC where the power cord plugs in.
-
-
-
There are two side panels that need to be removed. The one on the top left side (HMDI) is simply a snap on panel. You have to carefully pry it away from the side.
-
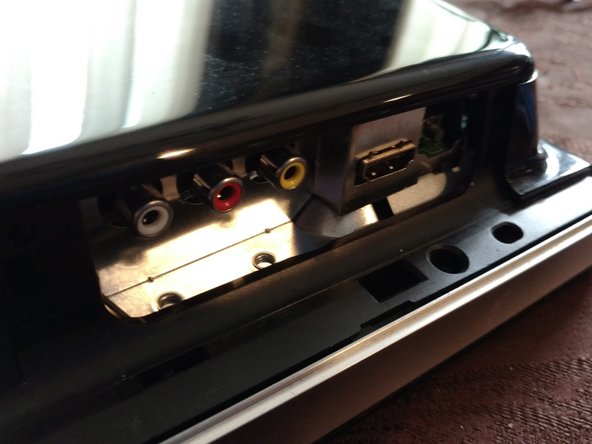
The other side is the network, usb and TV input panel. You don't need to remove this one at first but it eventually makes it easier if its off. Just carefully pry it away once the screws have been removed.
-
-
-
Once all the screws have been removed you should be able to lift the back panel up from the bottom of the unit remove it.
-
Hinge it from the top to make sure you remove it without damaging the built in camera at the top of the screen.
-
-
-
Remove the screws around the perimeter of the shield and remove it.
-
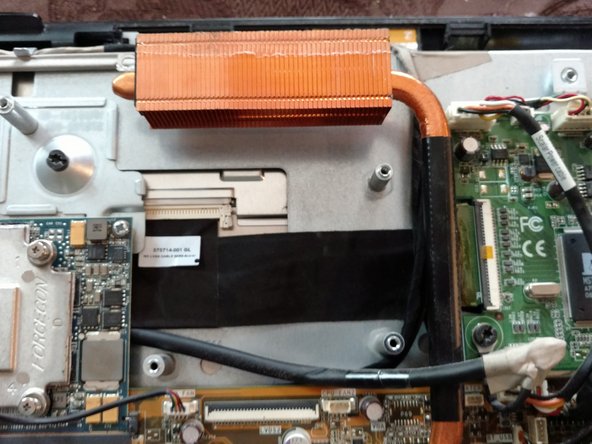
This exposes the motherboard and the fans.
-
-
-
The two fans on the Motherboard are identical, one is face up and the other face down.
-
Remove the four screws holding the fan down and unplug the unit from the motherboard.
-
You will need to peel the tap off the copper heat sink at the top and you may need to lift up on the heat sink to get the fan body to clear.
-
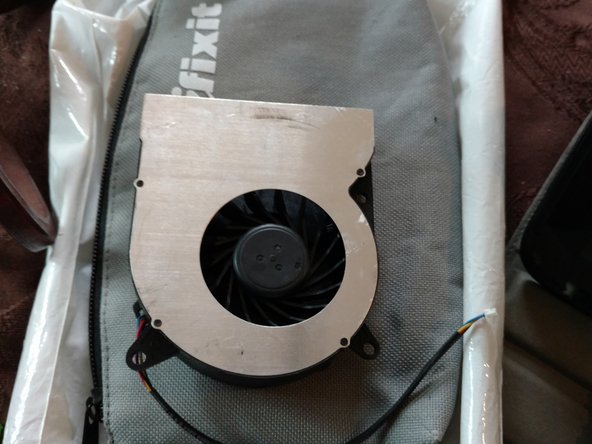
Lift up and then remove the fan.
-


To reassemble your device, follow these instructions in reverse order.
To reassemble your device, follow these instructions in reverse order.
İptal et: Bu kılavuzu tamamlamadım.
15 farklı kişi bu kılavuzu tamamladı.

12 Yorum
Question: I have same one and want to clone HDD under windows. Are there any way to attach additional HDD as temporary, I mean are there additional socket like desktop to connect sata cable to the motherboard?
I do not recall exactly if there are additional SATA ports on the motherboard. I just looked back at my pictures and am unable to see the ports underneath the shielding, so I can't confirm it. But it seems to me that there should be at least two SATA ports on that MB.
I believe i seen a second one. However, the SATA cord ran to the optical drive which was the CD/DVD port.
Hi, Good Article!
Just got the “fan dead, powering down” message on screen, so I’m just starting the process.
2 questions: 1-without power, how do I know which of the 2 fans is dead, or do I just replace them both? 2-Where did you get your replacement fans?
Thanx Much
Bob Chaphe
bobchaphe@gmail.com
Hi Bob I purchased my fans on ebay and I ended up replacing both. I would imagine that once the computer has cooled down you should be able to power it back up for a quick few seconds to get to the BIOS and or (with the back cover off) see which fan is dead. Probably just best to replace both based upon the age of the computer at this point.
Greg