Ana içeriğe geç
Onarım Topluluğuna Katılın - Hesap Oluşturun

HP dv5-1125nr Display Replacement

Neye ihtiyacın var

    1. HP dv5-1125nr Display Replacement, Battery: adım 1, 1 resimden 1.
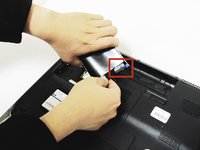
      • Ensure your computer is shut down. Removing the battery while the laptop is still on may corrupt your files. Remove any power adapters and cords connected to the laptop body.

      • Slide the switch to the left until the release clicks.

      FixBot'a Sor
      Yorum Ekle

    2. HP dv5-1125nr Display Replacement: adım 2, 1 resimden 1.
      • Remove the battery.

      • The release switch may need to be held down while removing the battery.

      FixBot'a Sor
      Yorum Ekle

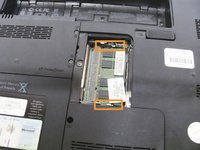
    1. HP dv5-1125nr Display Replacement, Hard Drive: adım 3, 2 resimden 1. HP dv5-1125nr Display Replacement, Hard Drive: adım 3, 2 resimden 2.
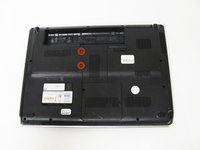
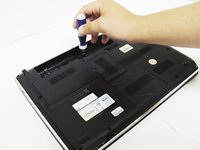
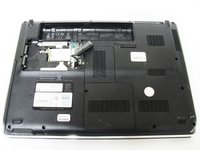
      • Remove the two 5mm Phillips screws on the hard drive cover using a Phillips #00 screwdriver.

      FixBot'a Sor
      Yorum Ekle

    2. HP dv5-1125nr Display Replacement: adım 4, 1 resimden 1.
      • Remove the plastic hard drive cover.

      FixBot'a Sor

      Yorum Ekle

    3. HP dv5-1125nr Display Replacement: adım 5, 2 resimden 1. HP dv5-1125nr Display Replacement: adım 5, 2 resimden 2.
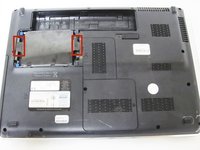
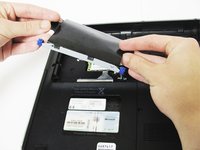
      • Pull up on the two plastic flaps on the hard drive enclosure to remove it.

      FixBot'a Sor

      Yorum Ekle

    4. HP dv5-1125nr Display Replacement: adım 6, 2 resimden 1. HP dv5-1125nr Display Replacement: adım 6, 2 resimden 2.
      • Gently lift the ribbon cable away from the hard drive enclosure to free the drive.

      FixBot'a Sor

      Yorum Ekle

    5. HP dv5-1125nr Display Replacement: adım 7, 2 resimden 1. HP dv5-1125nr Display Replacement: adım 7, 2 resimden 2.
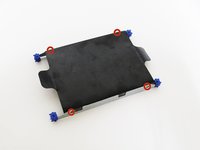
      • Locate four 2mm Phillips screws on the side of the enclosure and remove them using a Phillips #00 screwdriver.

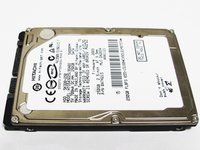
      • Slide the hard drive out of the enclosure to complete the removal process.

      FixBot'a Sor

      Yorum Ekle

    1. HP dv5-1125nr Display Replacement, RAM: adım 8, 1 resimden 1.
      • Remove the one 4mm Phillips screw from the RAM cover using a Phillips #00 screwdriver.

      FixBot'a Sor

      Yorum Ekle

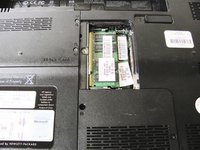
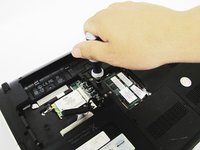
    2. HP dv5-1125nr Display Replacement: adım 9, 2 resimden 1. HP dv5-1125nr Display Replacement: adım 9, 2 resimden 2.
      • Remove the RAM cover to reveal the module's underneath.

      FixBot'a Sor
      Yorum Ekle

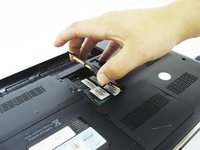
    3. HP dv5-1125nr Display Replacement: adım 10, 3 resimden 1. HP dv5-1125nr Display Replacement: adım 10, 3 resimden 2. HP dv5-1125nr Display Replacement: adım 10, 3 resimden 3.
      • Make sure to ground yourself before touching the RAM modules; they are very sensitive to static electricity.

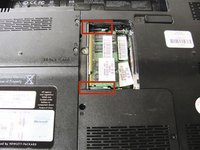
      • Push the two metal tabs on the side of the RAM module outwards, towards the battery and CMOS compartments (up and down).

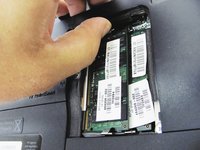
      • Once the module is released, gently pull the module upwards.

      • Repeat for the RAM module underneath the first one.

      FixBot'a Sor
      Yorum Ekle

    1. HP dv5-1125nr Display Replacement, Keyboard: adım 11, 1 resimden 1.
      • Begin by unscrewing the three 3mm Phillips head screws inside the battery bay with the Phillips #00 screwdriver.

      FixBot'a Sor

      Yorum Ekle

    2. HP dv5-1125nr Display Replacement: adım 12, 1 resimden 1.
      • Remove the five remaining 2mm screws using a Phillips #00 screwdriver.

      FixBot'a Sor

      Yorum Ekle

    3. HP dv5-1125nr Display Replacement: adım 13, 1 resimden 1.

      • Unscrew the 4mm Phillips screw inside the hard drive bay.

      • Make sure to keep track of which screw goes where. The sizes are different for each set of screws!

      FixBot'a Sor

      Yorum Ekle

    4. HP dv5-1125nr Display Replacement: adım 14, 2 resimden 1. HP dv5-1125nr Display Replacement: adım 14, 2 resimden 2.
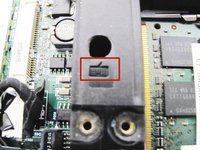
      • Locate the hole in between the hard drive and RAM compartments.

      • The hole is marked by a small keyboard symbol in the plastic (see the second picture).

      • Unscrew the 4mm Phillips head screw from this hole.

      FixBot'a Sor

      Yorum Ekle

    5. HP dv5-1125nr Display Replacement: adım 15, 2 resimden 1. HP dv5-1125nr Display Replacement: adım 15, 2 resimden 2.
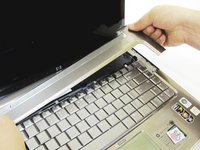
      • Flip the laptop, and use the plastic opening tool on the side seam to remove the top cover.

      • You may need to use the opening tool on both sides of the cover.

      • Be careful not to break the ribbon cables under the cover.

      FixBot'a Sor

      Yorum Ekle

    6. HP dv5-1125nr Display Replacement: adım 16, 1 resimden 1.
      Bu adımda kullanılan alet:
      Flathead 3/32" or 2.5 mm Screwdriver
      $5.49
      • Use a 2.5mm flathead screwdriver to remove the four 3mm screws on top of the keyboard.

      FixBot'a Sor

      Yorum Ekle

    7. HP dv5-1125nr Display Replacement: adım 17, 1 resimden 1.
      • Dislodge the keyboard to access the underside.

      • Do not fully remove the keyboard. It is still attached by a ribbon cable, and forceful removal could break this necessary connection.

      FixBot'a Sor

      Yorum Ekle

    8. HP dv5-1125nr Display Replacement: adım 18, 2 resimden 1. HP dv5-1125nr Display Replacement: adım 18, 2 resimden 2.
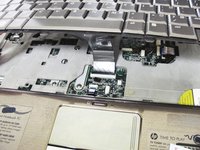
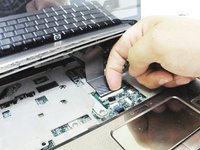
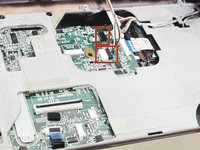
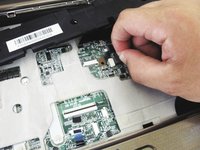
      • Locate the ribbon cable connection between the keyboard and motherboard.

      • Pull upwards on the small black bar to release the ribbon cable and remove it.

      • Do not yank on the ribbon or try to pull it out. This may break the cable or motherboard.

      FixBot'a Sor

      Yorum Ekle

    9. HP dv5-1125nr Display Replacement: adım 19, 1 resimden 1.
      • The keyboard is now ready for replacement.

      FixBot'a Sor

      Yorum Ekle

    1. HP dv5-1125nr Display Replacement, Display: adım 20, 3 resimden 1. HP dv5-1125nr Display Replacement, Display: adım 20, 3 resimden 2. HP dv5-1125nr Display Replacement, Display: adım 20, 3 resimden 3.
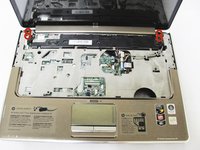
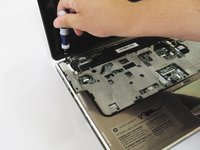
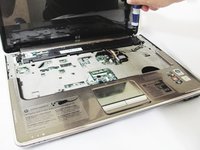
      • Locate four 3mm screws in the upper corners of the keyboard tray and remove them using a #00 Phillips screwdriver.

      FixBot'a Sor

      Yorum Ekle

    2. HP dv5-1125nr Display Replacement: adım 21, 2 resimden 1. HP dv5-1125nr Display Replacement: adım 21, 2 resimden 2.
      • Locate the two ribbon cable connectors that attach the speaker assembly to the motherboard.

      • Using your fingers, carefully detach the ribbon cables from the motherboard by pulling them straight out on the connector.

      FixBot'a Sor

      Yorum Ekle

    3. HP dv5-1125nr Display Replacement: adım 22, 1 resimden 1.
      • Remove the speaker assembly from the keyboard tray.

      FixBot'a Sor

      Yorum Ekle

    4. HP dv5-1125nr Display Replacement: adım 23, 1 resimden 1.
      • Locate the large display ribbon connector near the upper left corner of the keyboard tray and remove the ribbon by pulling straight out on the connector.

      FixBot'a Sor

      Yorum Ekle

    5. HP dv5-1125nr Display Replacement: adım 24, 1 resimden 1.
      • The display should now be loose, but make sure to remove all ribbon connectors before attempting to take off the display.

      • Locate the two final ribbon connectors for the display on the motherboard and remove them similarly by pulling straight outward on the connectors.

      • You are now free to remove the display from the computer.

      FixBot'a Sor

      Yorum Ekle

Sonuç

To reassemble your device, follow these instructions in reverse order.

İptal et: Bu kılavuzu tamamlamadım.

12 farklı kişi bu kılavuzu tamamladı.

Nick Loey

Üyelik tarihi: 04/01/14

1.715 İtibar

8 adet Kılavuz yazıldı

Ekip

Cal Poly, Team 9-15, Regan Spring 2014 Cal Poly, Team 9-15, Regan Spring 2014 üyesi

CPSU-REGAN-S14S9G15

4 Üyeler

100 adet Kılavuz yazıldı

1Rehber Yorum

Where can i buy the display?

Fabio Benedetti - Yanıt Paylaş

Yorum Ekle

İstatistikleri Görüntüle:

Son 24 Saat: 0

Son 7 gün: 11

Son 30 gün: 42

Her zaman: 4,538