Ana içeriğe geç

HTC Amaze Front Facing Camera Replacement

Neye ihtiyacın var

  1. HTC Amaze Front Facing Camera Replacement, Battery: adım 1, 2 resimden 1. HTC Amaze Front Facing Camera Replacement, Battery: adım 1, 2 resimden 2.
    • Gently press the Release Button located at the bottom of the phone in order to remove the back panel of the device.

  2. HTC Amaze Front Facing Camera Replacement: adım 2, 1 resimden 1.
    • Once you locate the battery, look for a notch below it.

    • Gently insert your fingernails into the notch.

    • Lift the battery out of its recess.

  3. HTC Amaze Front Facing Camera Replacement, HTC Amaze Back Panel Disassembly: adım 3, 3 resimden 1. HTC Amaze Front Facing Camera Replacement, HTC Amaze Back Panel Disassembly: adım 3, 3 resimden 2. HTC Amaze Front Facing Camera Replacement, HTC Amaze Back Panel Disassembly: adım 3, 3 resimden 3.
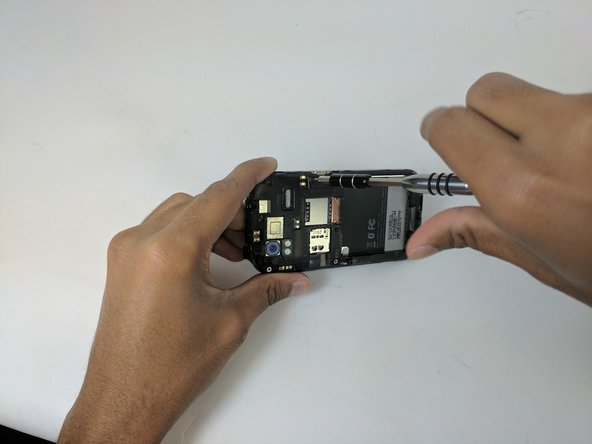
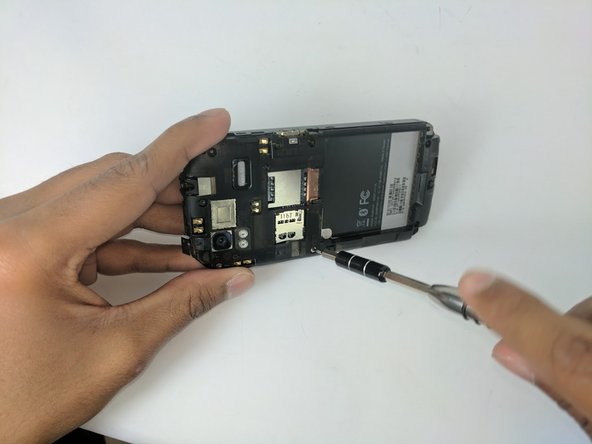
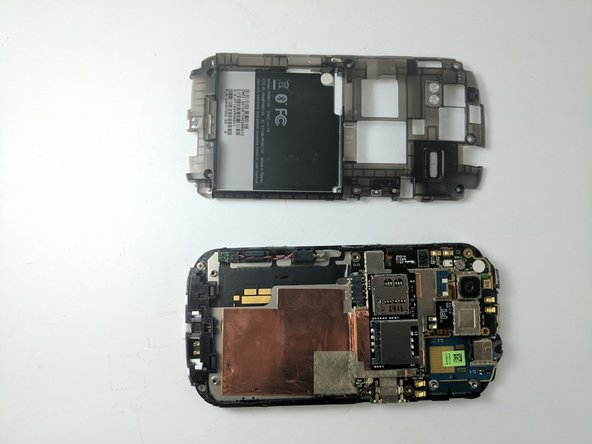
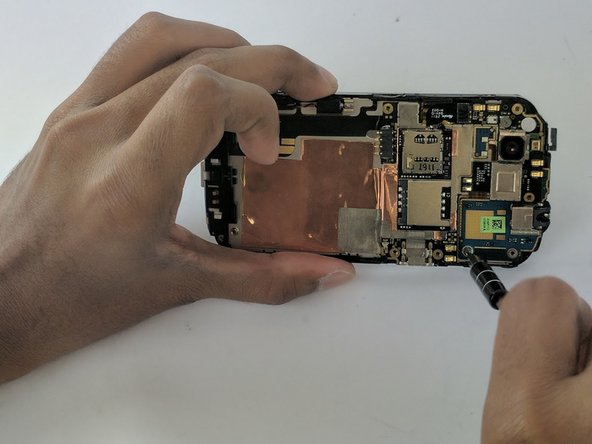
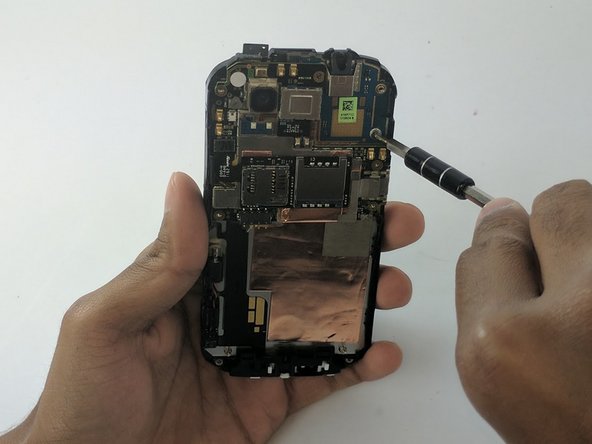
    • Use the Torx T5 screwdriver to remove the 7 Torx Screws (3mm) attached to the back housing of the device.

    • One of the Screws may have a tape attached to it that says void. Removing this screw will void the devices warranty.

  4. HTC Amaze Front Facing Camera Replacement: adım 4, 3 resimden 1. HTC Amaze Front Facing Camera Replacement: adım 4, 3 resimden 2. HTC Amaze Front Facing Camera Replacement: adım 4, 3 resimden 3.
    • Proceed to remove the back housing by using the spudger to gently unclip each clip holding the back housing in place and then lift the outer edges of the back housing

    • If you're having trouble opening the back try using the spudger to gently pry all around the panel before you attempt to remove it.

  5. HTC Amaze Front Facing Camera Replacement: adım 5, 2 resimden 1. HTC Amaze Front Facing Camera Replacement: adım 5, 2 resimden 2.
    • Now simply remove the back panel by gently pulling. This will make it easier to access the devices internal components.

  6. HTC Amaze Front Facing Camera Replacement, Motherboard: adım 6, 3 resimden 1. HTC Amaze Front Facing Camera Replacement, Motherboard: adım 6, 3 resimden 2. HTC Amaze Front Facing Camera Replacement, Motherboard: adım 6, 3 resimden 3.
    • Locate and remove the Phillips J000 screw.

  7. HTC Amaze Front Facing Camera Replacement: adım 7, 2 resimden 1. HTC Amaze Front Facing Camera Replacement: adım 7, 2 resimden 2.
    • Remove the power supply from the motherboard by gently pulling the end of the black wire with the precision tweezers.

  8. HTC Amaze Front Facing Camera Replacement: adım 8, 3 resimden 1. HTC Amaze Front Facing Camera Replacement: adım 8, 3 resimden 2. HTC Amaze Front Facing Camera Replacement: adım 8, 3 resimden 3.
    • First, gently lift the black strip by pulling. It will take a little force and then it will disconnect.

    • Next remove the yellow mylar tape using the precision tweezers.

  9. HTC Amaze Front Facing Camera Replacement: adım 9, 3 resimden 1. HTC Amaze Front Facing Camera Replacement: adım 9, 3 resimden 2. HTC Amaze Front Facing Camera Replacement: adım 9, 3 resimden 3.
    • Remove the jawbone connector that was under the mylar tape by gently pulling with the precision tweezers.

    • Now gently pull the motherboard away from its housing. You'll now have access to the bottom side of the motherboard.

  10. HTC Amaze Front Facing Camera Replacement: adım 10, 3 resimden 1. HTC Amaze Front Facing Camera Replacement: adım 10, 3 resimden 2. HTC Amaze Front Facing Camera Replacement: adım 10, 3 resimden 3.
    • Locate a second jawbone connector covered by mylar tape at the bottom of the back of the motherboard.

    • Remove the tape by pulling gently with the precision tweezers.

    • Remove the jawbone connector with the precision tweezers.

  11. HTC Amaze Front Facing Camera Replacement: adım 11, 2 resimden 1. HTC Amaze Front Facing Camera Replacement: adım 11, 2 resimden 2.
    • Carefully pull the motherboard out of its recess.

  12. HTC Amaze Front Facing Camera Replacement, Front Facing Camera: adım 12, 2 resimden 1. HTC Amaze Front Facing Camera Replacement, Front Facing Camera: adım 12, 2 resimden 2.
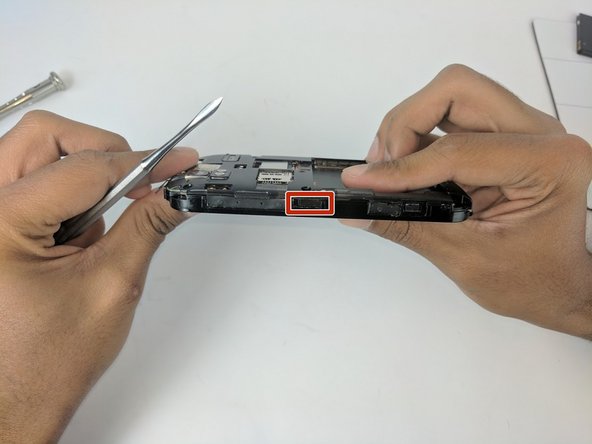
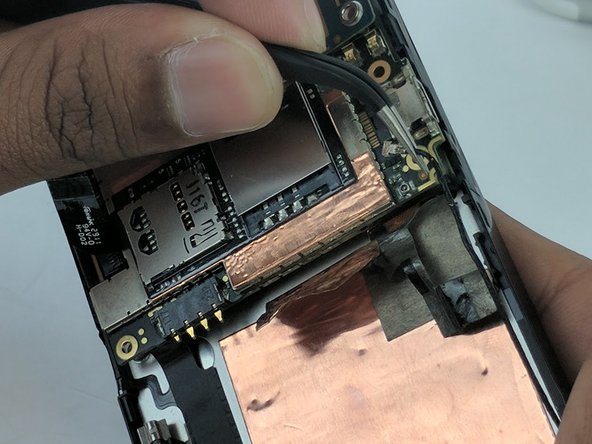
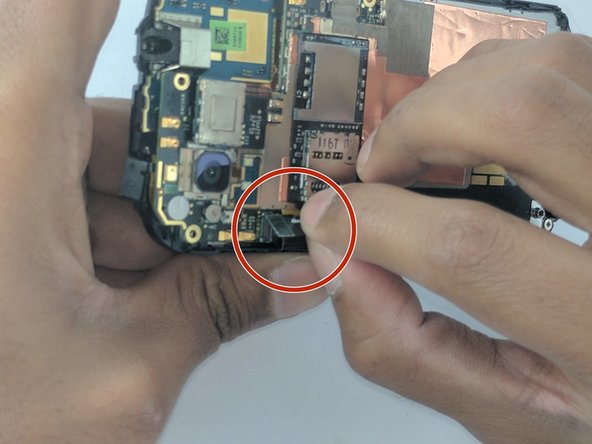
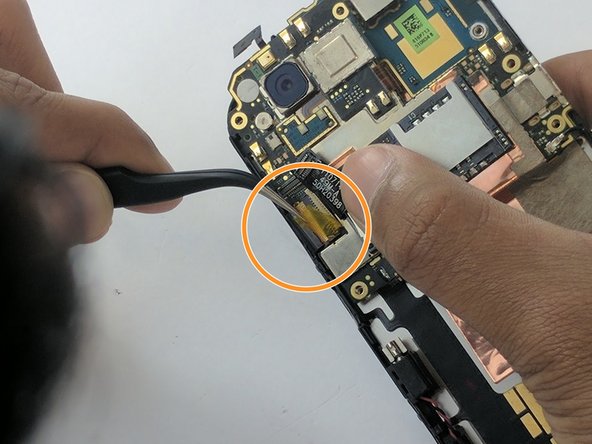
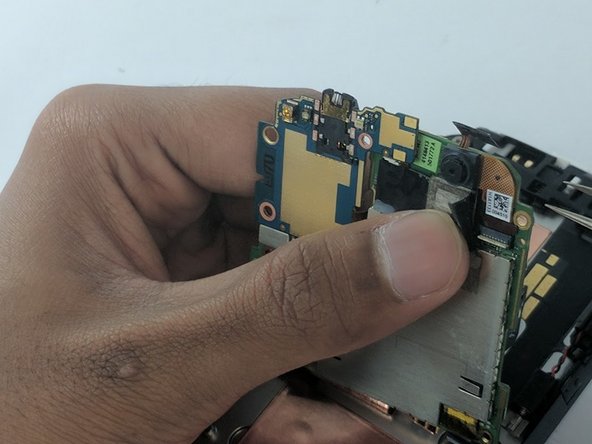
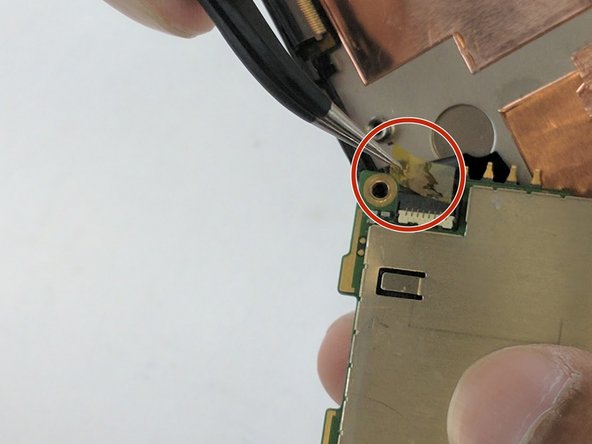
    • Locate the camera at the top right of the interior side of the motherboard, and remove the tape holding its connector in place. Peel back the tape using the precision tweezers

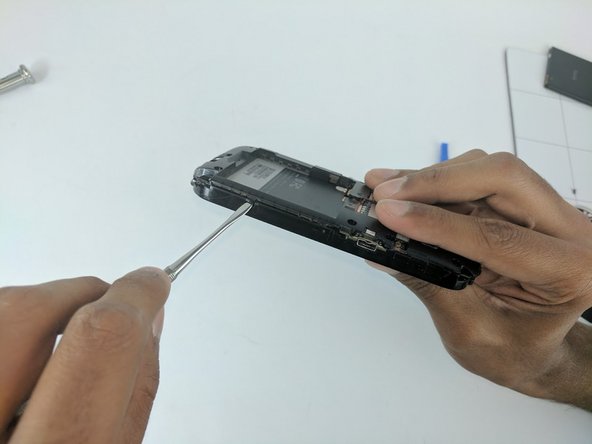
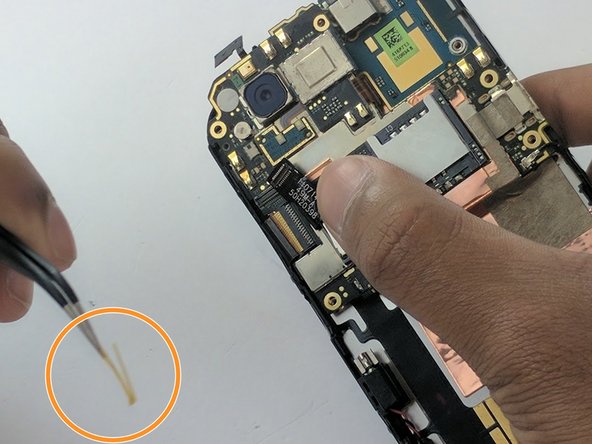
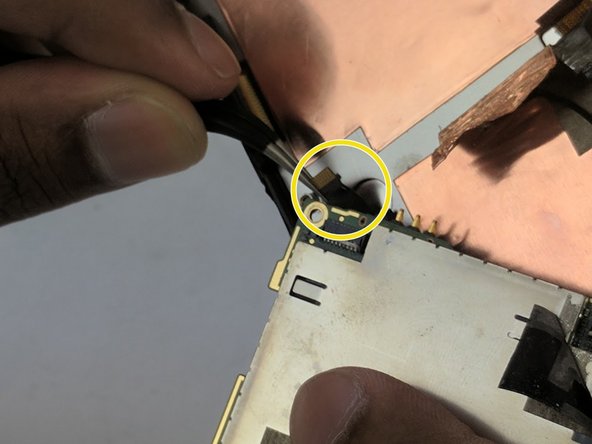
    • While holding the tape away, gently lift the camera up with the precision tweezers.

Sonuç

To reassemble your device, follow these instructions in reverse order.

Jonah DIngle

Üyelik tarihi: 09/22/16

286 İtibar

2 adet Kılavuz yazıldı

Ekip

USF Tampa, Team 16-3, Eyestone Fall 2016 USF Tampa, Team 16-3, Eyestone Fall 2016 üyesi

USFT-EYESTONE-F16S16G3

2 Üyeler

10 adet Kılavuz yazıldı

0 Yorum

Yorum Ekle

İstatistikleri Görüntüle:

Son 24 Saat: 0

Son 7 gün: 0

Son 30 gün: 2

Her zaman: 157