Bu sürüm, hatalı düzenlemeler içerebilir. En son doğrulanmış bellek kopyası dönün.
Neye ihtiyacın var
-
Bu adım çevrilmemiş. Çevrilmesine yardım edin
-
Use the plastic opening tool to scrape and loosen the adhesive from the crease surrounding the screen.
-
-
Bu adım çevrilmemiş. Çevrilmesine yardım edin
-
Wedge the plastic opening tool into the crack around the screen on the top, left and right sides.
-
-
Bu adım çevrilmemiş. Çevrilmesine yardım edin
-
Once the screen has been loosened on the top, left and right edges, lift the screen.
-
-
Bu adım çevrilmemiş. Çevrilmesine yardım edin
-
Gently remove the volume button. Using the plastic opening tool, loosen the back panel of the phone. Begin in the space where the battery was and work around the phone, following the crease of the back panel.
-
-
Bu adım çevrilmemiş. Çevrilmesine yardım edin
-
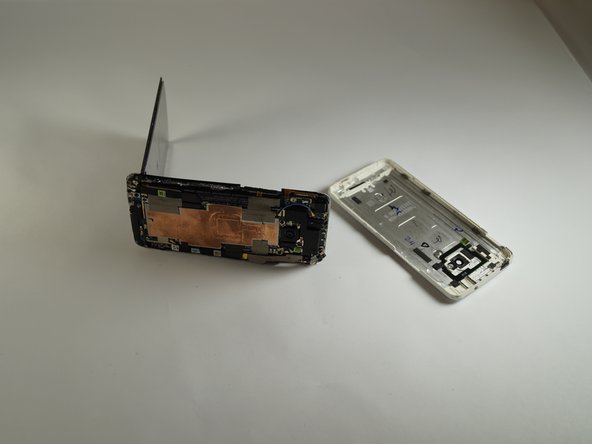
Pry the back open once loose and lift. The back panel will come off with time.
-
-
-
Bu adım çevrilmemiş. Çevrilmesine yardım edin
-
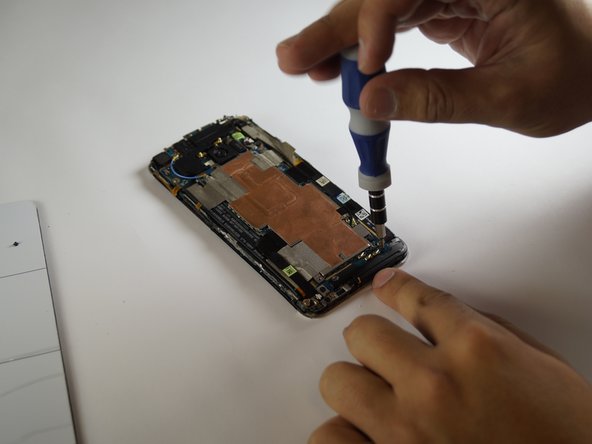
Remove all the #000 screws with a #000 Phillips screw driver
-
-
Bu adım çevrilmemiş. Çevrilmesine yardım edin
-
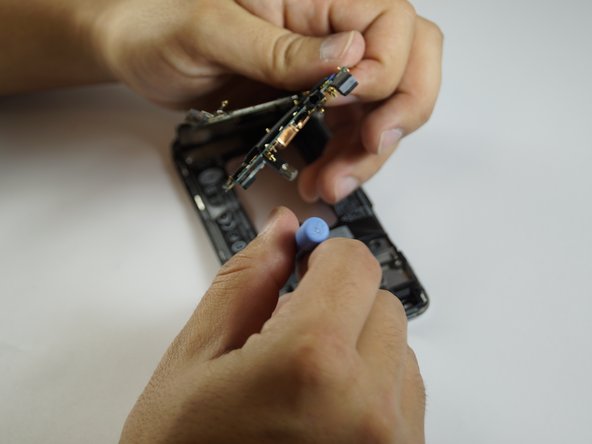
Use the tweezers to get underneath the mother board to lift.
-
-
Bu adım çevrilmemiş. Çevrilmesine yardım edin
-
Remove the Camera by detaching the box from the frame (you will have to rotate the metal piece on the box to remove it).
-
Lift the camera out of the motherboard.
-
-
Bu adım çevrilmemiş. Çevrilmesine yardım edin
-
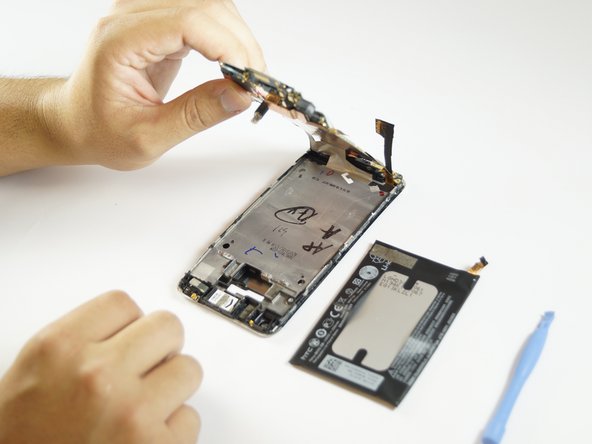
Lift the motherboard completely out of the phone. (may stay attached at the bottom by tape)
-
-
Bu adım çevrilmemiş. Çevrilmesine yardım edin
-
Use the blue opening tool to pry up the battery from the frame.
-
-
Bu adım çevrilmemiş. Çevrilmesine yardım edin
-
Remove the motherboard entirely if not done on step 9.
-
-
Bu adım çevrilmemiş. Çevrilmesine yardım edin
-
Remove the screws in the speaker at the bottom of the frame.
-
Lift the speaker out of the frame.
-


İptal et: Bu kılavuzu tamamlamadım.
16 farklı kişi bu kılavuzu tamamladı.

Ekip

USF Tampa, Team 12-1, Blackwell Fall 2014 USF Tampa, Team 12-1, Blackwell Fall 2014 üyesi
USFT-BLACKWELL-F14S12G1
4 Üyeler
7 adet Kılavuz yazıldı
Bir Yorum
Thanks for the tutorial. Not the most repair friendly device,! It took me 2,5 hours, so it's surely possible to do it faster than 10 hours ;)