Ana içeriğe geç

Bu sürüm, hatalı düzenlemeler içerebilir. En son doğrulanmış bellek kopyası dönün.

Neye ihtiyacın var

  1. , iOpener'ı Isıtma: adım 1, 2 resimden 1. , iOpener'ı Isıtma: adım 1, 2 resimden 2.
    • İşleme başlamadan önce mikrodalganızı temizlenmenizi tavsiye ederiz. Aksi takdirde, yüzeydeki yağlı maddeler iOpener'a yapışabilir.

    • iOpener'ı mikrodalga fırının ortasına yerleştirin.

    • Döner tablalı mikrodalga fırınlar için: Tablanın sorunsuz bir şekilde döndüğünden emin olun. Aksi takdirde, iOpener'ınız takılıp fazla ısınabilir ve yanabilir.

  2. : adım 2, 1 resimden 1.
    • iOpener'ı otuz saniye boyunca ısıtın.

    • Tamir süresince iOpener ısınacağı için, tek seferde otuz saniye olmak üzere yeniden ısıtın.

    • Tamir süresince iOpener'ı fazla ısıtmamaya dikkat edin; fazla ısıtma iOpener'ın patlamasına sebep olabilir.

    • iOpener'ın kabarık bir görüntüsü varsa, kesinlikle dokunmayın.

    • iOpener'ın orta kısmı hala dokunulamayacak kadar sıcaksa, tekrar ısıtmadan önce biraz daha kullanabilirsiniz. Doğru bir şekilde ısıtılmış iOpener, yaklaşık 10 dakika kadar sıcak kalacaktır.

  3. : adım 3, 1 resimden 1.
    • iOpener'ı sıcak olan ortasından değil, herhangi iki ucun birinden tutarak mikrodalga fırından çıkartın.

    • iOpener fırından çıktığında epey sıcak olacaktır, dikkat edin. Gerekli ise, fırın eldiveni kullanabilirsiniz.

  4. Bu adım çevrilmemiş. Çevrilmesine yardım edin

    : adım 4, 2 resimden 1. : adım 4, 2 resimden 2.
    • If you don't have a microwave, follow this step to heat your iOpener in boiling water.

    • Fill a pot or pan with enough water to fully submerge an iOpener.

    • Heat the water to a boil. Turn off the heat.

    • Place an iOpener into the hot water for 2-3 minutes. Make sure the iOpener is fully submerged in the water.

    • Use tongs to extract the heated iOpener from the hot water.

    • Thoroughly dry the iOpener with a towel.

    • The iOpener will be very hot, so be careful to hold it only by the end tabs.

    • Your iOpener is ready for use! If you need to reheat the iOpener, heat the water to a boil, turn off the heat, and place the iOpener in the water for 2-3 minutes.

  5. Bu adım çevrilmemiş. Çevrilmesine yardım edin

    : adım 5, 1 resimden 1.
    • Handling it by the tag, place the heated iOpener across the bottom casing.

    • Let the iOpener sit for at least a minute to soften the adhesive beneath the casing.

  6. Bu adım çevrilmemiş. Çevrilmesine yardım edin

    : adım 6, 3 resimden 1. : adım 6, 3 resimden 2. : adım 6, 3 resimden 3.
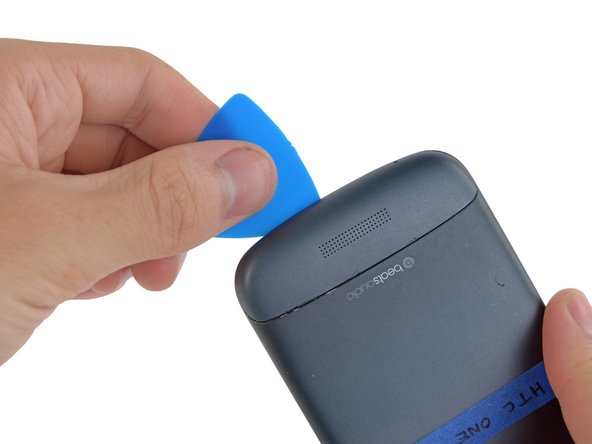
    • Gently place an opening pick in the corner of the gap between the bottom casing and rear case.

    • Slide the opening pick along the side of the casing, prying it away from the adhesive as you go.

  7. Bu adım çevrilmemiş. Çevrilmesine yardım edin

    : adım 7, 1 resimden 1.
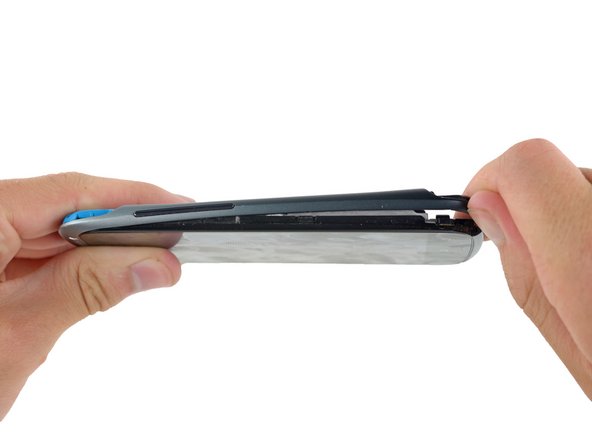
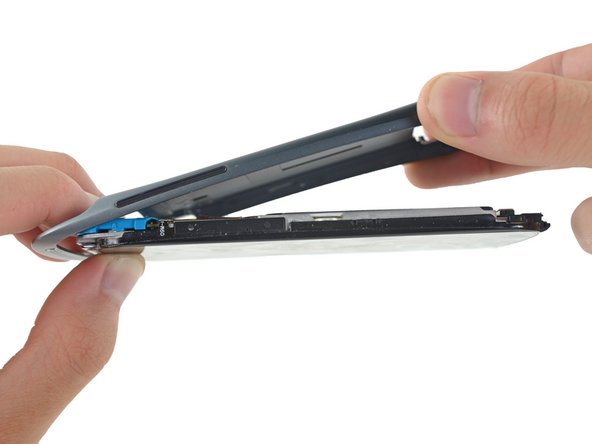
    • Use your fingers to pull the bottom casing off the rest of the phone.

  8. Bu adım çevrilmemiş. Çevrilmesine yardım edin

    : adım 8, 2 resimden 1. : adım 8, 2 resimden 2.
    • Starting at the groove near the headphone jack, use a plastic opening tool to lift the top casing.

  9. Bu adım çevrilmemiş. Çevrilmesine yardım edin

    : adım 9, 1 resimden 1.
    • Use your fingers to pull the top casing off of the rest of the phone.

  10. Bu adım çevrilmemiş. Çevrilmesine yardım edin

    : adım 10, 1 resimden 1.
    • Remove the following screws holding the rear case to the rest of the phone:

    • Two 3.15 mm Phillips #00 screws

    • One 4.15 Torx T5 screw

    • One 4 mm Torx T5 screw

  11. Bu adım çevrilmemiş. Çevrilmesine yardım edin

    : adım 11, 3 resimden 1. : adım 11, 3 resimden 2. : adım 11, 3 resimden 3.
    • Place your fingers on either side of the phone and gently push up on the rear case.

    • It is important to start from the bottom of the phone because the rear case wraps around the front of the phone at the top which makes it impossible to start prying from there.

  12. Bu adım çevrilmemiş. Çevrilmesine yardım edin

    : adım 12, 1 resimden 1.
    • Pull the rear case away from the rest of the phone with your hands.

  13. Bu adım çevrilmemiş. Çevrilmesine yardım edin

    : adım 13, 2 resimden 1. : adım 13, 2 resimden 2.
    • Using the pointed end of a spudger, lift the battery cable and release the connector.

  14. Bu adım çevrilmemiş. Çevrilmesine yardım edin

    : adım 14, 2 resimden 1. : adım 14, 2 resimden 2.
    • Switching to the flat end of the spudger, work your way underneath the battery and peel it away from the adhesive.

  15. Bu adım çevrilmemiş. Çevrilmesine yardım edin

    : adım 15, 1 resimden 1.
    • Remove the battery from the phone.

Bitiş Çizgisi

12 farklı kişi bu kılavuzu tamamladı.

Jay Miley

Üyelik tarihi: 04/22/14

5.044 İtibar

13 adet Kılavuz yazıldı

Ekip

Cal Poly, Team 10-55, Amido Spring 2014 Cal Poly, Team 10-55, Amido Spring 2014 üyesi

CPSU-AMIDO-S14S10G55

4 Üyeler

31 adet Kılavuz yazıldı

4 Yorum

i charge the battery very well but once i on the phone it will go off immediately

kene - Yanıt

Hello thank you for the guide. Getting the backplate off was tough. When assembling a little rubber block was loose. this goes next to the motor

J Shepherd - Yanıt

What do you use to glue the cover back on, so that in the future you can replace the battery again?

Natalie - Yanıt

What adhesive(s) should be used under the battery and to

reseal the case after completing replacement of the battery?

Dan Koren - Yanıt

Yorum Ekle

İstatistikleri Görüntüle:

Son 24 Saat: 0

Son 7 gün: 7

Son 30 gün: 13

Her zaman: 7,812