Giriş
Use this guide to remove or replace the motherboard in an HTC Vive.
You'll need a narrow, long-shaft driver to reach some of the screws in this guide.
Neye ihtiyacın var
-
-
Place a finger on the top edge of the compartment cover assembly and slide the assembly toward the front of the Vive until it comes loose from the headset.
-
Lift the cover away from the headset and slide it up the cables until it's out of the way.
-
-
-
Repeat the lifting and unplugging process with the remaining USB, power, and audio cables.
-
-
-
Use a T5 Torx driver to remove the two 12 mm-long screws securing the head strap mounts on either side of the headset.
-
-
-
Use tweezers to remove the small stickers over the four screws securing the outer shell.
-
Use a T5 Torx driver to remove the four 3.4 mm-long screws securing the outer shell.
-
-
-
Grasp the top edge of the right half of the outer shell, behind the component cover and near the seam in the center. Pull it to the right and upward, away from the headset to release the clip securing that part of the shell.
-
-
-
-
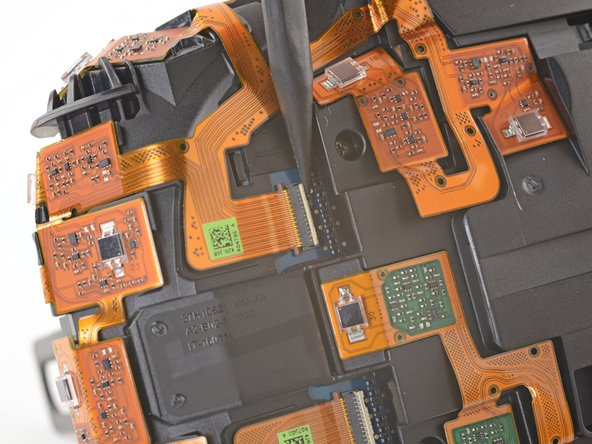
Use tweezers to remove the clear tape over all four of the sensor array cable connectors.
-
-
-
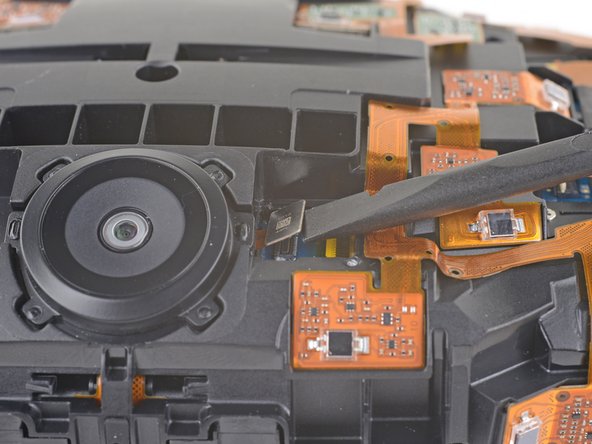
Use the pointed end of a spudger to flip up the small locking flap on one of the sensor array ZIF connectors.
-
Slide the cable straight out of its socket on the motherboard.
-
-
-
Use a PH000 driver to remove the five 3.9 mm screws securing the sensor array.
-
-
-
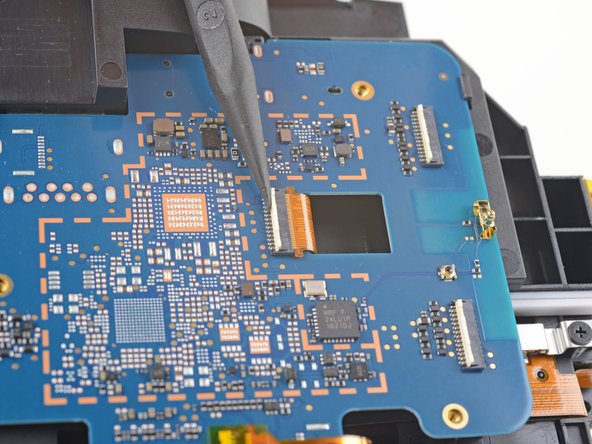
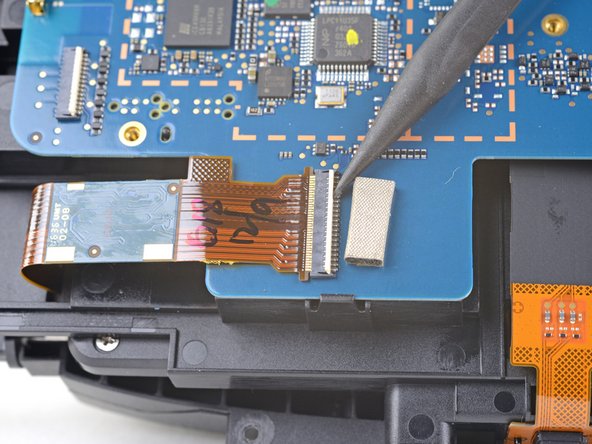
Remove the tape covering the interconnect cable socket.
-
Use the point of a spudger to flip up the small locking flap on the cable socket.
-
Slide the interconnect cable straight out of its socket on the motherboard.
-
-
-
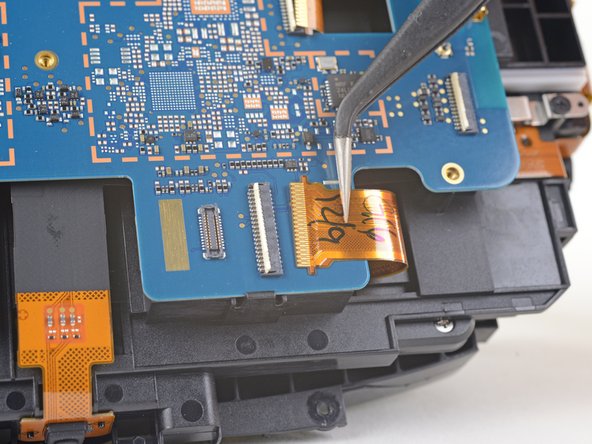
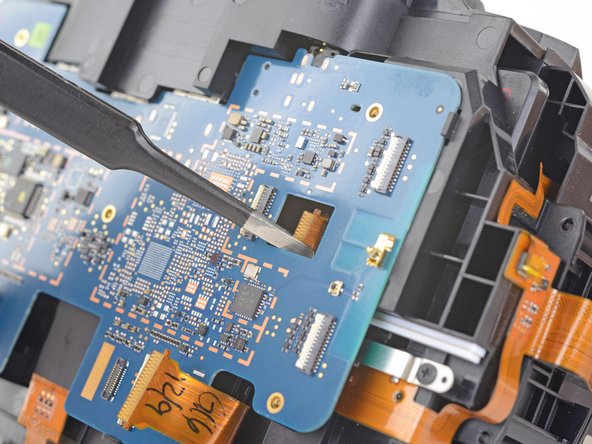
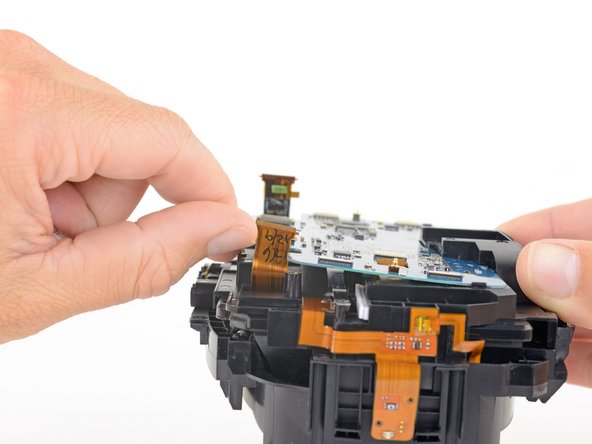
Press the non-port-end of the motherboard toward the top of headset while hinging it away from the midframe to free it from the clips securing that end.
-
Slide the motherboard toward the bottom of the headset, over the clips, to remove it.
-


Compare your new replacement part to the original part—you may need to transfer remaining components or remove adhesive backings from the new part before installing.
To reassemble your device, follow the above steps in reverse order.
Take your e-waste to an R2 or e-Stewards certified recycler.
Repair didn’t go as planned? Check out our Answers community for troubleshooting help.
İptal et: Bu kılavuzu tamamlamadım.
9 farklı kişi bu kılavuzu tamamladı.

4 Yorum
Any recommendations as to where to find a motherboard for the vive? Having trouble getting google to stop recommending motherboards that support vr.
You may (or may not) have luck trying to grab Vives with different broken parts off of eBay.
is that really the only way?
Gus -
Anyone know where to get a replacement vive motherboard? Even if it’s from china