Giriş
Benjamin Franklin once said that “an ounce of prevention is worth a pound of cure,” and that’s no different when it comes to keeping your soldering iron tip in working condition.
The working area of soldering iron tips are, in fact, iron-plated, due to both its conductive abilities and the fact that it is not readily dissolved by molten solder. Once that iron coating is damaged, it's gone for good. Extending the life of iron tips is all about keeping that iron coating intact and buildup-free.
A well-maintained soldering iron tip can last for years, and the biggest factor in tip lifespan and effective soldering is keeping it cleaned and tinned.
Use this guide to keep your soldering iron tip in tip-top shape.
Neye ihtiyacın var
-
-
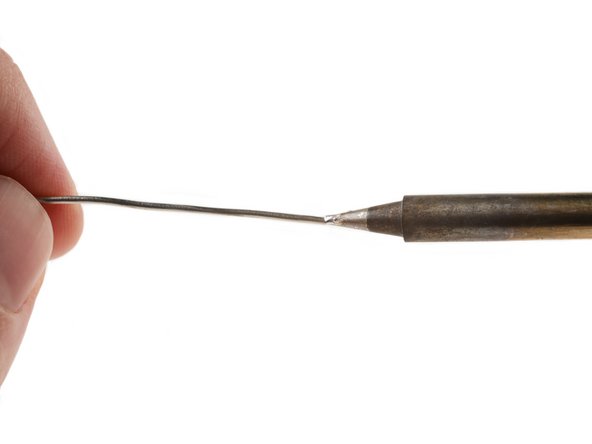
While the iron is cool, inspect the working area.
-
Bits of oxidation (rust), charred buildup, or superficial scratches (as shown in the first photo) on the working area happen with normal use and can be addressed with this guide.
-
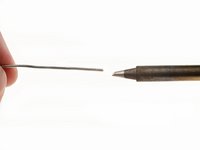
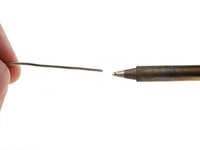
If you notice pits, holes, cracks, deformations, exposed copper, or other signs of physical damage (as shown in photos two and three), save yourself the headache and just replace the tip.
-
-
Bu adımda kullanılan alet:iFixit Soldering Tip Cleaner$9.95
-
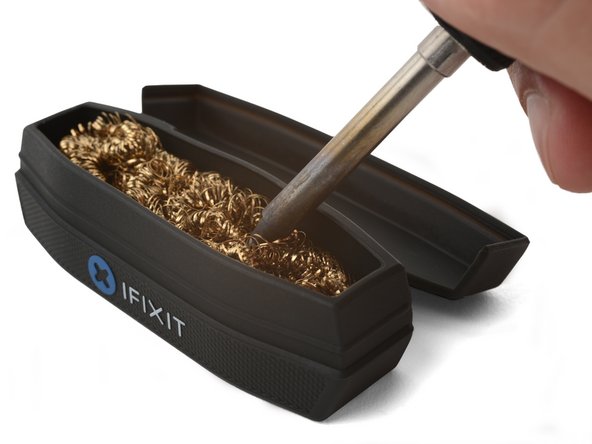
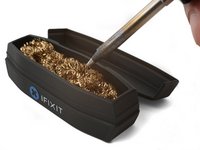
As you're soldering, regularly wiping off the hot iron tip with a brass or damp cellulose sponge is your first line of defense in keeping the tip functional.
-
Brass sponge: Small brass coils that have a similar texture to steel wool, but more wiry. Also called "brass wool," "brass tip cleaner," or "brass cleaning ball." Many solderers prefer it because it's long-lasting, low maintenance, and doesn't drop tip temperature.
-
Cellulose sponge: Usually come with most soldering workstations. Not as long-lasting as a brass sponge and must be kept damp (not soaking wet!) with distilled water while in use.
-
-
Bu adımda kullanılan alet:Lead-Free Solder$5.99
-
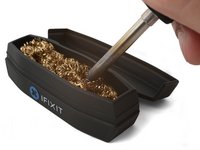
After cleaning off buildup with your brass or damp cellulose sponge, immediately feed some fresh rosin-core solder onto the entire working surface of the tip.
-
-
-
-
After the entire working surface of the iron tip has been coated with solder, clean off any excess solder with your brass or damp cellulose sponge.
-
Whether you're actively soldering or about to store your iron, you should always keep your tip tinned for these two reasons:
-
A tinned tip transfers heat much more effectively, making soldering a breeze.
-
The coat of solder creates a barrier between the tip and environment, dramatically reducing the rate of oxidation.
-
-
Bu adımda kullanılan alet:Tip Cleaning Paste Hakko FS100-01$14.99
-
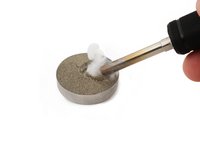
Heat the soldering iron to working temperature and insert the tip into the pot of tip tinner. Rotate the tip in the tinner for 3-4 seconds and ensure that the entire working area is exposed to the compound.
-
Clean off excess tinner with your brass or cellulose sponge.
-
-
-
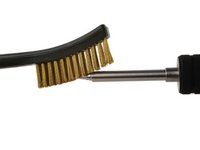
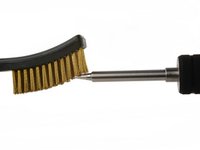
If oxidation/buildup remains after using the tip tinner, gently sweep the oxidation or buildup off with a brass wire brush.
-
After the larger bits of oxidation and buildup are removed, complete another round of tip tinning (Steps 2-4).
-
-
-
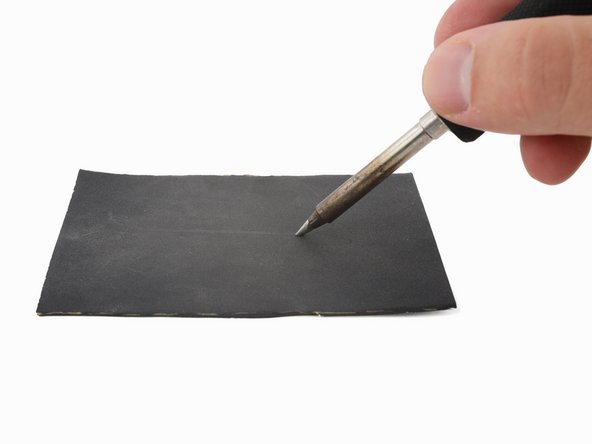
If tip tinner and wire brushing didn't bring your tip back to working condition, and you really need to finish that last connection or two, bust out some high-grit (600 or more) sandpaper.
-
Gently drag the tip across the surface of a polishing bar or high-grit sandpaper, following the shape of the tip.
-
Complete another round of tip tinning (Steps 2-4).
-
-
-
When you're finished soldering or storing the iron, before always leave a glob of solder on the working area of the tip. This protective coating prevents oxidation by sealing the tip from exposure to air and moisture.
-
When you're ready to solder again, simply heat the iron, wipe off the excess solder with a brass or damp cellulose sponge, and re-tin the tip.
-


Keep your tips tinned and happy soldering!
İptal et: Bu kılavuzu tamamlamadım.
24 farklı kişi bu kılavuzu tamamladı.

