Ana içeriğe geç

Bu sürüm, hatalı düzenlemeler içerebilir. En son doğrulanmış bellek kopyası dönün.

Neye ihtiyacın var

  1. Bu adım çevrilmemiş. Çevrilmesine yardım edin

    : adım 1, 2 resimden 1. : adım 1, 2 resimden 2.
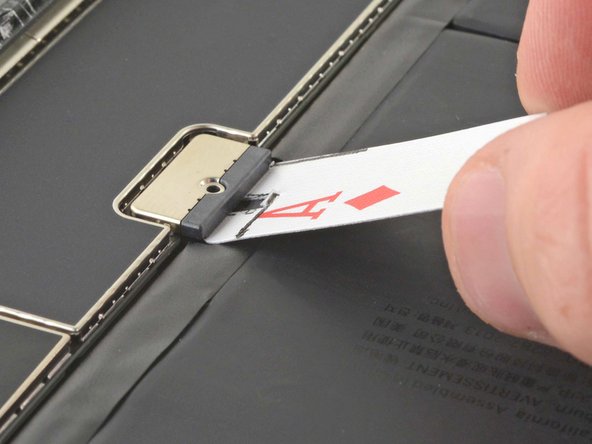
    • Line up the left edge of a playing card with the left edge of the battery connector.

    • Use a pen to mark both sides of the screw hole and the end of the battery connector as shown.

  2. Bu adım çevrilmemiş. Çevrilmesine yardım edin

    : adım 2, 2 resimden 1. : adım 2, 2 resimden 2.
    • Line up the top edge of the card with the top edge of the screw hole.

    • Use a pen to mark the bottom edge of the battery connector.

    • These markings will aid in cutting a slot in the card to clear the screw hole.

  3. Bu adım çevrilmemiş. Çevrilmesine yardım edin

    : adım 3, 2 resimden 1. : adım 3, 2 resimden 2.
    • The length of the battery blocker is not important, but we recommend it to be about an inch, or the length from the tip of your thumb to its knuckle.

    • Use a pair of scissors to cut out the playing card battery blocker as shown.

  4. Bu adım çevrilmemiş. Çevrilmesine yardım edin

    : adım 4, 3 resimden 1. : adım 4, 3 resimden 2. : adım 4, 3 resimden 3.
    • Be extremely slow and careful when you isolate the battery using a battery blocker. The battery contacts are easily bent or broken, resulting in irreversible damage.

    • Insert the battery blocker at a 35 degree angle to disconnect the battery.

    • The playing card ideally should slide under the logic board without encountering any blockages. After insertion, it should rest at a 15 degree angle.

    • Leave the battery blocker in place as you work.

Bitiş Çizgisi

8 farklı kişi bu kılavuzu tamamladı.

Robert Boyd

Üyelik tarihi: 02/01/21

26.479 İtibar

94 adet Kılavuz yazıldı

Bir Yorum

Thanks Robert. Great easy to create tool and excellent explanation.

Kevin Stark - Yanıt

Yorum Ekle

İstatistikleri Görüntüle:

Son 24 Saat: 8

Son 7 gün: 56

Son 30 gün: 256

Her zaman: 9,166