Bu sürüm, hatalı düzenlemeler içerebilir. En son doğrulanmış bellek kopyası dönün.
Neye ihtiyacın var
-
Bu adım çevrilmemiş. Çevrilmesine yardım edin
-
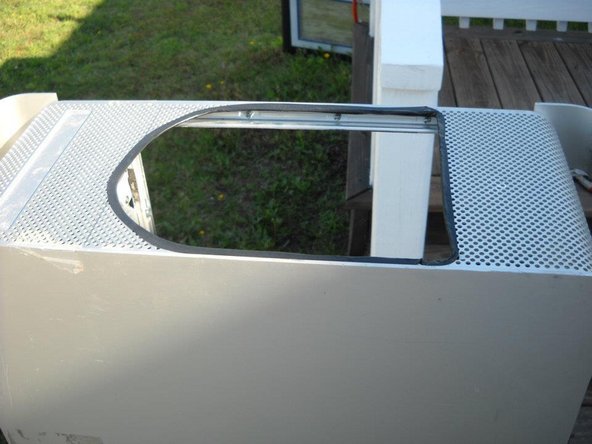
Cut a hole big enough to slide the mailbox into the case
-
-
Bu adım çevrilmemiş. Çevrilmesine yardım edin
-
Drill 4 holes through the bottom of the case and put wood underneath the case and screw the wood pieces to the bottom of the mailbox. Put a piece of wood under the mailbox to have something to screw it to. You may have to drill more holes to screw the boards together with long screws.
-
-
-
Bu adım çevrilmemiş. Çevrilmesine yardım edin
-
Slide in the mailbox and then put screws into the side of the mailbox going into the wood underneath.
-
-
Bu adım çevrilmemiş. Çevrilmesine yardım edin
-
Put a screw in the front and back of the inside of the mailbox.
-
-
Bu adım çevrilmemiş. Çevrilmesine yardım edin
-
Using the flag as a guide to where to drill the holes. Mark a spot for a hole for the flag to go through in the door of the case. Then drill holes accordingly.
-
-
Bu adım çevrilmemiş. Çevrilmesine yardım edin
-
Insert an S hook and use pliers to close the S hook around the plastic connector to hold the flag on.
-
-
Bu adım çevrilmemiş. Çevrilmesine yardım edin
-
Take a rubber fuel line and wrap it in silver hvac tape and slit the hose down the middle to make a seal to fill in the gaps between the mailbox. The silver tape is optional.
-
-
Bu adım çevrilmemiş. Çevrilmesine yardım edin
-
Use the silver tape to cover the screw heads inside of the mailbox.
-
-
Bu adım çevrilmemiş. Çevrilmesine yardım edin
-
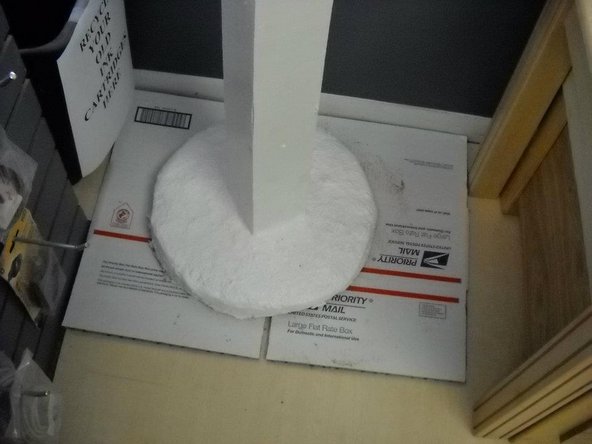
Take a flower pot and cut a hole in it to make a concrete base (optional) Mix the quickcrete up and fill the flower pot with it and flip it over and stick the wood pole in the concrete.
-
Use a level and something to hold the wood in a level position while it dries
-
-
Bu adım çevrilmemiş. Çevrilmesine yardım edin
-
Put the side panel with the flag back on and you should have finished mail box ready to be buried or in this case used as a self standing mailbox.
-


İptal et: Bu kılavuzu tamamlamadım.
Bir başkası bu kılavuzu tamamladı.

Ekip
