Bu sürüm, hatalı düzenlemeler içerebilir. En son doğrulanmış bellek kopyası dönün.
Neye ihtiyacın var
Videoya Genel Bakış
-
Bu adım çevrilmemiş. Çevrilmesine yardım edin
-
The door card is held securely in place with 5 screws.
-
-
Bu adım çevrilmemiş. Çevrilmesine yardım edin
-
Using a spudger, work off the cap of the first screw. The cap is tight; you may need a jimmy or metal spudger.
-
Using the flat end of a spudger, remove the airbag emblem. The emblem has clips on the top and bottom -- work carefully.
-
-
Bu adım çevrilmemiş. Çevrilmesine yardım edin
-
Using a T20 Torx driver with extension, remove all 5 bolts.
-
-
Bu adım çevrilmemiş. Çevrilmesine yardım edin
-
If you're working on the driver side door, remove the mirror control module. Disconnect it from its wiring plug.
-
-
-
Bu adım çevrilmemiş. Çevrilmesine yardım edin
-
Using a trim tool or similar, begin at the bottom of the door card and pop the card away from the door frame.
-
After you've released the bottom clips, work your way around.
-
-
Bu adım çevrilmemiş. Çevrilmesine yardım edin
-
Disconnect the following from the door panel:
-
Unlocking cable
-
Speaker cable(s)
-
Set the door panel aside.
-
-
Bu adım çevrilmemiş. Çevrilmesine yardım edin
-
The door panel is now removed.
-
You will see the airbag module, vapor barrier, and other components.
-
-
Bu adım çevrilmemiş. Çevrilmesine yardım edin
-
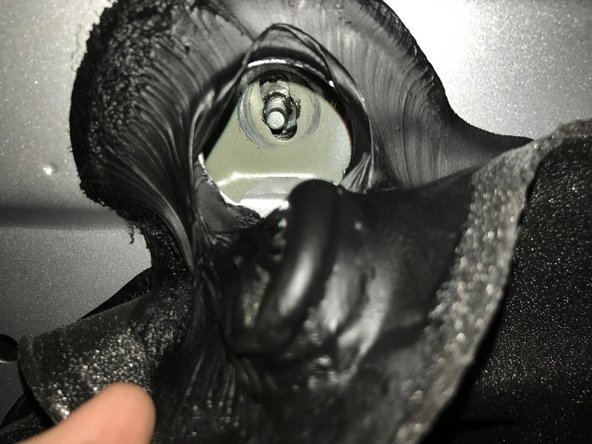
Very gently, peel back the vapor barrier to expose the retaining bolt.
-
Roll the window up.
-
Inspect the bolt. It is probably missing a nut!
-
-
Bu adım çevrilmemiş. Çevrilmesine yardım edin
-
While you're in here, inspect and tighten the bottom bolt.
-
-
Bu adım çevrilmemiş. Çevrilmesine yardım edin
-
Look in the bottom of your door and locate the nut that fell off that top bolt.
-
Replace the nut onto the upper bolt and tighten.
-


İptal et: Bu kılavuzu tamamlamadım.
Bir başkası bu kılavuzu tamamladı.

Bir Yorum
What is this bullshit? Ever think people may have both bolts there and tightened down still? Ever think other ifixit $@$* may still need to occur? And this is all you have to offer? Awesome thoroughness…