Ana içeriğe geç

How to realign HP Photosmart D110a scanner

Neye ihtiyacın var

  1. How to realign HP Photosmart D110a scanner, Printer Hood Assembly: adım 1, 1 resimden 1.
    • First, begin by removing the printer's hood.

    • Open the printer's mouth by simply pulling down on it; there are 2 mouth pieces that need to be pulled down.

    • Adjust the flap covering the scanner upward, as shown.

  2. How to realign HP Photosmart D110a scanner: adım 2, 1 resimden 1.
    • Remove the flap for the scanner. The flap is attached with two clips that can be dislodged by pulling lightly away from the printer.

  3. How to realign HP Photosmart D110a scanner: adım 3, 1 resimden 1.
    • Locate the three screws on top of the printer.

    • The orange circle shows a fourth screw located behind the power panel. Directions to remove this screw are in a later step.

  4. How to realign HP Photosmart D110a scanner: adım 4, 3 resimden 1. How to realign HP Photosmart D110a scanner: adım 4, 3 resimden 2. How to realign HP Photosmart D110a scanner: adım 4, 3 resimden 3.
    • Remove the three screws from the top of the printer with a T-9 screwdriver as shown.

  5. How to realign HP Photosmart D110a scanner: adım 5, 2 resimden 1. How to realign HP Photosmart D110a scanner: adım 5, 2 resimden 2.
    • To access and remove the fourth and final screw attaching the hood, the panel for the power button must be removed as follows:

    • Reach into the mouth of the printer and press on the small clip behind the power button. This allows the panel of the power button to be removed.

    • A picture of the power button panel removed is provided to show the location of the clip that needs to be pressed.

    • After pressing the clip, pull out the power button panel by pulling from right to left.

  6. How to realign HP Photosmart D110a scanner: adım 6, 2 resimden 1. How to realign HP Photosmart D110a scanner: adım 6, 2 resimden 2.
    • Remove the exposed screw that was covered by the power button panel.

    • Do not try and torque the screw from an angle. This will ruin the screw's head, and make it even more difficult to remove the screw. Only remove it as already described.

    • This screw is placed awkwardly. We found holding a T9 bit in a pair of needle nose pliers gave us enough leverage to pull it up.

  7. How to realign HP Photosmart D110a scanner: adım 7, 3 resimden 1. How to realign HP Photosmart D110a scanner: adım 7, 3 resimden 2. How to realign HP Photosmart D110a scanner: adım 7, 3 resimden 3.
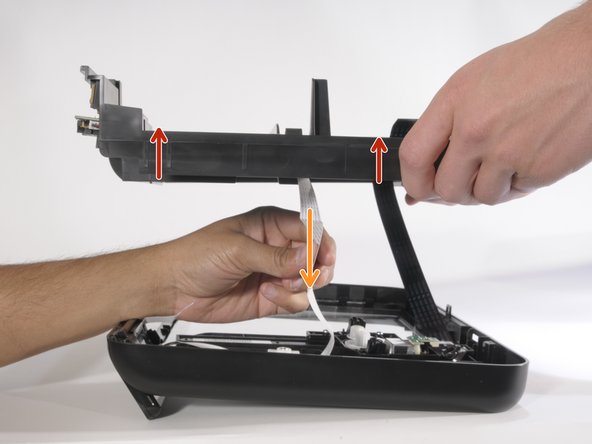
    • This step is easier with two people. Carefully have one person lift the hood of the printer 2-3 inches above where it was resting.

    • Remove the ribbon cables and wires attaching the motherboard (the only green PCB board) to the hood by gently pulling upward on them.

    • When all three cables are removed, lift the hood away from the printer and set it aside.

  8. How to realign HP Photosmart D110a scanner, Disassembling HP Photosmart D110a Printer Hood: adım 8, 3 resimden 1. How to realign HP Photosmart D110a scanner, Disassembling HP Photosmart D110a Printer Hood: adım 8, 3 resimden 2. How to realign HP Photosmart D110a scanner, Disassembling HP Photosmart D110a Printer Hood: adım 8, 3 resimden 3.
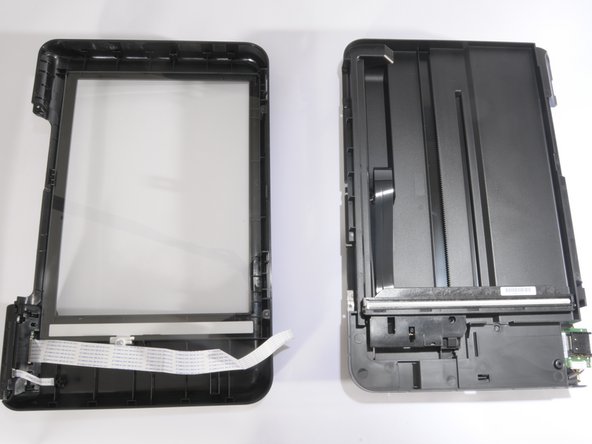
    • After being separated from the printer, the hood is ready to be disassembled.

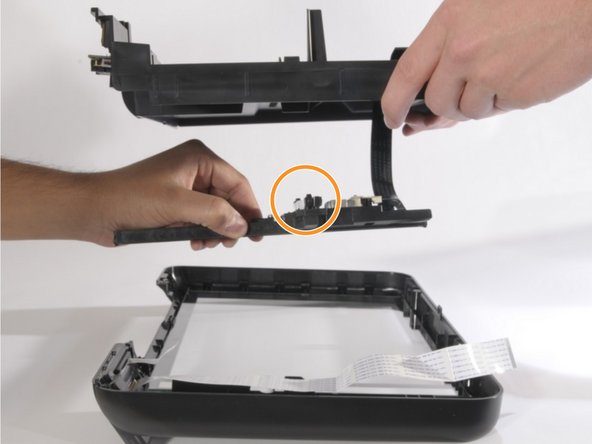
    • Remove the only screw on the printer hood's underside, as shown. Use a T-9 screwdriver.

  9. How to realign HP Photosmart D110a scanner: adım 9, 2 resimden 1. How to realign HP Photosmart D110a scanner: adım 9, 2 resimden 2.
    • With the screw removed, separate the two pieces of the hood by lifting it vertically.

    • Only lift the the top piece enough so that there is no tension applied to the ribbon cables shown.

    • Carefully pull down the white ribbon cable through the top piece of the hood.

  10. How to realign HP Photosmart D110a scanner: adım 10, 2 resimden 1. How to realign HP Photosmart D110a scanner: adım 10, 2 resimden 2.
    • Carefully separate the two hood pieces connected by the black ribbon.

    • Set the piece of the hood down such that no stress is applied to the scanner as it is attached by ribbon cable.

    • The printer hood should now be in 2 pieces.

  11. How to realign HP Photosmart D110a scanner, How to realign HP Photosmart D110a scanner: adım 11, 3 resimden 1. How to realign HP Photosmart D110a scanner, How to realign HP Photosmart D110a scanner: adım 11, 3 resimden 2. How to realign HP Photosmart D110a scanner, How to realign HP Photosmart D110a scanner: adım 11, 3 resimden 3.
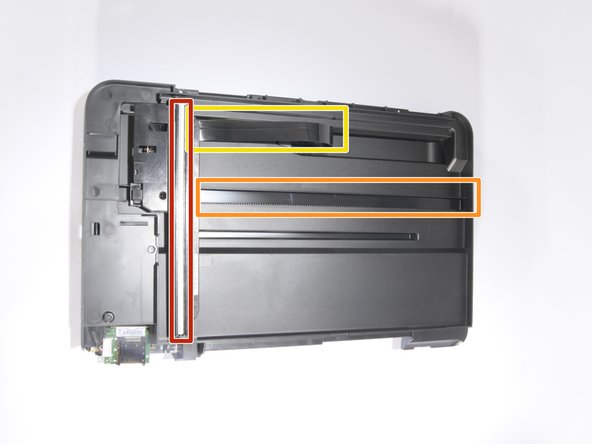
    • After having the hood removed and disassembled, locate the scanner.

    • Adjust the scanner wheel such that fits into the path.

    • If the black ribbon cable is twisted, untwist it so it appears as shown.

Sonuç

To reassemble your device, follow these instructions in reverse order.

2 farklı kişi bu kılavuzu tamamladı.

Tim Wise

Üyelik tarihi: 04/01/11

173 İtibar

7 adet Kılavuz yazıldı

Ekip

Cal Poly, Team 10-38, Forte Spring 2011 Cal Poly, Team 10-38, Forte Spring 2011 üyesi

CPSU-FORTE-S11S10G38

5 Üyeler

10 adet Kılavuz yazıldı

0 Yorum

Yorum Ekle

İstatistikleri Görüntüle:

Son 24 Saat: 0

Son 7 gün: 1

Son 30 gün: 6

Her zaman: 3,429