Ana içeriğe geç

How to repair a IdeaPad with faulty fingerprint

Neye ihtiyacın var

  1. How to repair a IdeaPad with faulty fingerprint, Back Panel: adım 1, 2 resimden 1. How to repair a IdeaPad with faulty fingerprint, Back Panel: adım 1, 2 resimden 2.
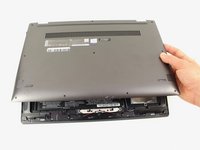
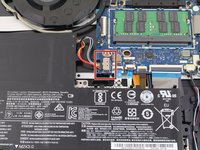
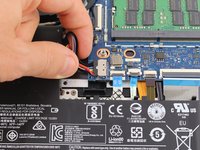
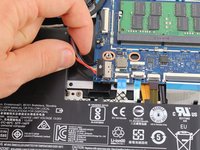
    • Remove the ten 5 mm Phillips #00 screws that are holding the back panel on.
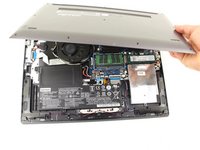
  2. How to repair a IdeaPad with faulty fingerprint: adım 2, 3 resimden 1. How to repair a IdeaPad with faulty fingerprint: adım 2, 3 resimden 2. How to repair a IdeaPad with faulty fingerprint: adım 2, 3 resimden 3.
    • Use a spudger to pry open the back case at the two hinge cutouts.

    • Gently use the plastic opening tool around the edges of the laptop to pry up the clips holding the rest of the back panel.

  3. How to repair a IdeaPad with faulty fingerprint: adım 3, 2 resimden 1. How to repair a IdeaPad with faulty fingerprint: adım 3, 2 resimden 2.
    • Once all the clips have been disengaged, lift off the back cover.

  4. How to repair a IdeaPad with faulty fingerprint, Battery: adım 4, 2 resimden 1. How to repair a IdeaPad with faulty fingerprint, Battery: adım 4, 2 resimden 2.
    • Remove the two 5 mm Phillips #00 screws that secure the battery in place.

  5. How to repair a IdeaPad with faulty fingerprint: adım 5, 3 resimden 1. How to repair a IdeaPad with faulty fingerprint: adım 5, 3 resimden 2. How to repair a IdeaPad with faulty fingerprint: adım 5, 3 resimden 3.
    • Using your fingers, grasp the entire bundle of wires to pull the battery cable from its connector. This will cut off power to the motherboard.

    • Be sure to apply even pressure across the wires and connector to not damage the battery cable.

    • Remove the battery from the device.

Sonuç

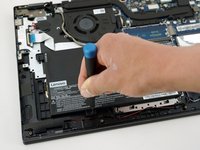
To reassemble your device, follow these instructions in reverse order.

[deleted]

Üyelik tarihi: 02/07/19

221 İtibar

1 Kılavuz yazıldı

0 Yorum

Yorum Ekle

İstatistikleri Görüntüle:

Son 24 Saat: 0

Son 7 gün: 0

Son 30 gün: 0

Her zaman: 24