Giriş
During sport, the hem of your trousers or jacket sleeves may become damaged and frayed. This will often get worse if not fixed, so don't let it get to that stage! This guide is one of two options for fixing this defect, and which does not shorten the length of your item. If you'd like to check the other option, please follow this link: How to repair a trouser/cuff hem (by shortening).
➡️Before you get started, please check the safety disclaimer at the bottom of the page.
Neye ihtiyacın var
-
-
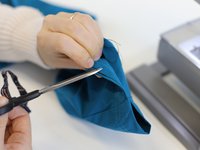
Cut away any damaged thread around the hole, to create a clean surface to repair.
-
Take care: don't cut away fabric, as this will shorten the repair.
-
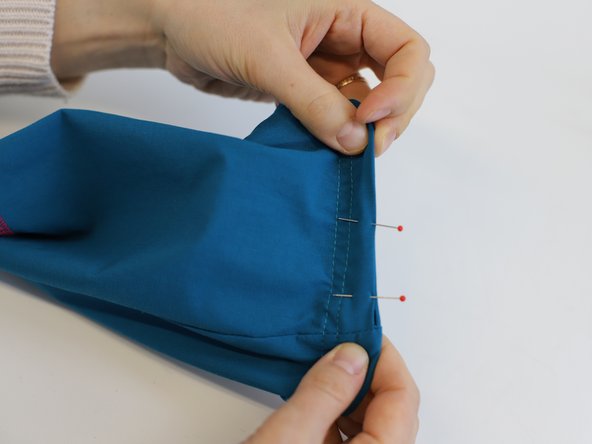
Turn the edges of the hole inside, so that they are tucked inside the hole.
-
-
-
-
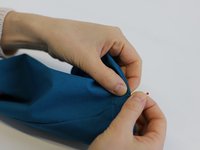
Pin the folded parts of the hole securely in place.
-
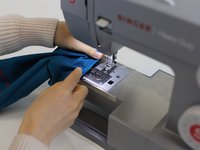
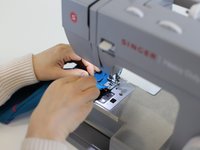
Prepare the sewing machine and offer up the repaired area.
-
Tip: For tips on setting up the machine take a look at this iFixit guide.
-
Depress the sewing machine foot and remove any pins in the way of the sewing route. Start sewing a straight line from one side of the hole to the other, close to the edge of the hem, and add a lock stitch at the beginning and end.
-
-
-
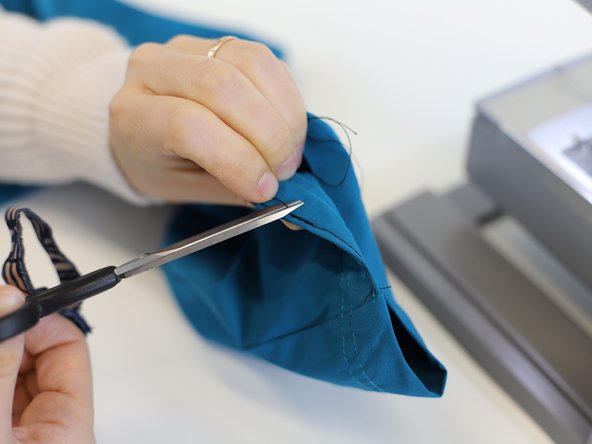
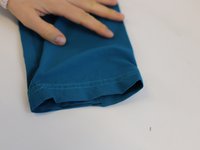
Finish the sewing and cut the loose thread to make a neat finish.
-
🛠️🏆👏 Congratulations! The repair is complete, and you're ready to go!
-


In need of another repair? Don't worry! Check out our other guides to find quick solutions for your favourite clothing, footwear and equipment!
----------------------------------------
🚨🛠️🩹 IMPORTANT SAFETY NOTICE:
The repair guides provided on this site are intended to help you repair products on your own. While we have put a lot of care into them, all repair work carries some risk:
- Safety Precautions: When repairing your product, take all necessary precautions to ensure your safety. Use appropriate tools and follow the instructions carefully.
- Product Condition: Once your product has been repaired, it may not meet original compliance guidelines anymore and could potentially have issues.
- Liability: We are not responsible for any damage or injury that may occur during the repair process or as a result of using a repaired product. You, as the repairer, assume all risks and responsibilities associated with the repair.
By using these repair guides, you fully acknowledge and accept the potential risks and responsibilities involved.
İptal et: Bu kılavuzu tamamlamadım.
Bir başkası bu kılavuzu tamamladı.

Ekip
