Ana içeriğe geç

Imation Superdisk USB Drive Plastic Arm Replacement

Neye ihtiyacın var

  1. Imation Superdisk USB Drive Plastic Arm Replacement, Plastic Housing: adım 1, 2 resimden 1. Imation Superdisk USB Drive Plastic Arm Replacement, Plastic Housing: adım 1, 2 resimden 2.
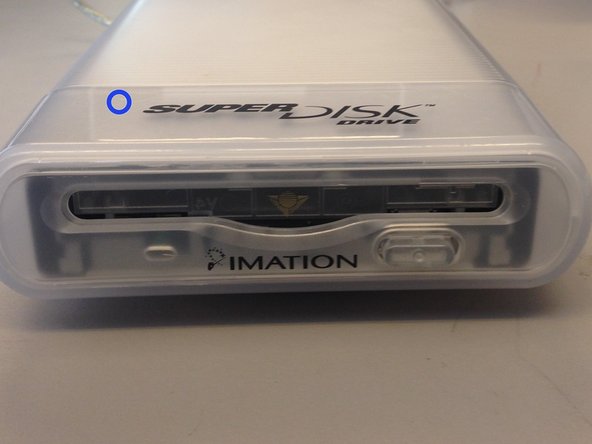
    • Flip the device over so the bottom is facing up.

    • You will know it is the bottom because there will be six silver screws visible.

  2. Imation Superdisk USB Drive Plastic Arm Replacement: adım 2, 2 resimden 1. Imation Superdisk USB Drive Plastic Arm Replacement: adım 2, 2 resimden 2.
    • Remove the USB converter device by gently pulling it out.

    • Do not pull the converter device out by the cord.

  3. Imation Superdisk USB Drive Plastic Arm Replacement: adım 3, 2 resimden 1. Imation Superdisk USB Drive Plastic Arm Replacement: adım 3, 2 resimden 2.
    • Remove the six silver screws using a small Phillips head screwdriver.

  4. Imation Superdisk USB Drive Plastic Arm Replacement: adım 4, 2 resimden 1. Imation Superdisk USB Drive Plastic Arm Replacement: adım 4, 2 resimden 2.
    • Slide the bottom plastic panel of the shell down so it is free of the end cap and the top panel.

    • Lift panel free of device.

  5. Imation Superdisk USB Drive Plastic Arm Replacement: adım 5, 2 resimden 1. Imation Superdisk USB Drive Plastic Arm Replacement: adım 5, 2 resimden 2.
    • Remove the plastic end cap by sliding it forward, freeing from the rest of the device.

    • You can identify the end cap by noting the label "SuperDisk Drive" above where you would insert a floppy disk.

  6. Imation Superdisk USB Drive Plastic Arm Replacement: adım 6, 2 resimden 1. Imation Superdisk USB Drive Plastic Arm Replacement: adım 6, 2 resimden 2.
    • Slide the metal housing out of the plastic shell.

  7. Imation Superdisk USB Drive Plastic Arm Replacement, Metal Casing: adım 7, 2 resimden 1. Imation Superdisk USB Drive Plastic Arm Replacement, Metal Casing: adım 7, 2 resimden 2.
    • Slide metal panel out of the metal casing.

  8. Imation Superdisk USB Drive Plastic Arm Replacement: adım 8, 2 resimden 1. Imation Superdisk USB Drive Plastic Arm Replacement: adım 8, 2 resimden 2.
    • Slide disk drive out of metal casing.

  9. Imation Superdisk USB Drive Plastic Arm Replacement, Daughter Board: adım 9, 1 resimden 1.
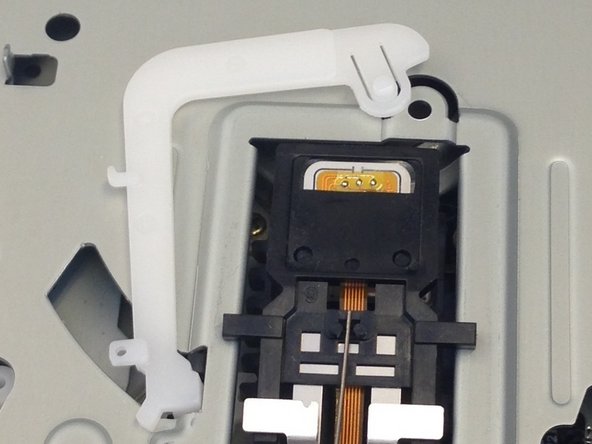
    • Flip the disk drive over so the the plug on the daughter board is visible.

  10. Imation Superdisk USB Drive Plastic Arm Replacement: adım 10, 2 resimden 1. Imation Superdisk USB Drive Plastic Arm Replacement: adım 10, 2 resimden 2.
    • Using an iPod opener put pressure on the white plug and pull backwards until the daughter board unplugs from the main unit.

  11. Imation Superdisk USB Drive Plastic Arm Replacement: adım 11, 2 resimden 1. Imation Superdisk USB Drive Plastic Arm Replacement: adım 11, 2 resimden 2.
    • Gently pull on the daughter board until it separates from the device.

  12. Imation Superdisk USB Drive Plastic Arm Replacement, Disc Drive Casing: adım 12, 2 resimden 1. Imation Superdisk USB Drive Plastic Arm Replacement, Disc Drive Casing: adım 12, 2 resimden 2.
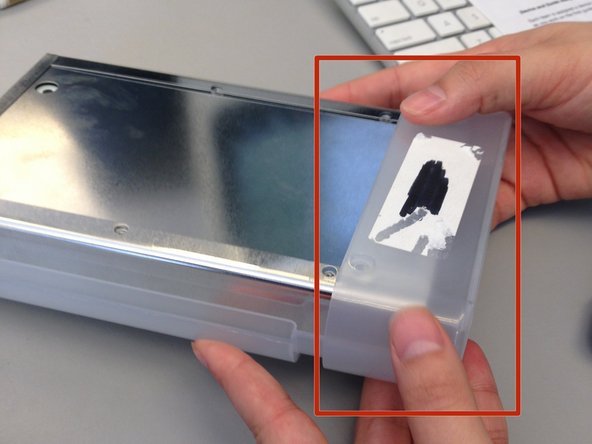
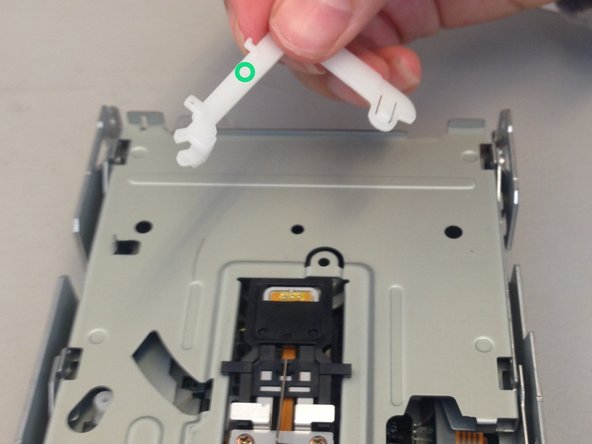
    • Place a plastic spudger in between the disk drive and its metal casing. Use the spudger as a lever the until the metal casing detaches from the disk drive.

    • You may have to use the plastic spudger in several spots along the metal casing.

  13. Imation Superdisk USB Drive Plastic Arm Replacement: adım 13, 1 resimden 1.
    • lift the disk drive completely out of the metal casing and set it aside.

  14. Imation Superdisk USB Drive Plastic Arm Replacement, Plastic Arm: adım 14, 1 resimden 1.
    • Flip the device over so the plastic arm is face up.

  15. Imation Superdisk USB Drive Plastic Arm Replacement: adım 15, 2 resimden 1. Imation Superdisk USB Drive Plastic Arm Replacement: adım 15, 2 resimden 2.
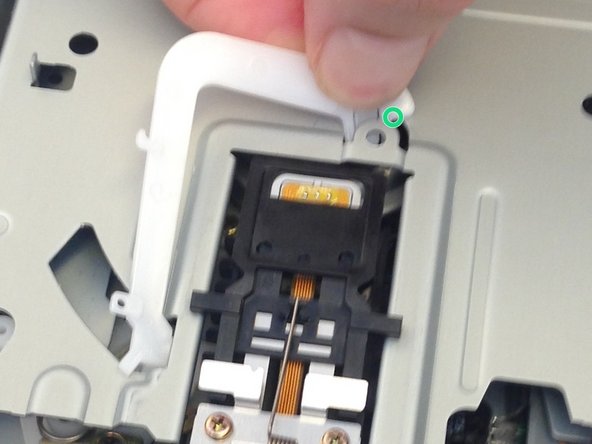
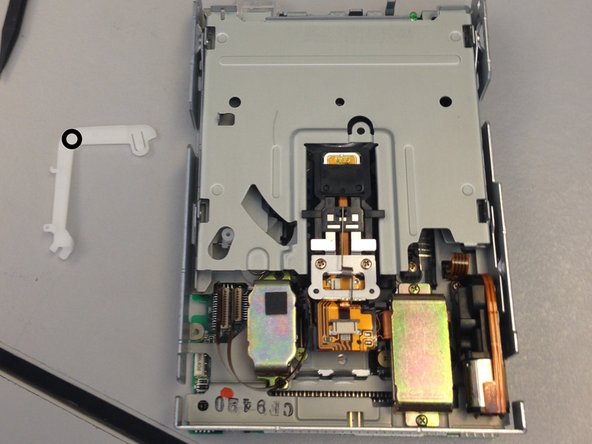
    • Remove the small spring that connects the plastic arm to the disk drive.

    • To the keep the spring from flying in the air and getting lost, put your finger on one end of the spring to hold it in place while you detach the other end. It does not matter which end you chose to detach first.

  16. Imation Superdisk USB Drive Plastic Arm Replacement: adım 16, 3 resimden 1. Imation Superdisk USB Drive Plastic Arm Replacement: adım 16, 3 resimden 2. Imation Superdisk USB Drive Plastic Arm Replacement: adım 16, 3 resimden 3.
    • Locate the tab with a raised dot on the immobile end of the plastic arm.

    • Apply pressure on the plastic tab and slide it backwards to release that end of the arm from the disk drive.

  17. Imation Superdisk USB Drive Plastic Arm Replacement: adım 17, 3 resimden 1. Imation Superdisk USB Drive Plastic Arm Replacement: adım 17, 3 resimden 2. Imation Superdisk USB Drive Plastic Arm Replacement: adım 17, 3 resimden 3.
    • Rotate the plastic arm until it fits through the opening in the disk drive and pull it out.

    • Completely remove the plastic arm from the disk drive.

    • Replace the arm if it is broken or set it aside and continue to your next task.

Sonuç

To reassemble your device, follow these instructions in reverse order.

Brittini

Üyelik tarihi: 02/11/14

22 İtibar

1 Kılavuz yazıldı

Ekip

Ohio State, Team 1-2, Buehl Spring 2014 Ohio State, Team 1-2, Buehl Spring 2014 üyesi

OSU-BUEHL-S14S1G2

4 Üyeler

14 adet Kılavuz yazıldı

0 Yorum

Yorum Ekle

İstatistikleri Görüntüle:

Son 24 Saat: 1

Son 7 gün: 1

Son 30 gün: 3

Her zaman: 554