Giriş
The lens unit is usually damaged when the camera is dropped on the ground or experiences some other kind of impact. If the lens unit does not move when you turn the camera on, it will need to be replaced. If the lens is cracked, it will need to be replaced. All you need for this guide is a Phillips 00 screwdriver, a Phillips 000 screwdriver, and your new lens unit from Fujifilm. As long as the camera is turned off and the battery is removed, there are no safety risks involved. To protect your new lens, always put on the strap when using the camera, and keep it in a case when you are not using it.
Neye ihtiyacın var
-
-
The battery compartment can be found on the backside of the camera. Pinpoint this compartment and focus on the right edge of the compartment gate to find the opening latch.
-
-
-
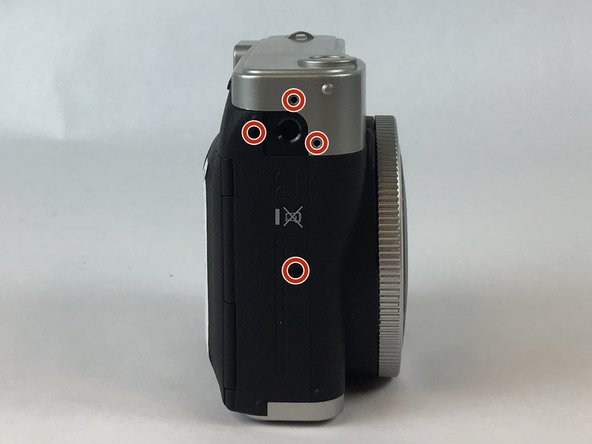
Face the front side of the camera towards you. To locate the left side turn the left side of the camera towards you.
-
Take out the four screws, sized 4.75 mm, with the Phillips #000 screwdriver.
-
-
-
-
Remove the anchors that hold the strap to the body of the camera. There is one on top, and one on the bottom.
-
Use the black spudger to pry off the silver casing on the top and the bottom of the camera.
-
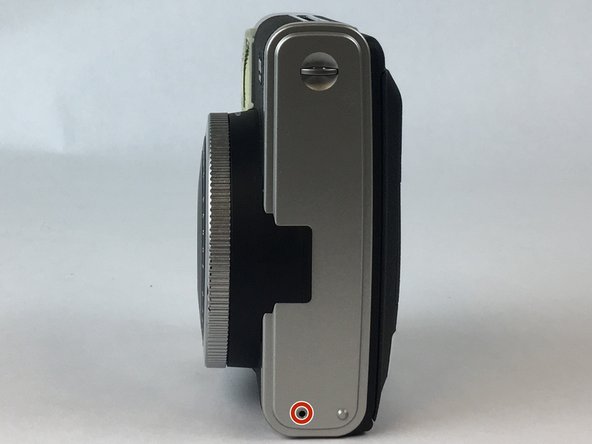
Remove the metal piece from which the film is ejected located on the right side of the camera. There is a 4.75 mm screw under the metal piece. Use a Phillips #000 screw driver to remove it.
I had to pry off the silver casing firts, and then remove the anchors. There are screws holding the anchors under the silver casing
-
-
-
Open up the camera by releasing the latches on the top and bottom of the camera. There are 2 latches on top and 2 on the bottom. Once the two halves of the camera are unhooked, you can easily pry open the camera with your hands.
-
Set camera down on a flat surface with both sides facing up.
-
-
-
Set aside the black, plastic loop located inside the lens cavity.
-
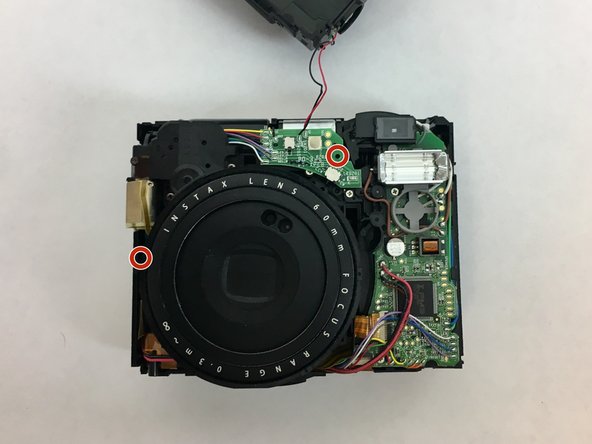
Use a Phillips #000 screwdriver to remove the two 3.75 mm sized screws marked in the photo.
-
Move aside the motherboard located under the top screw. Then remove the marked 3.75 mm sized screw.
The third screw in this step is incorrectly marked. The one that has to come out is actually the one to the right of the one marked. The board is probably more precisely referred to as just a circuit board not a motherboard to be nitpicky.
-
-
-
Remove the next two screws with a Phillips #000 screwdriver. The upper screw, sized 1.75 mm, is facing in towards the center of the lens unit. The lower screw, sized 4.75 mm, is to the right of the upper screw and faces down into the camera.
-


To reassemble your device, follow these instructions in reverse order.
To reassemble your device, follow these instructions in reverse order.
İptal et: Bu kılavuzu tamamlamadım.
9 farklı kişi bu kılavuzu tamamladı.
Ekip

USF Tampa, Team S2-G1, Nance Spring 2017 USF Tampa, Team S2-G1, Nance Spring 2017 üyesi
USFT-NANCE-S17S2G1
4 Üyeler
12 adet Kılavuz yazıldı