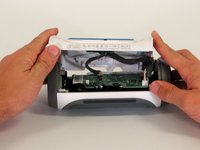
Ana içeriğe geç
Onarım Topluluğuna Katılın - Hesap Oluşturun

JBL Charge Motherboard Replacement

Neye ihtiyacın var

  1. JBL Charge Motherboard Replacement, Disassembling JBL Charge Casing: adım 1, 3 resimden 1. JBL Charge Motherboard Replacement, Disassembling JBL Charge Casing: adım 1, 3 resimden 2. JBL Charge Motherboard Replacement, Disassembling JBL Charge Casing: adım 1, 3 resimden 3.
    • Make sure the device is powered off before you begin to disassemble the speaker.

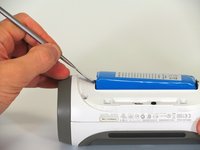
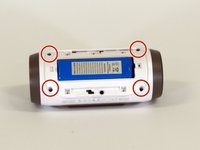
    • Remove the trim from the speaker using a jimmy or metal spudger.

    FixBot'a Sor

    Yorum Ekle

  2. JBL Charge Motherboard Replacement: adım 2, 2 resimden 1. JBL Charge Motherboard Replacement: adım 2, 2 resimden 2.
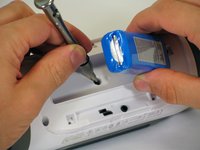
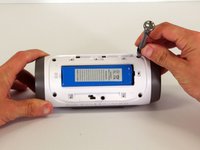
    • Use the PH1 screwdriver to remove all five of the 6 mm screws from the battery cover.

    • Remove the battery cover and set the cover aside.

    FixBot'a Sor

    Yorum Ekle

  3. JBL Charge Motherboard Replacement: adım 3, 2 resimden 1. JBL Charge Motherboard Replacement: adım 3, 2 resimden 2.
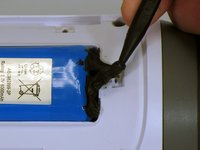
    • Use a spudger to carefully remove the liquid electrical tape that holds the battery inside the battery compartment.

    • Be careful not to puncture the battery, or damage the battery wire underneath the liquid electrical tape.

    FixBot'a Sor

    Yorum Ekle

  4. JBL Charge Motherboard Replacement: adım 4, 2 resimden 1. JBL Charge Motherboard Replacement: adım 4, 2 resimden 2.
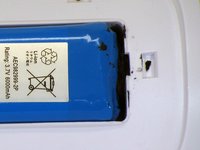
    • Use a spudger to lift the battery out of the device.

    • Lift the end of the battery that does not have the wire connection and remove the 16 mm PH2 screw underneath the battery.

    • Notice the wire that is connecting the battery to the device. Attempting to remove the battery completely could cause damage to the wire. Do not use a metal spudger to remove the battery, this could cause damage.

    FixBot'a Sor

    Yorum Ekle

  5. JBL Charge Motherboard Replacement: adım 5, 2 resimden 1. JBL Charge Motherboard Replacement: adım 5, 2 resimden 2.
    • Remove the four 16 mm screws from the white plastic casing using the PH2 screwdriver.

    FixBot'a Sor

    Yorum Ekle

  6. JBL Charge Motherboard Replacement: adım 6, 2 resimden 1. JBL Charge Motherboard Replacement: adım 6, 2 resimden 2.
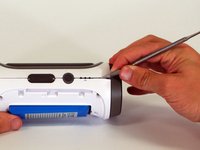
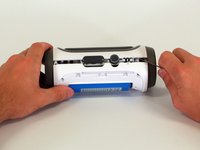
    • Starting in a corner of the device where the casing and the side meet, use a pointed metal spudger to pry the back casing off the speaker and the glue holding the seam together.

    • Slide the metal spudger along the seam to separate the back casing from the rest of the speaker.

    FixBot'a Sor

    Yorum Ekle

  7. JBL Charge Motherboard Replacement: adım 7, 2 resimden 1. JBL Charge Motherboard Replacement: adım 7, 2 resimden 2.
    • Once the back casing is open, disconnect the three white connectors from the motherboard.

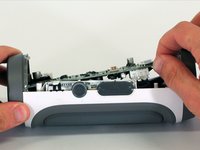
    • Remove the upper casing.

    FixBot'a Sor

    Yorum Ekle

  8. JBL Charge Motherboard Replacement, Motherboard: adım 8, 1 resimden 1.
    • Remove the 9 mm Phillips screw in the corner of the motherboard.

    FixBot'a Sor

    Yorum Ekle

  9. JBL Charge Motherboard Replacement: adım 9, 2 resimden 1. JBL Charge Motherboard Replacement: adım 9, 2 resimden 2.
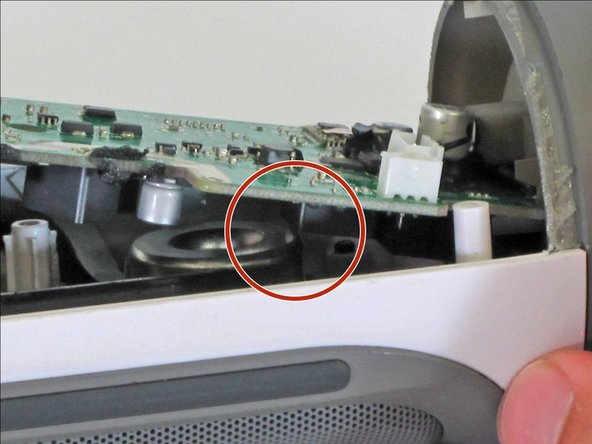
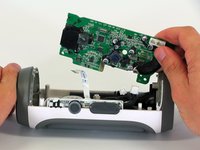
    • Remove the motherboard from the casing by lifting the corner of the board out of the device.

    • If the motherboard won't budge, be sure that the square component on the bottom of the motherboard clears the edge of the speaker.

    • During reassembly, make sure the motherboard is fully installed and not sticking up past its original position, as this could damage the motherboard.

    FixBot'a Sor

    Yorum Ekle

  10. JBL Charge Motherboard Replacement: adım 10, 1 resimden 1.
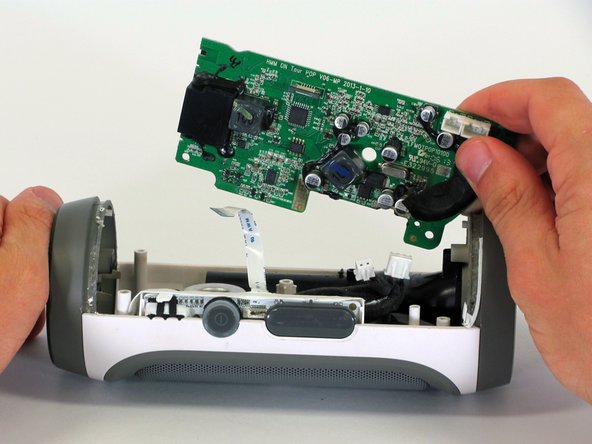
    • Disconnect the two white connectors from the bottom of the motherboard.

    FixBot'a Sor

    Yorum Ekle

  11. JBL Charge Motherboard Replacement: adım 11, 2 resimden 1. JBL Charge Motherboard Replacement: adım 11, 2 resimden 2.
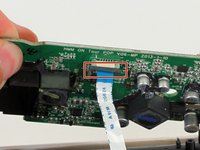
    • Pull down on the black clip holding the ribbon cable in place.

    • Pull the ribbon cable from the connector using the blue tab.

    • Remove the motherboard from the device.

    FixBot'a Sor

    Yorum Ekle

Sonuç

To reassemble your device, follow these instructions in reverse order.

İptal et: Bu kılavuzu tamamlamadım.

8 farklı kişi bu kılavuzu tamamladı.

Jake Bertholf

Üyelik tarihi: 04/01/15

378 İtibar

2 adet Kılavuz yazıldı

Ekip

Cal Poly, Team 12-1, Lancaster Spring 2015 Cal Poly, Team 12-1, Lancaster Spring 2015 üyesi

CPSU-LANCASTER-S15S12G1

5 Üyeler

11 adet Kılavuz yazıldı

16Kılavuz Yorumları

Hello I have 3 jbl speakers I bought that work only if plugged to the wall and aux cable... other than that it doesn't work at all .. Bluetooth or even the buttons don't function

hector - Yanıt Paylaş

had same issue. fixed it by reconnecting the cable that conncts LEDs/ buttons

nyancatsarecute - Yanıt Paylaş

i have the same problem

Denny Berroa - Yanıt Paylaş

Hello, mine doesn't emit any sound, bluetooth is connected, buttons are working, could it be that some audio cable inside is disconnected?

giubo - Yanıt Paylaş

hello can i ask if how many pins in the flex for power button i accidentally damage when i fixed it

djcriztorey - Yanıt Paylaş

Yorum Ekle

İstatistikleri Görüntüle:

Son 24 Saat: 4

Son 7 gün: 12

Son 30 gün: 89

Her zaman: 32,114