Bu çeviri bir makine tarafından oluşturulmuştur ve henüz bir kişi tarafından incelenmemiştir. Bu dili konuşuyor musunuz? İnceleme için.
Giriş
LED arayüzünü çalıştıran durum ekranı işlevini yitirdiğinde, cihaz üzerindeki kontrolünüz kısıtlanır. Bu kılavuz, durum ekranını nasıl değiştireceğinizi adım adım anlatacaktır.
Neye ihtiyacın var
-
-
-
Cihazın yapışkanını gevşetmek için iOpener aracını kullanın. iOpener talimatlarına aşağıdaki bağlantıdan ulaşabilirsiniz.
 FixBot'a Sor
-
-
-
Daha büyük olan plastik açma aletinin düz ucunu ön panel ile arka panel arasına yerleştirin.
-
Cihazı açmak için aleti cihazın arkasına doğru çekerek ayırın.
-
Bu işlemi cihazın tüm kenarları boyunca tekrarlayın.
-
-
-
-
-
-
Hoparlörden anakarta giden kabloyu beyaz soketten çıkararak dikkatlice ayırın.
-
-
-
PH000 tornavidayı kullanarak anakart üzerindeki üç adet 4,55 mm vidayı sökün.
-
Tornavida uçlarının adları her bir ucun yan tarafında yazılıdır.
-
-
-
-
-
PH000 tornavida kullanarak durum ekranındaki üç adet 4,6 mm vidayı sökün.
-
-
-
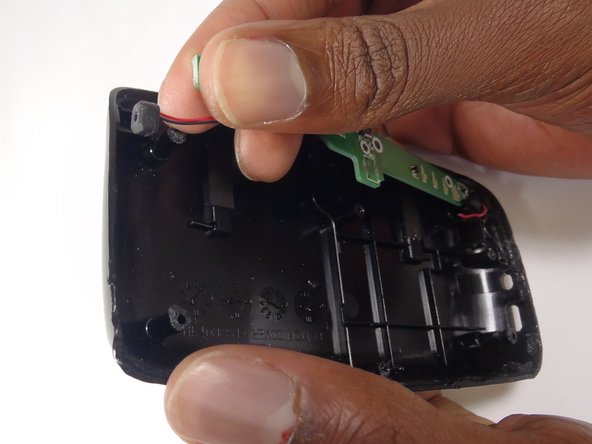
Durum ekranını arka plakaya bağlayan kabloları ayırın. Bunu, kabloyu siyah soketten çekerek yapın.
-
Bu işlemi durum kartının her iki tarafındaki kablolar için gerçekleştirin.
-
-


Cihazınızı yeniden toplamak için bu talimatları ters sırada uygulayın.
İptal et: Bu kılavuzu tamamlamadım.
Bir başkası bu kılavuzu tamamladı.
Bu çevirmenlere özel teşekkürler:
100%

Translation Bot dünyayı onarmamıza yardım ediyor! Katkıda bulunmak ister misiniz?
Çeviriye Başlayın ›
Ekip

Baylor, Team 8-13, Williams Fall 2014 Baylor, Team 8-13, Williams Fall 2014 üyesi
BU-WILLIAMS-F14S8G13
3 Üyeler
15 adet Kılavuz yazıldı