Giriş
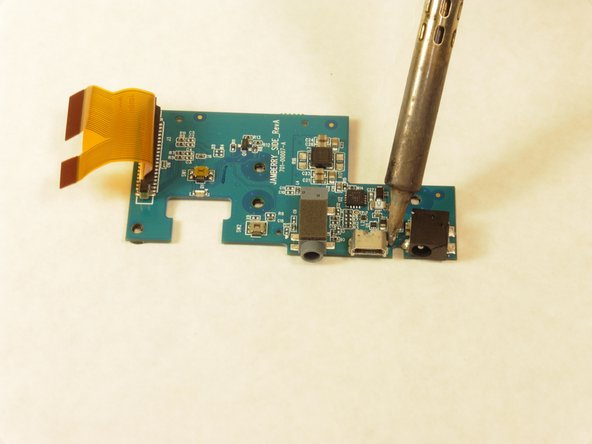
If you are having trouble either connecting your Jambox via the Micro USB port or your Micro USB port has become damaged at some point, then this guide will walk you through the step-by-step process to replace it. The Micro USB port is connected with the auxiliary board, which will need to be replaced as well. This guide requires minimal soldering.
Neye ihtiyacın var
-
-
Remove both end caps by putting a plastic opening tool in the center of the seam. Work around the edges to pry the end caps off completely.
-
-
-
With the Jawbone logo facing towards you and with correct orientation, place the Jambox with the left end cap facing upward.
-
Unscrew indicated T6 9.7 mm screws.
-
Gently loosen the tabs from their anchor points so the bottom may be removed.
-
Flip the Jambox so the other end cap is facing up. The USB cable is on this side (metal grounding clip, indicated in orange). Repeat the above two steps.
-
-
-
-
Turn the Jambox so that the button panel is visible.
-
Remove the indicated screws, T6 9.6 mm.
-
-
-
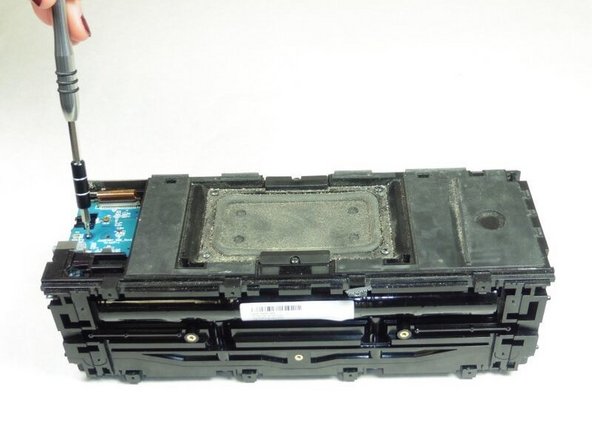
Remove the indicated T6 7.4 mm screw holding the auxiliary board in place.
-
Carefully lift the auxiliary board up and off to the side.
-


To reassemble your device, follow these instructions in reverse order.
To reassemble your device, follow these instructions in reverse order.
Ekip

Cal Poly, Team 24-5, Lancaster Spring 2015 Cal Poly, Team 24-5, Lancaster Spring 2015 üyesi
CPSU-LANCASTER-S15S24G5
4 Üyeler
9 adet Kılavuz yazıldı
7 Yorum
Hi, great guide. My jambox has a broken headphone input. Where can I buy one to solder in. Or can I buy an entire new aux board?
I'm also looking for a new headphone input. Where do I find one?
C Dare -
You guys keep failing to mention where to get replacement parts. Any ideas??
Where do I purchase the replacement auxiliary port?
Where do I purchase the replacement auxiliary port