Ana içeriğe geç

Jura Capresso IMPRESSA J5 Magnetic Drainage Valve

Neye ihtiyacın var

  1. Jura Capresso IMPRESSA J5 Magnetic Drainage Valve, Jura Capresso IMPRESSA J5  opening procedure: adım 1, 1 resimden 1.
    • Unplug the power cord!

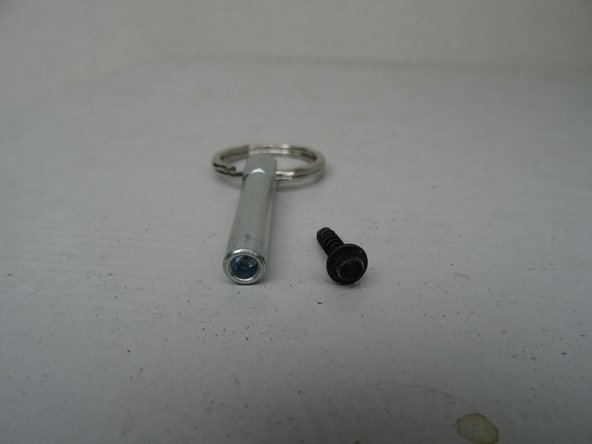
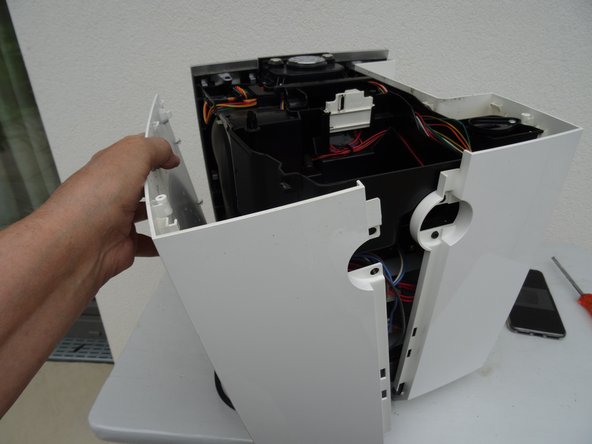
    • Remove the water tank and the drip tray. Remove all coffee beans from the storage container.

  2. Jura Capresso IMPRESSA J5 Magnetic Drainage Valve: adım 2, 3 resimden 1. Jura Capresso IMPRESSA J5 Magnetic Drainage Valve: adım 2, 3 resimden 2. Jura Capresso IMPRESSA J5 Magnetic Drainage Valve: adım 2, 3 resimden 3.
    • Flip open the lid of the bean compartment.

    • Unscrew the two slotted screws inside the bean compartment. The screws have a rubber washer and will not come out completely.

    • Remove the bean compartment.

  3. Jura Capresso IMPRESSA J5 Magnetic Drainage Valve: adım 3, 3 resimden 1. Jura Capresso IMPRESSA J5 Magnetic Drainage Valve: adım 3, 3 resimden 2. Jura Capresso IMPRESSA J5 Magnetic Drainage Valve: adım 3, 3 resimden 3.
    Bu adımda kullanılan alet:
    iFixit Precision 4 mm Screwdriver Bit
    $2.99
    Satın Al
    • The top cover is fastened with oval head screws. Unscrew them.

    • These screws have an oval head that makes them look like rivets (picture 2). You need to use a special bit - also available at iFixit - for their removal. Here a DIY guide. If the right bit is not available, it could be done with a pair of needle nose pliers. Jura wants to keep us out of our own machines!!!

  4. Jura Capresso IMPRESSA J5 Magnetic Drainage Valve: adım 4, 1 resimden 1.
    • Also remove the two oval head screws underneath the ground coffee compartment lid.

  5. Jura Capresso IMPRESSA J5 Magnetic Drainage Valve: adım 5, 1 resimden 1.
    • Now you can pry up the top cover all around.

    • Remove the top cover. This often requires a little force.

    • Use plastic tools to avoid scratching your device.

  6. Jura Capresso IMPRESSA J5 Magnetic Drainage Valve: adım 6, 2 resimden 1. Jura Capresso IMPRESSA J5 Magnetic Drainage Valve: adım 6, 2 resimden 2.
    • Turn the device with the back facing you.

    • Turn the Jura label a few degrees counterclockwise. If it's hard to do, use a small suction cup.

    • Remove the Jura label.

  7. Jura Capresso IMPRESSA J5 Magnetic Drainage Valve: adım 7, 3 resimden 1. Jura Capresso IMPRESSA J5 Magnetic Drainage Valve: adım 7, 3 resimden 2. Jura Capresso IMPRESSA J5 Magnetic Drainage Valve: adım 7, 3 resimden 3.
    • Underneath the label you will find two Torx T15 screws. Remove them.

    • Carefully pull the top of the chrome cover slightly outwards, then push it down and put it aside.

  8. Jura Capresso IMPRESSA J5 Magnetic Drainage Valve: adım 8, 1 resimden 1.
    • Remove the Torx T15 screw on the side panel with the water tank.

  9. Jura Capresso IMPRESSA J5 Magnetic Drainage Valve: adım 9, 2 resimden 1. Jura Capresso IMPRESSA J5 Magnetic Drainage Valve: adım 9, 2 resimden 2.
    • Pull the right side panel slightly towards the back.

    • Remove the side panel.

  10. Jura Capresso IMPRESSA J5 Magnetic Drainage Valve: adım 10, 1 resimden 1.
    • Pull the left side panel slightly towards the back and remove it.

  11. Jura Capresso IMPRESSA J5 Magnetic Drainage Valve, Jura J5 Magnetic Drainage Valve: adım 11, 1 resimden 1.
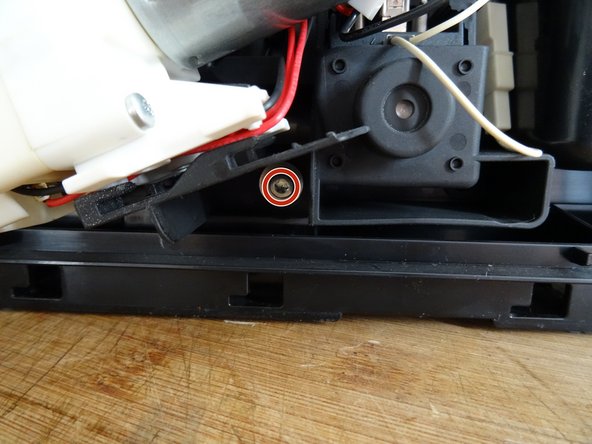
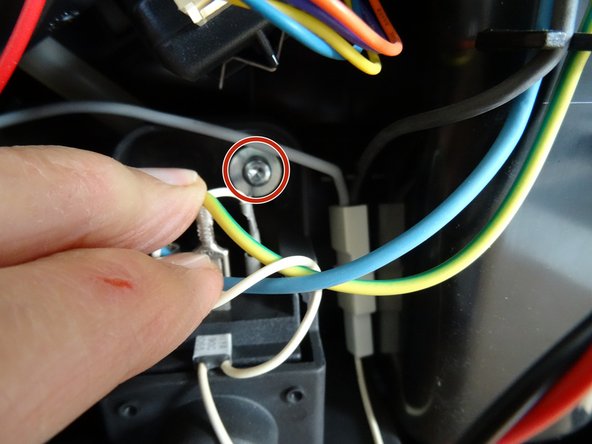
    • The motor for the drainage valve is located in the lower side of the unit near the center. It is fastened with three screws and connected with several flat plugs. In the picture, the ceramic valve has already been pushed off.

    • Note: models from J6 onwards have a motor installed and not a magnet.

  12. Jura Capresso IMPRESSA J5 Magnetic Drainage Valve: adım 12, 3 resimden 1. Jura Capresso IMPRESSA J5 Magnetic Drainage Valve: adım 12, 3 resimden 2. Jura Capresso IMPRESSA J5 Magnetic Drainage Valve: adım 12, 3 resimden 3.
    • Unscrew the three Torx T15 screws on the motor for the drain valve. Pay attention to the washers underneath.

    • Carefully pull out the motor.

    • If you want to replace it, you still have to disconnect the flat connectors. Note where the connectors are connected.

Sonuç

Work through the steps in reverse order to reassemble your device.

2 farklı kişi bu kılavuzu tamamladı.

Bu çevirmenlere özel teşekkürler:

de en

100%

Bu çevirmenler dünyayı onarmamıza yardım ediyor! Katkıda bulunmak ister misiniz?
Çeviriye Başlayın ›

VauWeh

Üyelik tarihi: 10/19/15

202.869 İtibar

246 adet Kılavuz yazıldı

Ekip

Repair is War on Entropy Repair is War on Entropy üyesi

Community

25 Üyeler

1.111 adet Kılavuz yazıldı

0 Yorum

Yorum Ekle

İstatistikleri Görüntüle:

Son 24 Saat: 3

Son 7 gün: 4

Son 30 gün: 36

Her zaman: 866