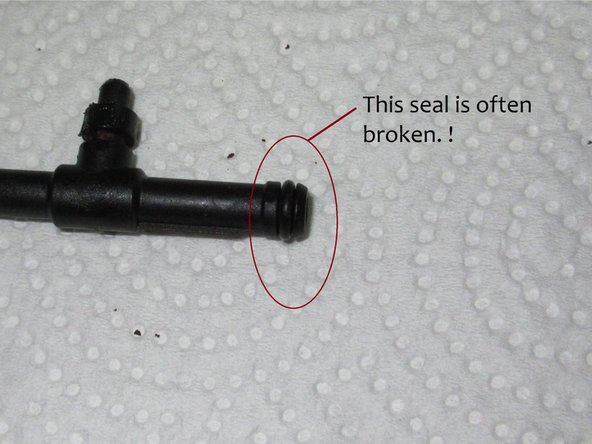
Ana içeriğe geç

Jura Drainage valve (2)

Neye ihtiyacın var

  1. Jura Drainage valve (2), Jura Drainage valve (2): adım 1, 3 resimden 1. Jura Drainage valve (2), Jura Drainage valve (2): adım 1, 3 resimden 2. Jura Drainage valve (2), Jura Drainage valve (2): adım 1, 3 resimden 3.
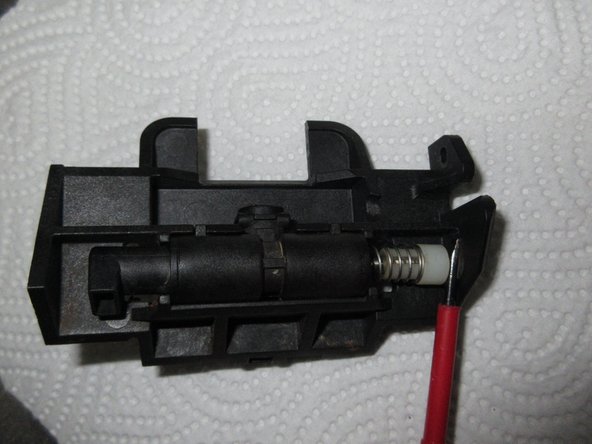
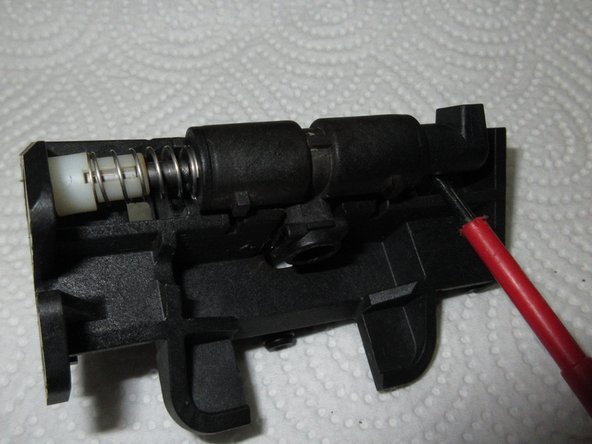
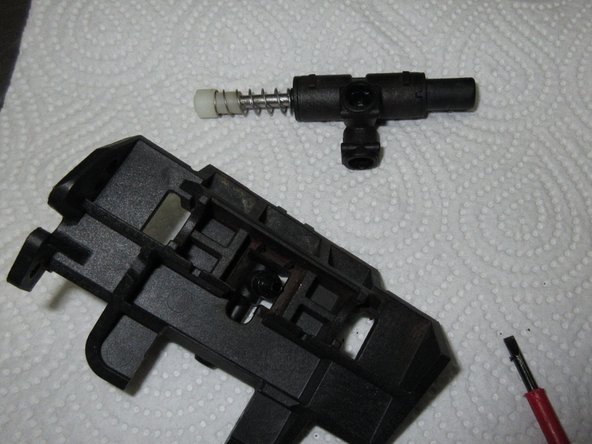
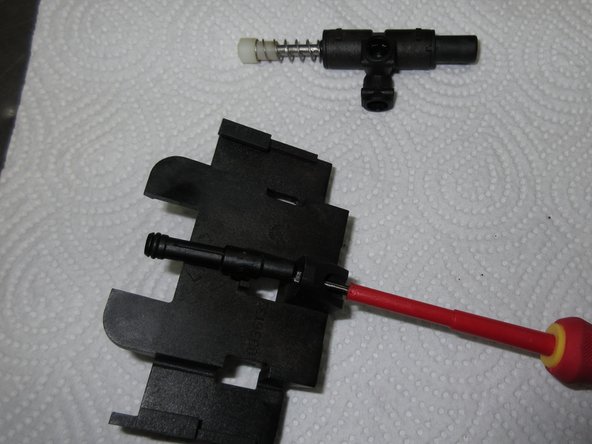
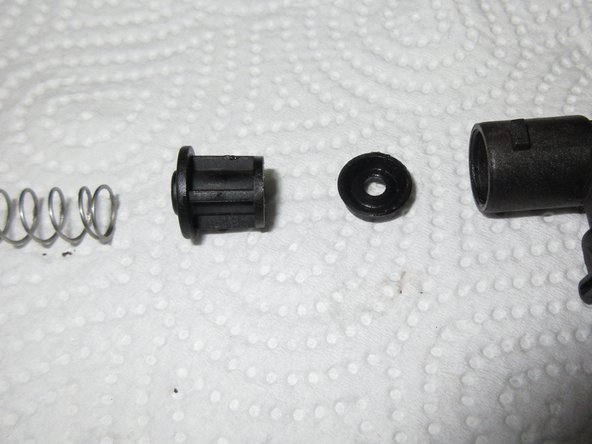
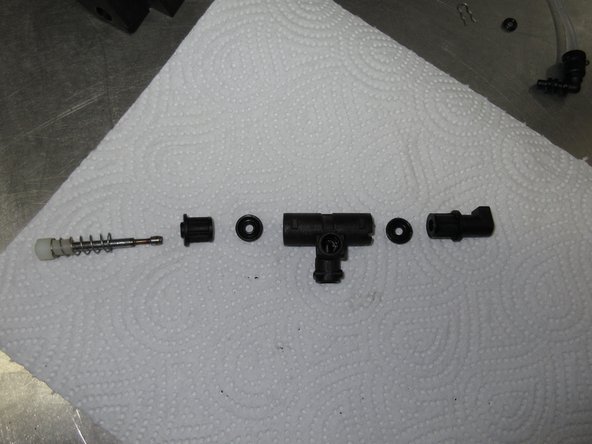
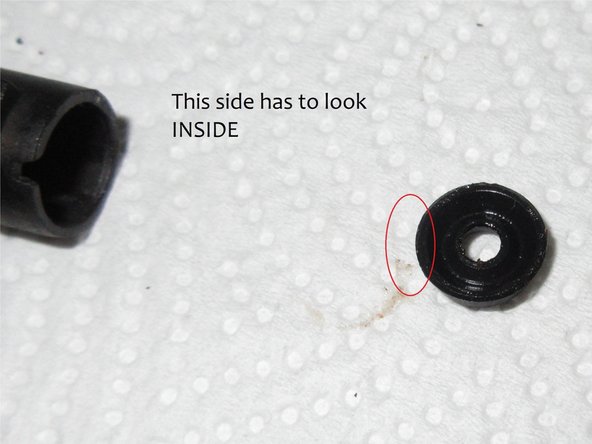
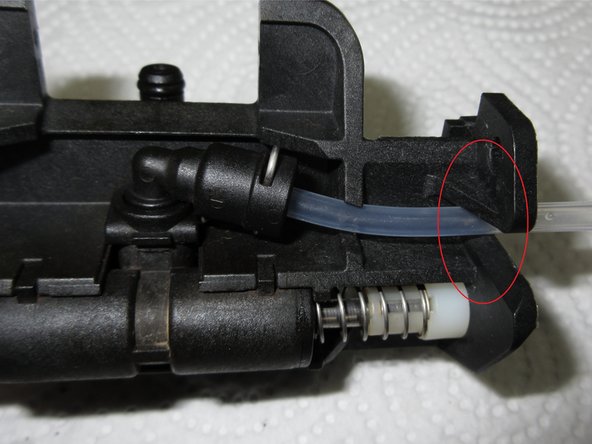
    • The brewing group has already been removed and disassembled. Now it's time for the drainage valve.

    • There will be many pictures

    • All you need a small flathead screwdriver.

  2. Jura Drainage valve (2): adım 2, 3 resimden 1. Jura Drainage valve (2): adım 2, 3 resimden 2. Jura Drainage valve (2): adım 2, 3 resimden 3.
    • Images front and back

  3. Jura Drainage valve (2): adım 3, 3 resimden 1. Jura Drainage valve (2): adım 3, 3 resimden 2. Jura Drainage valve (2): adım 3, 3 resimden 3.
    • Pull off the clamp and pull out the inlet hose. At the end there is a seal, it often gets stuck in the drainage valve. Swap them out when reassembling.

  4. Jura Drainage valve (2): adım 4, 3 resimden 1. Jura Drainage valve (2): adım 4, 3 resimden 2. Jura Drainage valve (2): adım 4, 3 resimden 3.
    • Pull out the clip on the docking tube

    • Pry out the valve body. Make sure the white cap slides out of its hole.

    • Detach the docking nozzle.

  5. Jura Drainage valve (2): adım 5, 3 resimden 1. Jura Drainage valve (2): adım 5, 3 resimden 2. Jura Drainage valve (2): adım 5, 3 resimden 3.
    • Detailed photos.

    • The position of the sealing rings are marked green in picture 3.

    • The sealing ring on the docking socket is marked in red in picture 2. It is especially important. It's a little thinner than the other two.

    • The brackets are marked in red.

  6. Jura Drainage valve (2): adım 6, 3 resimden 1. Jura Drainage valve (2): adım 6, 3 resimden 2. Jura Drainage valve (2): adım 6, 3 resimden 3.
    • Here all the parts of the valve.

  7. Jura Drainage valve (2): adım 7, 1 resimden 1.
    • Here is the entire valve in one picture

  8. Jura Drainage valve (2): adım 8, 3 resimden 1. Jura Drainage valve (2): adım 8, 3 resimden 2. Jura Drainage valve (2): adım 8, 3 resimden 3.
    • Reassembly

    • When assembling, make sure that the lips of the seals point to the pressure side, i.e. inward, and the flat side outward.

    • When installing, make sure that the pressure hose runs through the slot in the valve carrier.

Sonuç

Follow the steps in reverse order to reassemble your device.

3 farklı kişi bu kılavuzu tamamladı.

Bu çevirmenlere özel teşekkürler:

de en

100%

Bu çevirmenler dünyayı onarmamıza yardım ediyor! Katkıda bulunmak ister misiniz?
Çeviriye Başlayın ›

Schwarzstein

Üyelik tarihi: 07/15/13

2.813 İtibar

13 adet Kılavuz yazıldı

0 Yorum

Yorum Ekle

İstatistikleri Görüntüle:

Son 24 Saat: 2

Son 7 gün: 49

Son 30 gün: 211

Her zaman: 7,874