Ana içeriğe geç

Jura Z5 Grindstone Replacement

Neye ihtiyacın var

  1. Jura Z5 Grindstone Replacement, Opening the Jura Z series housing: adım 1, 1 resimden 1.
    • Unplug the machine from the power outlet

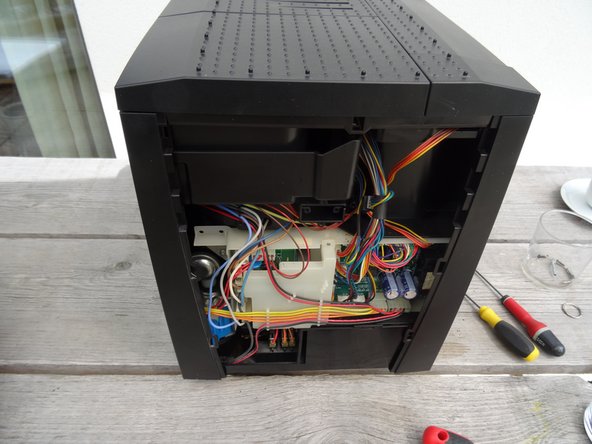
    • Remove all attachments: water tank, drip tray, aroma lid

  2. Jura Z5 Grindstone Replacement: adım 2, 3 resimden 1. Jura Z5 Grindstone Replacement: adım 2, 3 resimden 2. Jura Z5 Grindstone Replacement: adım 2, 3 resimden 3.
    • Turn the machine so the back is facing toward the front.

    • The Jura sign must be removed. Turn it a few millimeters counterclickwise.

    • If this becomes difficult use a suction cup to assist.

    • Remove the Jura sign.

  3. Jura Z5 Grindstone Replacement: adım 3, 2 resimden 1. Jura Z5 Grindstone Replacement: adım 3, 2 resimden 2.
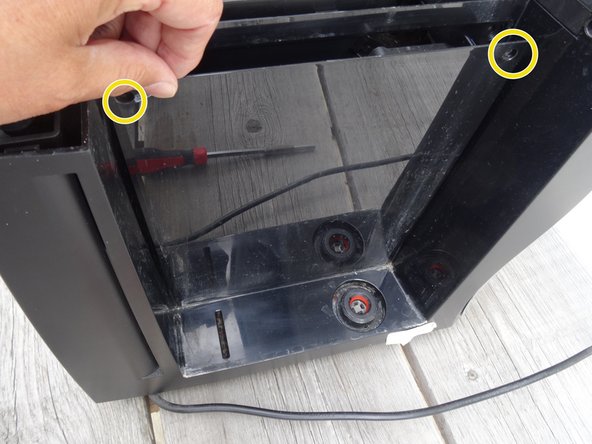
    • Behind the Jura sign are two screws with an oval head. They have to be removed.

    • These screws have an oval head that makes them look like rivets (picture 2). You need to use a special bit for their removal. If the right bit is not available, it could be done with a pair of needle nose pliers. Jura wants to keep us out of our own machines!!!!

  4. Jura Z5 Grindstone Replacement: adım 4, 2 resimden 1. Jura Z5 Grindstone Replacement: adım 4, 2 resimden 2.
    • Push the back down a bit and then remove it.

  5. Jura Z5 Grindstone Replacement: adım 5, 1 resimden 1.
    • Pull the right side panel- as seen looking to the frontpanel - backwards and take it off.

    • Sometimes it gets a bit stuck and may require a bit more of a pull.

  6. Jura Z5 Grindstone Replacement: adım 6, 3 resimden 1. Jura Z5 Grindstone Replacement: adım 6, 3 resimden 2. Jura Z5 Grindstone Replacement: adım 6, 3 resimden 3.
    • In this step, you should remove the screws of the left side panel. The side panel can only be removed after removing the top cover.

    • Remove the Torx T15 screw on the front wall of the side panel.

    • In the side part there is a lid over the brew group. The lid is fastened at the top with two oval head screws. Remove those to remove the lid.

    • With the cover removed the brew group becomes visible

  7. Jura Z5 Grindstone Replacement: adım 7, 3 resimden 1. Jura Z5 Grindstone Replacement: adım 7, 3 resimden 2. Jura Z5 Grindstone Replacement: adım 7, 3 resimden 3.
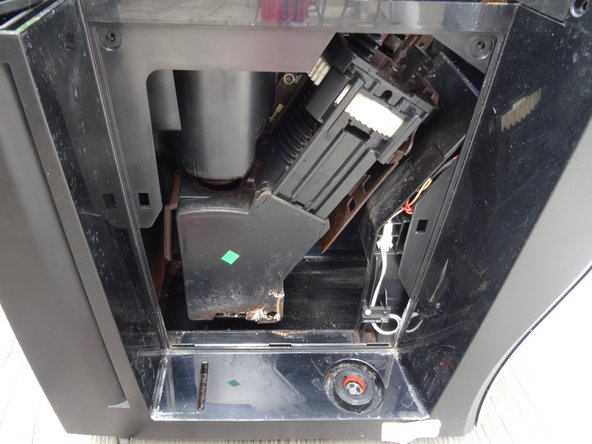
    • This step shows how to remove the top cover

    • Remove the powder tray and all coffee beans.

    • The cover is fastened with three Torx T15 screws. Those are easily visible under the covers as well as the small cover on the left back side.

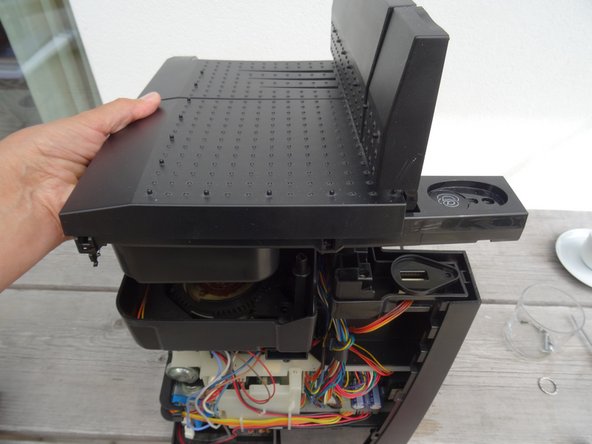
    • Remove the two Phillips screws on the bean container and remove the bean container.

    • Lift the cover upwards.

    • If it is stuck, use a plastic opening tool to carefully pry it open.

    • The lid of the bean container is held in place by a small, strong magnet that loosely rests. It is either in the green marked recess, or it remains hanging on the bean container. Make sure it is not lost!

  8. Jura Z5 Grindstone Replacement: adım 8, 2 resimden 1. Jura Z5 Grindstone Replacement: adım 8, 2 resimden 2.
    • Pull the left side panel backwards to take it off.

    • For some repairs it is not necessary to remove the left side panel.

  9. Jura Z5 Grindstone Replacement, Jura Z model Grindstone replacement: adım 9, 1 resimden 1.
    • Here you can see new and old millstones. You can hardly see that the old grinding stones are no longer good.

  10. Jura Z5 Grindstone Replacement: adım 10, 1 resimden 1.
    • The grinder is located at the rear of the machine.

    • Pull off the grinder adjuster, remember its position.

  11. Jura Z5 Grindstone Replacement, Removing The Grinder Ring: adım 11, 3 resimden 1. Jura Z5 Grindstone Replacement, Removing The Grinder Ring: adım 11, 3 resimden 2. Jura Z5 Grindstone Replacement, Removing The Grinder Ring: adım 11, 3 resimden 3.
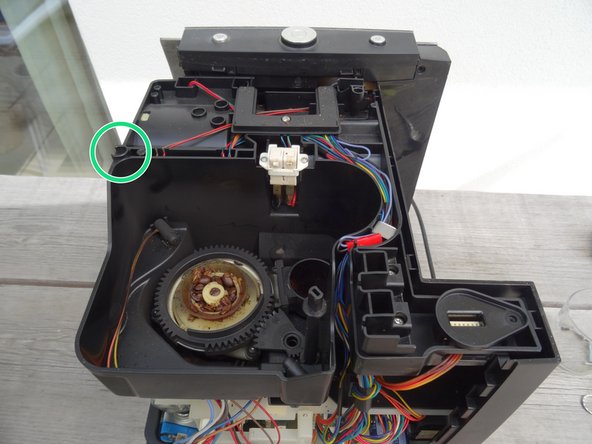
    • Now the grinder is free. Again take a picture, then pull out the axis of the adjuster with moderate force.

    • This adjuster may not be present on some models.

    • Depending on the model you will find a silicon sealing on top of the grinder ring, remove it.

    • Watch the fabrication signs , here green. This alignment must be restored later. Now turn the great black gear about 90 degrees counterclockwise. The grinder ring is free and can be lifted off.

  12. Jura Z5 Grindstone Replacement, The Grinder Cone: adım 12, 3 resimden 1. Jura Z5 Grindstone Replacement, The Grinder Cone: adım 12, 3 resimden 2. Jura Z5 Grindstone Replacement, The Grinder Cone: adım 12, 3 resimden 3.
    • In the next step be very careful not to loose these three springs, balls and cartridges.

    • The grinding cone is fastened with a long Torx T20 screw. The screw head is often covered with remnants of coffee beans. Expose the head and turn the screw out counterclockwise.

    • Now the bean feeder (the small white snail) can be removed. The grinder cone and drive can now also be lifted up carefully.

  13. Jura Z5 Grindstone Replacement, Cleaning: adım 13, 2 resimden 1. Jura Z5 Grindstone Replacement, Cleaning: adım 13, 2 resimden 2.
    • The grinder is usually filled with old, sticky coffee grounds. Clean everything carefully for an excellent coffee aroma.

    • Gently lift the felt ring around the drive shaft with a needle, then wipe it clean with a damp cloth. Do not attempt to wash it, as there is a risk that it will swell. When first used, turn it over with the clean side up.

    • Clean the inside of the grinder with a brush and damp cloth, and the blades with a dishwashing brush. Ensure it is properly dried before use.

  14. Jura Z5 Grindstone Replacement, Change The Grinder Ring: adım 14, 3 resimden 1. Jura Z5 Grindstone Replacement, Change The Grinder Ring: adım 14, 3 resimden 2. Jura Z5 Grindstone Replacement, Change The Grinder Ring: adım 14, 3 resimden 3.
    • Push both of the small latches alternately. Then the ring cover should come out.

    • Two clamps hold the grinder ring in its place, push them aside and it should come free.

    • Again clean everything. Press the new ring and cover in its place. With that the grinder ring is exchanged.

  15. Jura Z5 Grindstone Replacement, Change The Grinder Cone: adım 15, 1 resimden 1.
    • First insert the cleaned driver, then the three sleeves, springs and balls. Now fit the grinding cone on the three balls.

    • Then fit the auger, screw in central screws. When screwing in, push the cone downwards and make sure that everything meshes.

    • This screw turns into plastic. If it doesn't fit properly, the thread will be damaged. So first turn the screw counterclockwise until you feel that the first thread is engaged. Then tighten it turning clockwise.

  16. Jura Z5 Grindstone Replacement, Reassembling: adım 16, 1 resimden 1.
    • Insert grinding ring. The black gear is turned to the right again until the three marks are aligned. Then reinstall the adjuster drive shaft as it was originally.

    • The adjustment oft the new grinder burrs musst not necessarily be the same as the old ones. You can approximately find the mean position, which was marked before, by turning the outer ring as far as possible clockwise, then turning it fourteen clicks backwards.

    • It is a good idea to check if the grinder rotates freely. You can remove the meal hopper and look at the millstones from the side.

    • Then install the remaining parts in reverse order.

    • You can set the grinding degree nicely by placing an empty roll of toilet paper perpendicular to the open mill and filling it with a few coffee beans. Plug in the plug (be careful!), choose a cup of coffee and watch as the coffee grounds fall out of the grinder.

  17. Jura Z5 Grindstone Replacement, Before - After: adım 17, 2 resimden 1. Jura Z5 Grindstone Replacement, Before - After: adım 17, 2 resimden 2.
    • These two pictures are no fake: Before repairing the grinder the coffee is thin and transparent. With new stones the coffee is strong and has a fine crema. The repair was a real success!

  18. Jura Z5 Grindstone Replacement, Jura Z5 model Grindstone: adım 18, 2 resimden 1. Jura Z5 Grindstone Replacement, Jura Z5 model Grindstone: adım 18, 2 resimden 2.
    • These images show a way to test with the machine open. Be very careful and do not reach into the machine! There is a risk of injury and electric shock.

    • There are two microswitches at the top that trigger the display's "missing powder lid" and "powder chute open" errors. Outsmart the two microswitches with two clamps.

    • Place an empty toilet paper roll on the grinder and put a handful of coffee beans in it.

    • Plug in the power and draw a cup of coffee.

    • Now you can observe how the grind looks (it should be quite fine-grained, almost like flour) and how much falls into the brewing chamber. Change the setting very slowly, as the effects can only be observed after two cups.

    • The markings on the adjusters should be at medium grind as shown. When assembling, make sure that the knob on the top cover is properly engaged with the adjuster.

    • Never forget to disconnect the power plug before reassembly!

Sonuç

Work through the steps in reverse order to reassemble your device.

Bu çevirmenlere özel teşekkürler:

de en

100%

Bu çevirmenler dünyayı onarmamıza yardım ediyor! Katkıda bulunmak ister misiniz?
Çeviriye Başlayın ›

VauWeh

Üyelik tarihi: 10/19/15

202.975 İtibar

246 adet Kılavuz yazıldı

Ekip

Repair is War on Entropy Repair is War on Entropy üyesi

Community

25 Üyeler

1.114 adet Kılavuz yazıldı

0 Yorum

Yorum Ekle

İstatistikleri Görüntüle:

Son 24 Saat: 1

Son 7 gün: 8

Son 30 gün: 59

Her zaman: 1,343