Ana içeriğe geç
KATCHY Insect Trap Disassembly and Clean

KATCHY Insect Trap Disassembly and Clean

Ryan

Ryan ve 4 diğer katkıda bulunanlar

En son February 25, 2025 tarihinde güncellendi

15 - 20 dakika
Kolay
İşlem Görüntüleri
Madde imleri!
Metin kafa karıştırıcı
Öğrenci İş Başında

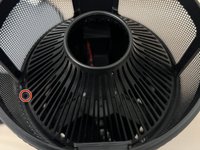
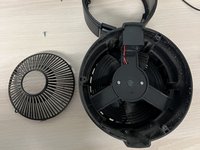
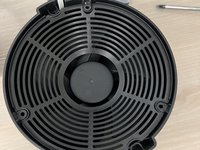
When exposed to excessive dust and lint, the air vent and fan can be clogged by lint build-up. Where they become unusable because the bugs can't pass through the holes and the fan slows down. This guide will show people how to restore their Trap to be fully functional and allow the airflow to be dragged to the sticky trap.

Neye ihtiyacın var

iFixit bu bağlantılar üzerinden satın aldığınızda komisyon kazanır.
  1. KATCHY Insect Trap Disassembly and Clean, KATCHY Insect Trap Disassembly and Clean: adım 1, 2 resimden 1. KATCHY Insect Trap Disassembly and Clean, KATCHY Insect Trap Disassembly and Clean: adım 1, 2 resimden 2.
    • Unplug the Power plug from the device.

  2. KATCHY Insect Trap Disassembly and Clean: adım 2, 1 resimden 1.
    • Open the tray lid to remove the used insect trap.

  3. KATCHY Insect Trap Disassembly and Clean: adım 3, 2 resimden 1. KATCHY Insect Trap Disassembly and Clean: adım 3, 2 resimden 2.
    • Flip the device upside down while leaving the tray lid open.

  4. KATCHY Insect Trap Disassembly and Clean: adım 4, 1 resimden 1.
    • Remove the mesh from the base.

  5. KATCHY Insect Trap Disassembly and Clean: adım 5, 1 resimden 1.
    • Unlock the vent and UV light bar.

  6. KATCHY Insect Trap Disassembly and Clean: adım 6, 2 resimden 1. KATCHY Insect Trap Disassembly and Clean: adım 6, 2 resimden 2.
    • Optional: Push the circuit cover case away from the clip to unclip and clean.

  7. KATCHY Insect Trap Disassembly and Clean: adım 7, 2 resimden 1. KATCHY Insect Trap Disassembly and Clean: adım 7, 2 resimden 2.
    • Flip the device so that it is no longer upside down.

    • If the top cover is stuck, grab onto the base and push the cover out with your thumb.

  8. KATCHY Insect Trap Disassembly and Clean: adım 8, 1 resimden 1.
    • Be careful not to damage the wire connecting it to the base. They should be connected still.

  9. KATCHY Insect Trap Disassembly and Clean: adım 9, 2 resimden 1. KATCHY Insect Trap Disassembly and Clean: adım 9, 2 resimden 2.
    • (Extra) Two screws are protecting the circuit board if you want to do something with it.

  10. KATCHY Insect Trap Disassembly and Clean: adım 10, 1 resimden 1.
    • Double-check that the fan has no dust to ensure the motor will run more efficiently with less dust.

  11. KATCHY Insect Trap Disassembly and Clean: adım 11, 1 resimden 1.
    • Retrace steps by going in reverse order to reassemble each part.

Sonuç

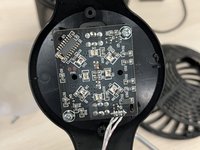
To reassemble your device, follow these instructions in reverse order. Plug the power supply into the device and check if everything works. The UV light should display like normal.

Bir başkası bu kılavuzu tamamladı.

Ryan

Üyelik tarihi: 03/20/24

220 İtibar

1 Kılavuz yazıldı

0 Yorum

Yorum Ekle

İstatistikleri Görüntüle:

Son 24 Saat: 0

Son 7 gün: 1

Son 30 gün: 14

Her zaman: 955